


Growing green onions or scallions is one of the fastest and most satisfying wins in any home garden. These versatile alliums are ready to harvest in as little as 60 days, grow happily in containers or open beds, and keep producing fresh stems all season long with almost no effort.
Some of the links in this article may be affiliate links. If you make a purchase through these links, we may earn a small commission at no extra cost to you. Thank you.
Key highlights from this guide:
- Green onions and scallions are slightly different but grown in exactly the same way
- You can start from seeds, sets, or even leftover kitchen scraps
- Most varieties are ready to harvest between 60 and 70 days after planting
- Cut-and-come-again harvesting gives you multiple crops from a single sowing
What Are Green Onions and Scallions — and Are They the Same Thing?
People use these two names almost interchangeably, and for good reason — they look and taste nearly identical. The subtle difference comes down to maturity. Scallions are harvested very young, before any noticeable bulb develops at the base. They have a straight white stem that grades smoothly into hollow green tops. Green onions are left to grow a little longer and develop a small, clearly defined bulb at the root end, giving them a slightly bolder flavour when eaten raw.
In practice, most home gardeners and cooks treat them as one and the same. You will find them bundled together on supermarket shelves without distinction, and most UK seed catalogues list them under both names interchangeably. Everything in this guide applies equally to both — pick whichever term your seed packet uses and follow the same steps.
Both types belong to the Allium family, making them close relatives of leeks, chives, and bulb onions. Their mild, fresh flavour suits raw use in salads, slaws, and garnishes as well as cooked applications in stir-fries, soups, and egg dishes. Gardeners value them for their speed, their compact footprint, and their ability to deliver multiple harvests from a single planting — qualities that make them ideal for beginners and experienced growers alike.
Why Should You Grow Your Own Green Onions in 2026?
The economics of growing your own scallions are hard to argue with. A standard supermarket bunch costs between 60p and £1.20. A packet of seeds — containing several hundred seeds — costs roughly the same amount and will produce dozens of harvests across the season. Cut-and-come-again techniques typically yield three or four cuts from a single sowing before replanting.
Freshness is the other major advantage. Supermarket scallions often spend several days in cold storage and transit before reaching the shelf. That time softens their crunch and dulls their flavour. When you cut stems straight from your own bed or container, you get maximum flavour and brightness — a noticeable difference on the plate.
There is also the satisfaction of full control over inputs. You decide whether to use organic compost, avoid synthetic pesticides, and water with harvested rainwater. If growing more of your own food interests you, scallions pair naturally with other fast-cropping edibles — combining them with something like a home rice patch for a sustainable supply gives you a surprisingly broad range of kitchen staples without relying heavily on the shops.
Which Variety of Green Onion or Scallion Should You Choose?
Choosing the right variety for your growing conditions makes a real difference to your results. Here is a comparison of the most popular options available to UK gardeners in 2026.
| Variety | Flavour Profile | Best Use | Cold Tolerance | Days to Harvest |
|---|---|---|---|---|
| White Lisbon | Mild, classic | All-round beginner’s choice | Good | 60–65 days |
| Evergreen Bunching | Mild to medium | Year-round and cold-climate growing | Excellent | 65–70 days |
| Tokyo Long White | Delicate, slightly sweet | Asian cooking, container growing | Moderate | 60–70 days |
| North Holland Blood Red | Mild, decorative | Salads, visual contrast | Good | 65 days |
White Lisbon is the most widely recommended variety for beginners. It germinates reliably, tolerates a range of soil conditions, and produces consistently mild, tender stems. Evergreen Bunching is the go-to choice if you want to extend your season into autumn and winter — it withstands light frosts without losing quality. Tokyo Long White produces exceptionally long, slim stems that suit container growing and work beautifully in noodle dishes and Asian-style recipes. North Holland Blood Red adds a splash of colour to mixed salad bowls and grows just as easily as the white-stemmed varieties.
What Do You Need Before You Start?
Green onions and scallions are genuinely low-maintenance crops. You do not need a large garden, specialist tools, or expensive equipment to get started. Here is what to have ready before you plant.
- Seeds or sets: Seeds offer the widest variety choice and are very cost-effective. Sets — small, dry bulbs — establish slightly faster but with fewer variety options.
- Soil or compost: Well-draining, loose soil with a pH between 6.0 and 7.0. A general-purpose peat-free compost works well for container growing.
- Container or bed: Containers need to be at least 15 cm (6 inches) deep. Raised beds, standard borders, and window boxes all work equally well.
- Sunlight: A spot receiving at least 6 hours of direct sun per day. South-facing windowsills and beds are ideal.
- Watering can with a rose head: A gentle spray prevents seeds from being dislodged after sowing.
- Nitrogen-rich liquid fertiliser: Optional, but applying every two to three weeks noticeably speeds up leafy growth.
One underrated advantage of scallions is how little space they need. A 30 cm window box can hold a productive row, and companion planting them alongside tomatoes or carrots is widely reported to deter aphids and carrot fly naturally, benefiting the whole bed without any extra effort.
How Do You Plant Green Onions or Scallions Step by Step?
Planting is quick and straightforward. Follow these steps and you should see seedlings emerging within 7 to 14 days, depending on soil temperature and the time of year.
- Prepare your soil or compost. Loosen the growing medium to a depth of 15 cm. Remove stones and large clumps. Mix in a small amount of well-rotted compost to improve drainage and add nutrients.
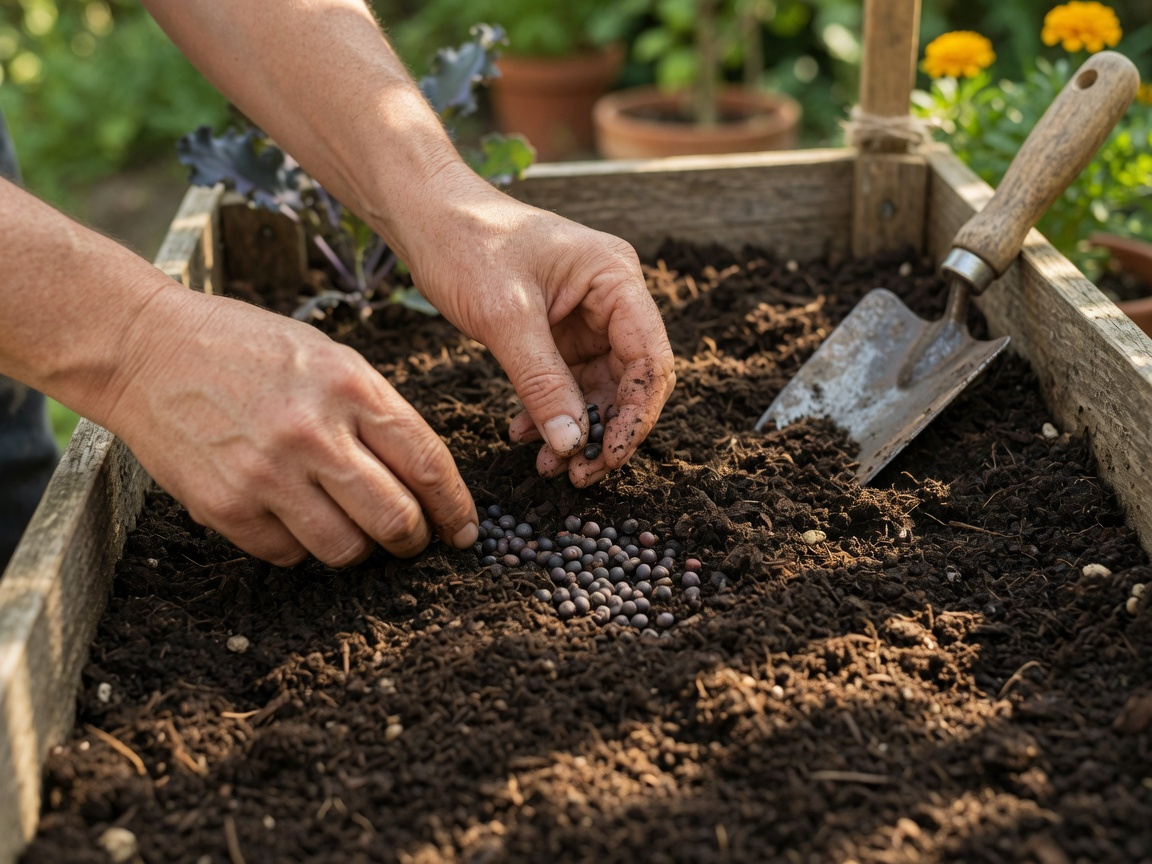
- Sow seeds or plant sets. For seeds, sprinkle thinly across the surface and cover with a 5 mm layer of fine compost or soil. For sets, push each one 2.5 cm (1 inch) into the soil with the pointed end facing upwards.
- Space correctly from the start. Thin seedlings to around 2.5 cm apart as they emerge. Leave 30 cm between rows to allow airflow and easy access. For a continuous harvest, sow a fresh row every two weeks throughout the season.
- Water gently but thoroughly. Water the bed immediately after planting. Keep the surface consistently moist during germination — never waterlogged, never bone dry.
- Label every row. Young scallion seedlings look remarkably similar to grass. A simple marker saves confusion and lets you track exactly when each row was sown.
- Provide warmth for indoor starts. If starting seeds indoors 6 to 8 weeks before the last expected frost, place trays on a warm windowsill or in a propagator. Germination is most reliable at soil temperatures between 10 and 25°C.
If you enjoy exploring creative ways to sow seeds, it is worth looking into DIY seed bombs made from clay, flour, or paper — a fun technique that works well for scattering quick-growing herbs and alliums across a patch without fussy spacing.
How Do You Water and Feed Green Onions for the Best Growth?
Watering is where most beginners make their first mistake. Green onions dislike sitting in waterlogged soil, but they also struggle when conditions are allowed to dry out completely. The goal is consistent, even moisture without saturation.
Check the top 2 to 3 cm of soil before reaching for the watering can. If it feels dry to the touch, it is time to water. If it still feels damp, wait another day. In hot, dry summer weather this might mean watering every other day. In a cool or wet spring, once every three to four days is typically sufficient. Container-grown plants dry out faster than open beds, so check them more frequently during warm spells.
Feeding is optional if you have prepared your soil well with compost, but it does make a visible difference. A balanced liquid fertiliser with a higher nitrogen content applied every two to three weeks encourages the lush green leafy growth that makes scallions so useful in the kitchen. Avoid over-feeding — too much nitrogen produces impressive-looking foliage but weak roots and a shorter productive life. Mulching around rows with a thin layer of compost also helps retain moisture, suppress weeds, and feed the soil gradually throughout the season.
When and How Do You Harvest Green Onions or Scallions?
Most varieties are ready to harvest between 60 and 70 days after sowing. The stems are at their best when they are roughly pencil-thick at the base and the green tops are bright, upright, and firm. Do not leave them too long — once the plant starts to bolt (send up a flower stalk), the stems become tough and the flavour turns sharp and bitter.
You have two options at harvest time. The first is to pull the entire plant, roots and all, by grasping near the base and pulling steadily upward. This gives you the full white stem and the small bulb, which delivers a stronger flavour in cooked dishes. The second method — and the one most home growers prefer — is cut-and-come-again harvesting. Use clean scissors or a sharp knife to cut stems about 2.5 cm above the soil line, leaving the root system intact. The plant will regrow from the base, giving you a second and sometimes a third harvest from the same roots before the quality declines.
If you want to save seeds for future seasons, allow a small number of plants to bolt fully, flower, and set seed. The black seeds dry on the plant and can be collected in paper envelopes in late summer. Understanding which plants reproduce reliably from saved seed is valuable knowledge for any gardener — this guide to crops that grow true to seed covers the principles in detail and will help you decide which varieties are worth saving.
How Do You Store and Use Your Freshly Harvested Scallions?
Freshly cut scallions keep in the refrigerator for up to one week. Wrap them loosely in damp kitchen paper, place them inside a resealable bag or lidded container, and store them in the salad drawer. Keeping them upright in a glass with a small amount of water at the base — as you would fresh-cut flowers — keeps the green tops perky and extends their life by several days.
In the kitchen, use the white base in cooked applications. It softens beautifully in stir-fries, soups, and sauces, releasing a gentle, rounded onion sweetness. Use the green tops raw as a finishing garnish for noodles, scrambled eggs, baked potatoes, grilled fish, and rice dishes. Both parts are fully edible — using the whole stem reduces waste and gives you two distinct flavour intensities from the same ingredient.
For longer-term storage, chopped scallions freeze well for up to three months. Spread them in a single layer on a lined baking tray and freeze until solid before transferring to a sealed container — this prevents clumping. Frozen scallions will not retain their crunch, but they are perfectly suited to any cooked dish.
What Problems Might You Encounter and How Do You Fix Them?
Green onions and scallions are robust and rarely troubled by serious problems, but a handful of issues do come up from time to time. Catching them early almost always means a simple fix rather than losing a whole row.
- Yellowing leaves: The most common cause is underwatering or nitrogen deficiency. Check soil moisture first. If the soil is adequately moist, apply a nitrogen-rich liquid feed and monitor for improvement over the following week.
- Thin, weak stems: Usually caused by overcrowding, insufficient light, or inadequate feeding. Thin plants to improve airflow and move containers to a sunnier position. Feed with a liquid fertiliser to boost growth.
- Stem rot at the base: A clear sign of overwatering or poor drainage. Reduce watering immediately and check that containers have functioning drainage holes. Remove and dispose of affected plants away from the compost heap to prevent the spread of pathogens.
- Onion fly maggots: The larvae of the onion fly burrow into stems and roots, causing wilting and collapse. Prevent them by covering young plants with fine insect-mesh netting from sowing through to establishment. Rotating your growing location each year breaks the pest lifecycle effectively.
- Thrips: Tiny insects that leave silvery streaking and distortion on leaves. Blast affected plants with a firm water spray to dislodge the insects. Encouraging beneficial insects such as lacewings and ladybirds into the garden provides sustainable long-term control.
- Downy mildew: A grey-white fungal growth on leaf surfaces, most common during wet, cool periods. Thin plants to improve airflow, water at the base rather than overhead, and water in the morning so the foliage dries before evening.
A quick visual check each time you water takes no more than a minute and is by far the most effective form of pest and disease management. Problems spotted at their first sign are nearly always resolved with minimal intervention.
Can You Regrow Green Onions from Kitchen Scraps?
Yes — and this is one of the most satisfying tricks any beginner can try. The next time you use a bunch of supermarket scallions, do not throw away the white root ends. Trim the green tops for cooking and keep a 2 to 3 cm section of the white base with the small root fronds still attached.
Place the root ends upright in a small glass with enough water to submerge the roots but not the cut end. Set the glass on a sunny windowsill. Within three to five days, new green shoots will begin pushing upwards from the cut surface. Change the water every two to three days to keep it fresh and prevent bacterial buildup. You can clip these regrown tops repeatedly for several weeks before the plant exhausts itself.
For more sustained production, transfer the root ends into a small pot of peat-free compost once the roots are visibly growing well in water. Soil-grown regrowth produces stronger, more flavourful stems than water culture alone and keeps plants productive for months. This approach is a brilliant gateway into food growing for anyone without outdoor space — all you need is a windowsill, a pot, and a bunch of scallions you were going to use anyway.
The same principle of making the most of what a plant produces applies across many edible crops. If you also grow peppers alongside your scallions, it is well worth exploring seed saving from green pepper fruits — a technique that lets you propagate your best plants year after year at no cost.

Frequently Asked Questions About Growing Green Onions and Scallions
How long does it take to grow green onions from seed?
Seeds germinate within 7 to 14 days when soil temperature is between 10 and 25°C. The full plant reaches harvest size in 60 to 70 days from sowing. Starting seeds indoors 6 to 8 weeks before the last expected frost gives you an earlier outdoor harvest and extends your productive season at both ends.
Can you grow green onions in pots or containers?
Absolutely. Green onions and scallions thrive in any container at least 15 cm (6 inches) deep. A good peat-free compost, adequate drainage holes, and a sunny windowsill or balcony position are all you need. Window boxes, repurposed tin cans, terracotta pots, and deep seed trays all work well. Container plants dry out faster than open beds, so check moisture levels more frequently in warm weather.
What is the difference between green onions and scallions?
Green onions have a small, clearly defined bulb at the base and are harvested slightly more mature. Scallions are pulled before any bulb develops, giving them a straight white stem throughout. The flavour difference is minor — scallions are fractionally milder. Both are grown in exactly the same way, and most gardeners and cooks use the terms interchangeably without any practical confusion.
Do green onions come back every year?
Most common varieties are grown as annuals and complete their life cycle within a single season. However, certain bunching onion types — most notably Evergreen Bunching — are perennial in milder UK climates and will regrow reliably from the same root system year after year. Using cut-and-come-again harvesting also means that a single spring sowing can deliver multiple crops across the full growing season without any replanting.
How often should I water green onions?
Water when the top 2 to 3 cm of soil feels dry to the touch. In warm, dry summer conditions that typically means every one to two days. In cool or wet weather, every three to four days is usually plenty. Container-grown plants need checking more frequently than open beds, particularly during hot spells. Consistent moisture is the goal — avoid both prolonged drought and extended waterlogging.
Can I grow green onions indoors all year round?
Yes, with the right light conditions. Green onions need at least 6 hours of light per day to grow well. A south-facing windowsill works from spring through early autumn. During the low-light months of late autumn and winter, supplementing with a daylight-spectrum LED grow light for 12 to 14 hours per day keeps growth steady. Indoor growing in compost always outperforms water-only regrowth in both yield and flavour intensity.
What should I plant next to green onions?
Scallions are excellent companion plants and grow well alongside tomatoes, carrots, brassicas, and beetroot. The mild allium scent is widely reported to deter aphids and carrot fly, benefiting neighbouring crops without any extra work. Avoid planting scallions near beans, peas, or asparagus — alliums are known to inhibit the growth of legumes and can reduce yields in asparagus beds over time.
Start Growing Your Green Onions Today
Green onions and scallions reward very little effort with very quick results. With a small container of well-draining compost, a packet of seeds, and a basic watering routine, you can have fresh stems ready for the kitchen in under ten weeks — and keep harvesting from the same plants throughout the season using the cut-and-come-again method.
Here is a simple action timeline to get you started this week:
- Day 1: Choose your variety. White Lisbon is the safest beginner’s choice. Source a seed packet from a garden centre or reputable online supplier.
- Day 2–3: Prepare your container or bed with well-draining, peat-free compost. Ensure drainage holes are clear.
- Day 3–4: Sow seeds or plant sets following the step-by-step guide above. Label the row with the variety and sowing date.
- Days 7–14: Watch for germination. Keep the surface consistently moist and thin seedlings to 2.5 cm apart as they emerge.
- Weeks 8–10: Harvest your first cut using scissors. Sow a fresh row straight away to keep a continuous supply coming through.
The more you grow your own food, the more you realise how much is possible in even a small space. Once scallions are a regular part of your gardening routine, branching out into other fast and rewarding edible crops comes naturally.


