
Growing peppers from green fruit is absolutely possible — the key is harvesting seeds at the right moment. Seeds inside a mature green pepper are fully formed and viable even before the fruit turns red, as long as you know when to collect them. Get the timing and storage right, and you can build a productive seed library from a single harvest that serves your garden for years to come.
Some of the links in this article may be affiliate links. If you make a purchase through these links, we may earn a small commission at no extra cost to you. Thank you.
Quick summary:
- Pepper seeds become viable at the mature green stage, when the fruit is full-sized and seeds are plump and fully formed.
- Waiting for the fruit to show the first blush of colour change (yellow, pink, or orange) maximises germination success.
- Store saved seeds at 40 °F / 5 °C with relative humidity at 8 % or lower for maximum longevity.
- Techniques like scarification and warm-water soaking give saved seeds a germination head start.
What Is the Mature Green Stage in Pepper Plants?
The mature green stage is the point at which a pepper fruit has reached its full size but hasn’t yet changed colour. At this stage the seeds inside have completed their development and are biologically ready to germinate. Many gardeners assume they need to wait for a deep red, orange, or chocolate-coloured pepper before saving seeds — but that’s not strictly the case.
Seed maturity and fruit maturity are two separate, overlapping processes. Seeds finish their development first, while the fruit continues to ripen over the following weeks, building sugars and changing colour. Understanding this distinction is the foundation of successful pepper seed saving — and it means you have a wider harvest window than you might think.
That said, seeds from a fully ripe fruit consistently show higher germination rates and more vigour than those taken from an early mature-green pepper. So the mature green stage represents your minimum threshold — anything earlier and your seeds are unlikely to germinate reliably.
When Is the Best Time to Harvest Pepper Seeds From Green Fruit?
The sweet spot for harvesting sits just past the mature green stage, at the moment the fruit begins to shift colour. Watch the skin of the pepper carefully: the very first blush of yellow, pink, or orange is your signal that the seeds inside have reached peak viability. At this early colour-break point, germination potential is comparable to seeds taken from a fully ripe pepper — without the additional wait.
If you’re working with a short growing season or need to clear your beds before autumn frosts arrive, harvesting at colour break is an excellent compromise. You’re not sacrificing seed quality in any meaningful way, and you’re freeing up valuable space sooner. For tips on making the most of your growing space and managing seasonal timing, these vegetable garden layout tips and tricks are worth keeping to hand.
If a frost is forecast and you have no choice but to pick fully green, uncoloured fruits, all is not lost. Place the picked peppers in a warm, dry spot indoors and allow them to continue ripening off the plant. The seeds will keep maturing over the following days as the fruit softens and begins to change colour — though germination rates may be slightly lower than from colour-break or fully ripe fruit.
How Do You Tell Whether Pepper Seeds Are Mature Enough to Save?
Cut your pepper open and inspect the seeds directly. Mature, viable seeds share a few clear characteristics that tell you they’re ready to harvest and save:
- Colour: Cream to pale yellow — not translucent, white-grey, or watery-looking, which signals underdevelopment.
- Firmness: Plump and solid to the touch. Flat or shrivelled seeds have not filled out properly and are unlikely to germinate.
- Attachment: Firmly connected to the central placenta, though they should release cleanly when you apply gentle pressure.
A simple float test can offer additional guidance. Drop a handful of seeds into a glass of room-temperature water: seeds that sink tend to be dense and viable, while floaters are more likely to be hollow or underdeveloped. This test isn’t infallible — some viable seeds float briefly — so treat it as a rough screening tool rather than a definitive verdict.
Occasionally you might slice into a pepper and find tiny green shoots already forming inside the fruit — a phenomenon known as vivipary. Seeds showing signs of vivipary have already begun germinating and won’t store well, but they can sometimes be planted immediately with reasonable success. If you’re curious about why this happens and what it means for your seed saving efforts, this guide to vivipary and premature sprouting explains the biology in full.
What Are the Ideal Conditions for Storing Saved Pepper Seeds?
How you store your seeds after harvesting determines how well they perform next season. Even perfectly viable seeds will deteriorate rapidly in warm, humid conditions. Temperature and moisture are the two variables that matter most — and both are easy to control with basic household equipment.
| Storage Factor | Target Condition | What Goes Wrong Without It |
|---|---|---|
| Relative humidity | 8 % or lower | Mould, premature germination, fermentation damage |
| Temperature | 40 °F / 5 °C | Accelerated cell deterioration, loss of viability |
| Light exposure | Complete darkness | UV light degrades seed coatings and reduces germination rates |
| Oxygen exposure | Minimal (airtight) | Oxidation degrades seed oils and reduces longevity |
A small sealed glass jar with a silica gel sachet, stored in your refrigerator or a cool, dark cellar, meets all four of these criteria neatly. Label each jar clearly with the variety name and the harvest year so you can quickly identify your stock at planting time. A small slip of paper written in pencil works particularly well — pencil holds up better than ink in slightly cool, humid fridge environments.
Before sealing your jar, make absolutely certain your seeds are fully dry. Sealing even slightly damp seeds is one of the most common seed saving mistakes and leads directly to mould. Spread seeds on a sheet of non-coated paper or a fine mesh screen in a warm, well-ventilated location for a minimum of ten to fourteen days. They’re ready when they snap cleanly rather than bending — that snap is your signal of proper dryness.

How Long Will Saved Pepper Seeds Remain Viable?
Under optimal conditions — low humidity, cool and stable temperature, complete darkness — pepper seeds typically remain viable for two to four years. Some carefully stored batches germinate successfully beyond the four-year mark, though germination rates do decrease progressively as the seeds age.
The main enemy of longevity isn’t age itself — it’s humidity fluctuation. Each time moisture levels rise and fall, seeds undergo micro-cycles of swelling and contraction that gradually damage their internal cellular structures. A stable environment, even one that isn’t perfectly cold, will usually outperform a colder location with frequent temperature and humidity swings (such as a frequently opened fridge door).
Always run a germination test before committing to sowing a large quantity from an older seed batch. Place ten seeds between damp paper towels at room temperature and check after ten to fourteen days. A germination rate of 70 % or higher indicates your seed stock is in good working order for the season ahead. Below 50 % and you’ll want to sow more densely or source fresh seed.
Can You Save Seeds From Green Peppers Bought at the Supermarket?
Yes, with a few important caveats. Supermarket peppers are typically picked at the mature green stage for transit and shelf-life purposes, which means the seeds inside are often viable — but germination rates tend to be less predictable than with home-grown fruit you’ve monitored from the start.
The more significant concern is variety. The majority of commercially grown peppers are F1 hybrids, which means seeds from the fruit won’t reliably produce plants that resemble the parent. You might plant seeds from a bright red supermarket bell pepper and end up with something that looks and tastes entirely different. For consistent, predictable results season after season, seek out open-pollinated or heirloom varieties from a reputable seed supplier — these are designed for seed saving and will reward the effort handsomely.
If you do want to experiment with supermarket seeds, a short fermentation step can help. Soaking seeds in water for 24–48 hours before drying removes any germination-inhibiting gel coating and helps reduce seed-borne pathogens. Keep the fermentation brief — pepper seeds are more sensitive to over-fermentation than tomato seeds, for instance.
Should You Ferment Pepper Seeds Before Planting?
Fermentation is optional for peppers, and for home-grown, open-pollinated fruit it’s largely unnecessary. That said, it does carry real benefits in certain situations. Here’s an honest look at both sides:
- Pros: Fermentation can break down germination inhibitors in the seed coat, improve the speed of germination, and reduce the transmission of some seed-borne fungal and bacterial pathogens by exposing them to the acidic fermentation environment.
- Cons: Over-fermentation damages seeds and reduces viability. It adds time and steps to the process. For healthy, home-grown fruit from clean stock, the marginal benefit is small.
If you do choose to ferment: place seeds in a small jar with just enough room-temperature water to cover them, leave in a warm spot for 24–48 hours maximum, then rinse thoroughly under running water and spread to dry on paper for at least ten days. Never extend fermentation beyond 48 hours with peppers — the window between helpful and harmful is narrower than it is with tomatoes.
For most home gardeners growing open-pollinated heirloom peppers from their own plants, a thorough rinse, a full drying period, and correct storage achieves excellent germination without any fermentation at all.
What Techniques Improve the Germination Rate of Saved Pepper Seeds?
Pepper seeds can be slow and uneven germinators even under good conditions. Two targeted pre-sowing techniques are well established in horticultural practice and consistently improve results:
- Scarification: Gently roughen the seed coat using fine sandpaper, or soak seeds in warm (not hot) water for eight to twelve hours before sowing. This softens the outer coating and allows moisture to penetrate more quickly, reducing the time to germination by several days in many cases.
- Stratification: For seeds stored over winter that seem reluctant to germinate, a brief cold stratification period — placing lightly moistened seeds in a sealed bag in the refrigerator for two to three weeks before sowing — can help trigger the germination response more reliably, particularly in varieties that naturally experience cold winters in their native habitat.
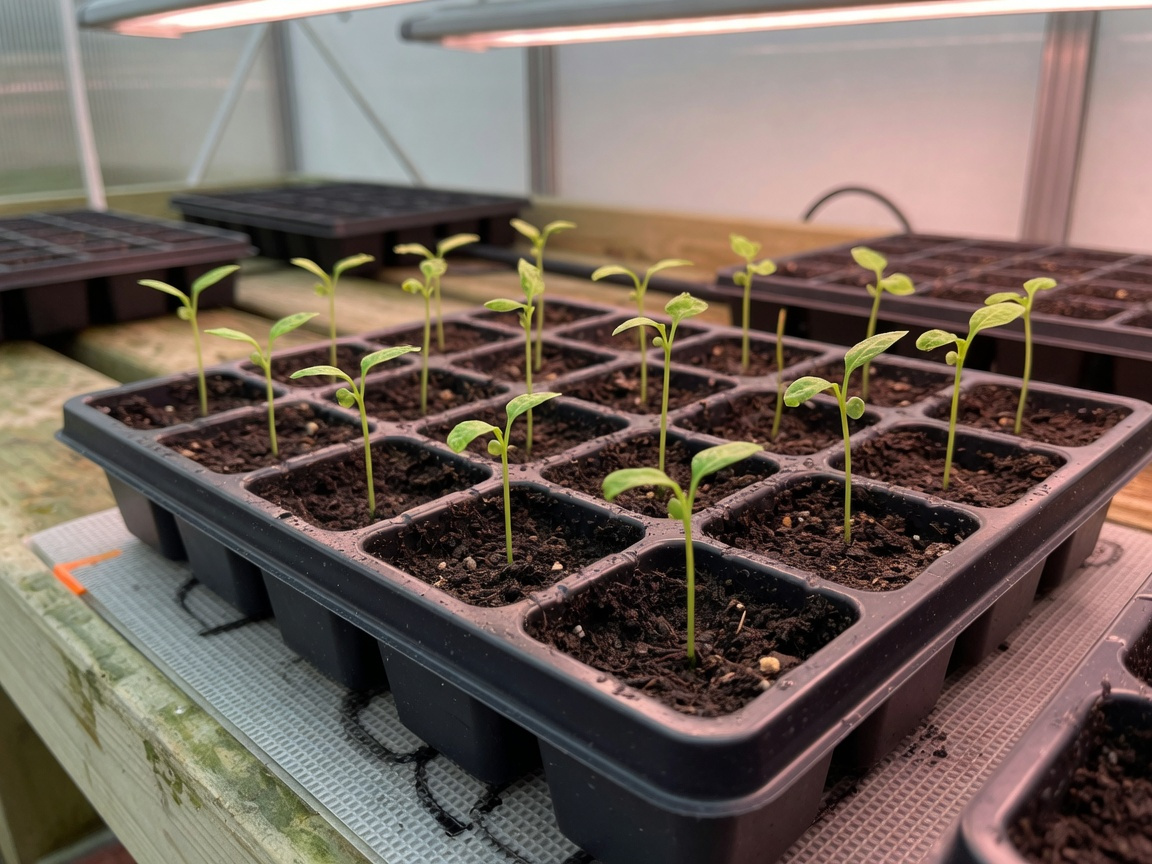
Beyond pre-treatment, the single most impactful factor for pepper germination is consistent bottom heat. Peppers evolved in warm, tropical climates and soil temperatures below 18 °C / 65 °F significantly slow or prevent germination. A propagation heat mat set to 24–29 °C / 75–85 °F makes a measurable difference to both germination speed and overall success rates. If you’re building your 2026 growing season from the ground up, there’s plenty of practical seasonal guidance in this overview of starting a summer garden successfully.
Do Peppers Grown From Saved Seeds Stay True to Type?
Open-pollinated and heirloom pepper varieties generally grow true to seed — meaning offspring closely resemble the parent plant in fruit shape, colour, size, and flavour. This predictability is the main reason experienced seed savers gravitate towards heirloom varieties: you know exactly what you’re growing, and you can refine your selection with each passing year.
Cross-pollination is the primary risk to trueness. Peppers are pollinated predominantly by insects, and if multiple varieties are growing within close range of each other, bees and other pollinators can transfer pollen between plants. The result is hybrid seed that won’t breed true. To prevent unwanted crossing, grow seed-saving varieties at least 50–100 metres apart where possible, or hand-pollinate individual flowers and cover them with a small mesh bag before insects arrive.
F1 hybrid varieties will not grow true to seed under any circumstances — their genetic architecture means the offspring are variable and often markedly inferior to the parent. The “F1” label on a seed packet is your clear indicator. If reliable results across generations matter to you, stick with open-pollinated or heirloom lines for your seed saving programme. To see how this principle applies across your whole growing plot, it’s worth exploring which fruits reliably grow true to seed — a practical companion guide for planning your annual seed saving.
Step-by-Step: How to Save Pepper Seeds From Green Fruit
- Select your pepper (Week 1): Choose a healthy, well-shaped fruit from your most vigorous plant. Ideally wait until the skin shows the first hint of colour change for the best seed viability.
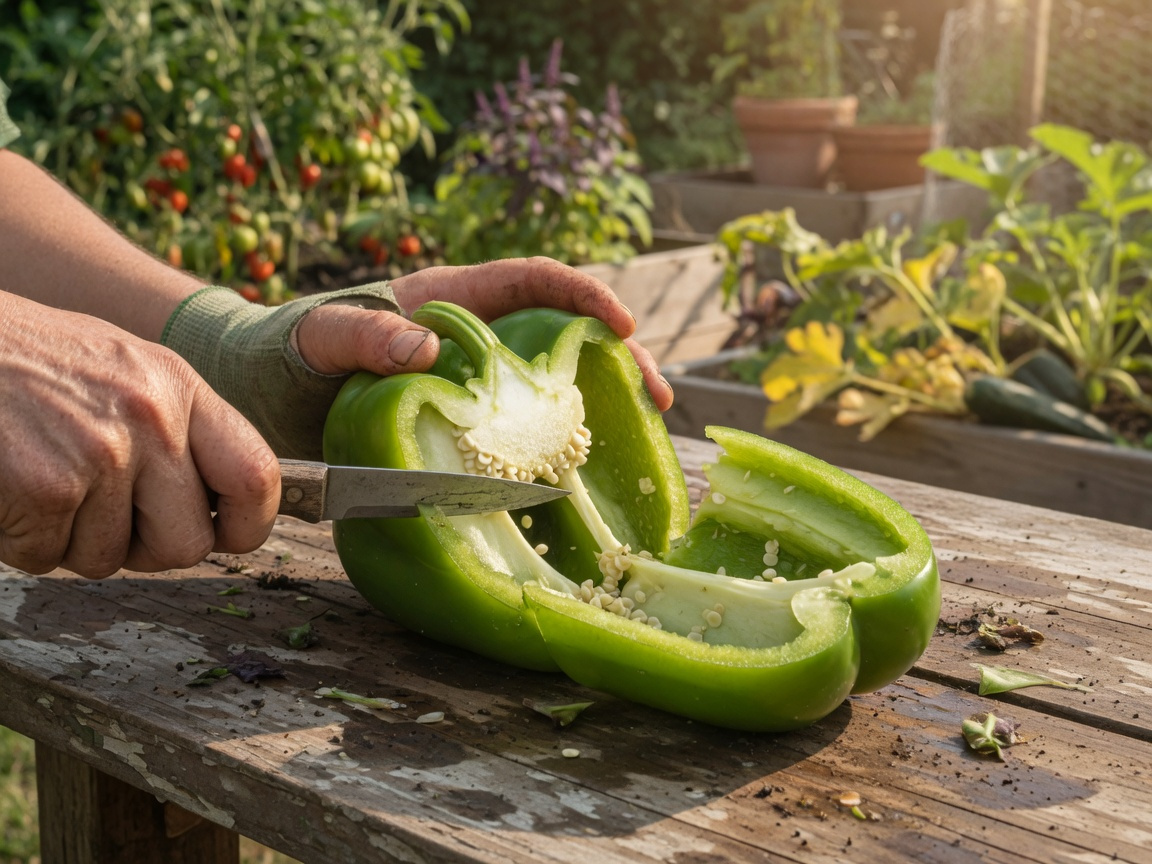
- Extract the seeds (Week 1): Slice the pepper lengthways with a sharp knife. Gently pull or scrape the seed cluster away from the central placenta, being careful not to cut through the seeds themselves.
- Rinse thoroughly (Week 1): Place seeds in a fine-mesh sieve and rinse under cool running water, rubbing gently to remove fruit pulp and gel coating.
- Ferment if needed (Days 1–2, optional): For store-bought or potentially disease-exposed fruit, soak seeds in room-temperature water for 24–48 hours. Rinse thoroughly once complete.
- Dry completely (Weeks 1–2): Spread seeds in a single layer on non-coated paper or a mesh screen in a warm, well-ventilated spot. Leave for a minimum of ten to fourteen days, turning occasionally. Seeds are fully dry when they snap rather than bend.
- Store correctly (Ongoing): Place dried seeds in a labelled, airtight glass jar with a silica gel sachet. Store in a cool, dark location at around 40 °F / 5 °C with humidity at 8 % or lower.
- Test viability before sowing (Next season): Place ten seeds between damp paper towels at room temperature. After ten to fourteen days, count how many have sprouted. A germination rate of 70 % or higher means your seed stock is in great shape for spring sowing.
Frequently Asked Questions
Can I save seeds from peppers that aren’t fully ripe?
Yes, provided the pepper has reached the mature green stage — full-sized, with plump pale-yellow seeds visible inside. Seeds from very young, underdeveloped fruit are not viable and won’t germinate. The closer the fruit is to showing a colour change when you harvest, the better your germination rate is likely to be.
How long can I store pepper seeds before they lose viability?
Properly stored pepper seeds — in a sealed jar at 40 °F / 5 °C with relative humidity at 8 % or below — typically remain viable for two to four years. Some well-stored batches germinate successfully beyond that window. Always run a paper-towel germination test before sowing a large quantity from older stock.
Do I need to ferment pepper seeds before storing or planting them?
No, not for healthy, home-grown open-pollinated fruit. A thorough rinse followed by a full two-week drying period is sufficient. Fermentation is most useful for seeds taken from store-bought fruit, where it helps break down germination inhibitors and reduce seed-borne pathogens. If you do ferment, keep it to 24–48 hours maximum — pepper seeds are sensitive to over-fermentation.
What’s the most effective way to improve germination rates for saved pepper seeds?
Soak seeds in warm water for eight to twelve hours before sowing (scarification), and use a propagation heat mat to maintain soil temperature at 24–29 °C / 75–85 °F during germination. Bottom heat is the single most impactful factor for pepper germination — without it, even viable seeds can take weeks to emerge or fail to germinate at all.
Can I plant seeds from green peppers I bought at the supermarket?
You can try, though results are unpredictable. The main issue is that most supermarket peppers are F1 hybrids, and their seeds won’t produce plants that reliably match the parent fruit. For consistent results from season to season, open-pollinated or heirloom varieties from a dedicated seed supplier give you far more control over what ends up on your plate.
Will plants grown from saved pepper seeds look the same as the parent?
Yes, if you’re saving from an open-pollinated or heirloom variety and no cross-pollination has occurred. Isolate your seed-saving plants from other pepper varieties — aim for 50–100 metres minimum, or hand-pollinate — to protect genetic integrity. F1 hybrids do not grow true to seed and should be avoided if predictability matters to you.
Is it better to save seeds from green peppers or fully ripe ones?
Fully ripe peppers consistently produce seeds with the highest germination potential and vigour. However, seeds from fruits at the colour-break stage (just beginning to turn) are very close in performance and are a perfectly practical choice when a full ripening period isn’t available. Green, uncoloured peppers are the minimum viable option — usable in a pinch, but not the first choice if you can help it.
Your Next Steps for a Productive Seed Saving Season
Saving pepper seeds from green fruit is one of the most rewarding low-cost practices a home gardener can adopt. The most important things to take away: harvest at the colour-break stage for the best viability, dry your seeds completely before sealing them away, and keep them in a cool, dark, low-humidity environment for the longest possible shelf life.
Start with one or two of your favourite open-pollinated varieties this season. Label your jars clearly, run a germination test in late winter before you commit to sowing, and adjust your technique each year based on what you learn. Seed saving is a skill that compounds beautifully over time — small improvements in your process each season build into a genuinely reliable seed library within just a few years.
The next time you’re planning what to grow, remember that a well-kept seed collection gives you the flexibility to experiment with new positions, spacings, and combinations in your beds — and having reliable seed stock on hand makes that kind of growing confidence effortless.