
Growing an umbrella tree successfully comes down to five core things: bright indirect light, free-draining soil, disciplined watering, seasonal feeding, and occasional pruning. Nail those and your Schefflera will reward you with lush, architectural growth for years — even decades — to come.
Some of the links in this article may be affiliate links. If you make a purchase through these links, we may earn a small commission at no extra cost to you. Thank you.
The Schefflera, native to Taiwan and Hainan Island, has earned its place as one of the most popular tropical houseplants in the UK and beyond. Whether you’ve just brought your first one home or you’re troubleshooting a plant that isn’t quite thriving, this complete 2026 guide covers everything — from choosing the ideal spot to propagating new plants from your existing one.
Key Takeaways
- Scheffleras need at least four to six hours of bright, indirect light daily — direct sun scorches their leaves.
- Overwatering is the leading cause of Schefflera death; always let the top 2–3 cm of soil dry out before watering again.
- Feed with a balanced fertiliser monthly from April through September, and not at all in winter.
- Pruning in spring encourages bushy, compact growth and stops your plant becoming a single leggy column.
- Both stem cuttings and air layering produce new plants reliably — propagation is one of the most enjoyable aspects of growing this species.
What Is the Schefflera Umbrella Tree and Why Is It Such a Favourite in 2026?
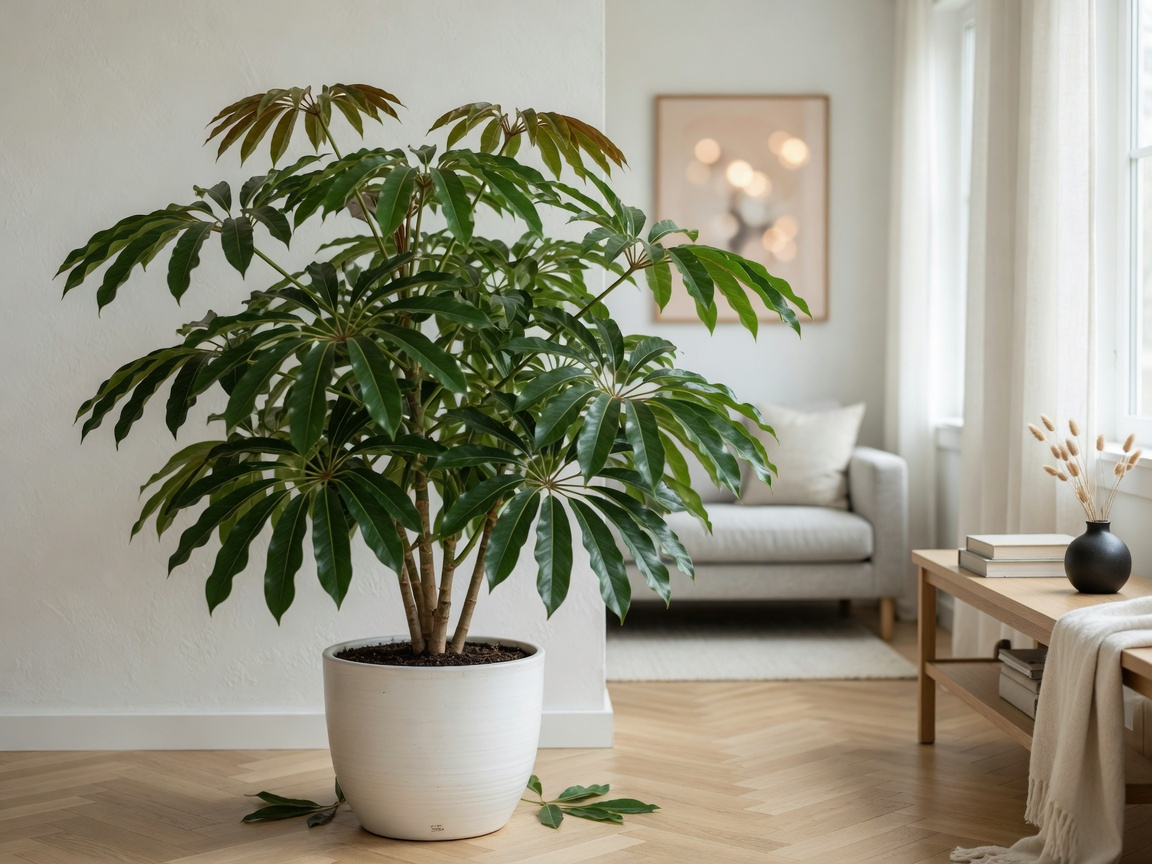
The Schefflera gets its common name — umbrella tree — from the way its glossy, finger-like leaflets radiate outward from a central stalk, creating a shape that genuinely resembles an upturned umbrella. It’s one of those plants that looks like it belongs in an interior design magazine, yet it’s easier to care for than it appears.
Two species dominate the houseplant market. Schefflera actinophylla is the larger of the two — it can reach ceiling height indoors over many years and carries bold, dramatic foliage that commands attention in a room. Schefflera arboricola, the dwarf umbrella tree, stays more compact at around 1.5 metres indoors and suits smaller living spaces beautifully. Both share essentially identical care requirements, so everything in this guide applies to either species.
The Schefflera’s generous, spreading canopy makes it particularly effective at transforming a bare corner into a lush, calming focal point — which is a big part of why it remains one of the most searched-for houseplants year after year.
If you enjoy growing other tropical trees indoors, you’ll find that the care principles here overlap with those in our guide to caring for a Ficus benjamina weeping fig — though the Schefflera is generally more forgiving of minor care lapses, making it an excellent starting point for those building their confidence with tropical houseplants.
Where Should You Place Your Umbrella Tree for the Best Results?
Light is the single most important factor in Schefflera success, and it’s worth spending time on this before you do anything else. These plants need bright, indirect sunlight — the kind of light you’d find one to two metres back from a large south- or east-facing window. A north-facing room is generally too dim; a west-facing window works well in summer when the afternoon light isn’t too harsh.
Direct sunlight — especially through glass in summer — scorches the leaves, leaving bleached patches and brown tips that are cosmetic damage only but can’t be reversed once they’ve appeared. Too little light and the plant stretches toward the window, becomes leggy, and drops its lower leaves as it concentrates energy on the new growth nearest the light source. A minimum of four to six hours of bright indirect light each day is the target for healthy, compact growth.
Temperature consistency is just as important as light intensity. Scheffleras are comfortable in the 15–24°C (59–75°F) range that suits most UK homes. Sustained temperatures below 12°C (54°F) trigger significant leaf drop, and cold draughts from leaky windows, exterior doors, or air conditioning vents are equally damaging — even when ambient room temperature seems fine, a cold draught on the foliage causes real distress.
One important behavioural quirk: Scheffleras strongly dislike being moved. Once yours is settled in a spot where it’s growing well, leave it there. Rotating the pot 90 degrees monthly is fine — it keeps growth even — but moving the plant to a new position, even one that appears equally bright, frequently triggers a wave of leaf drop as the plant readjusts. Choose your spot thoughtfully and commit to it.
Ideal Location Checklist
- Choose a bright room with a south- or east-facing window.
- Position the plant 60–90 cm back from the glass to avoid direct sun exposure.
- Maintain a room temperature consistently above 12°C (54°F) at all times.
- Keep well away from radiators, air vents, and exterior doorways.
- Rotate the pot monthly for even growth, but avoid relocating the plant once it is settled.
What Soil Does a Schefflera Need to Thrive?
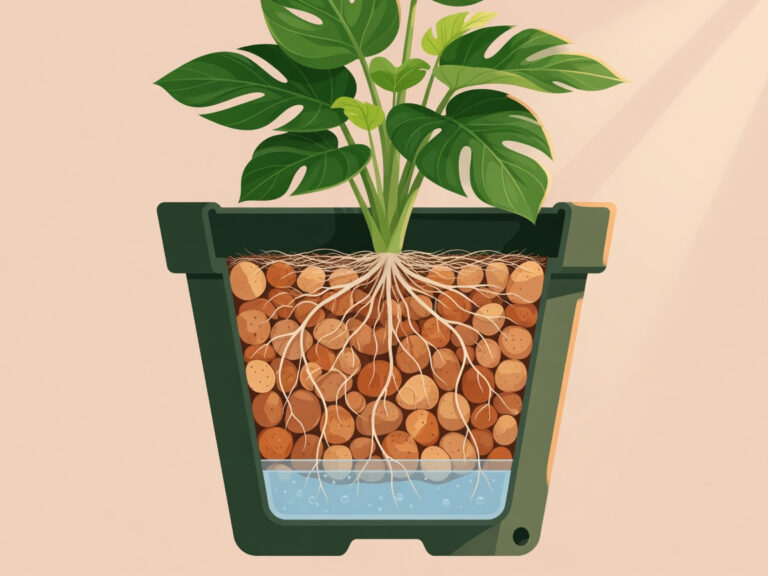
Scheffleras aren’t especially demanding about soil fertility, but they are extremely particular about drainage. Sitting in waterlogged compost for even a short period creates the conditions for root rot, and once that takes hold it’s difficult to reverse. Your priority with soil choice is to create a mix that water moves through freely, while still retaining enough moisture to keep roots hydrated between waterings.
A reliable mix for potted Scheffleras is two parts peat-free multi-purpose compost, one part perlite, and one part coarse horticultural grit. The compost provides nutrients and baseline moisture retention; the perlite and grit open the structure significantly, allowing air to reach the roots and surplus water to drain away in seconds rather than pooling at the base. Scheffleras prefer a slightly acidic to neutral pH of around 6.0–6.5, which most quality multi-purpose composts fall within naturally.
If you prefer a more sustainable growing medium, coconut coir is an excellent peat-free alternative that holds moisture evenly while remaining well-aerated. It’s virtually pH-neutral, which suits Scheffleras perfectly. Substitute it in the same ratio as you would peat compost and your plant will adapt well. Coir also has the benefit of resisting compaction over time — a problem that affects standard compost in containers after a year or two of watering and settling.
One thing to avoid entirely: garden soil. It compacts badly in containers, reduces drainage dramatically, and introduces pests, pathogens, and weed seeds that your houseplant has no defences against. Even if it seems like a convenient option, it causes far more problems than it solves when used in a pot.
How Do You Plant a Schefflera Correctly?
Choosing the right pot size is the first and most commonly overlooked step. Select a container that’s only 3–5 cm (about 1–2 inches) larger in diameter than the plant’s current root ball. A pot that’s too large holds far more soil than the roots can access — and all that surplus soil stays wet, creating exactly the waterlogged conditions root rot exploits. Err on the side of a snug fit rather than giving the roots excess space to grow into.
Drainage holes are non-negotiable for Scheffleras. If you want to display yours in a decorative cache pot without holes, that’s perfectly fine — just remove the inner pot after watering, let it drain for 30 minutes, then return it to the outer pot. Never let the plant sit in standing water, even briefly.
Step-by-Step Planting Guide
- Add a 2–3 cm layer of horticultural grit or small stones to the base of the pot to improve drainage from the outset.
- Fill the pot halfway with your prepared soil mix.
- Remove the plant from its existing container and gently loosen any circling or tightly matted roots with your fingers.
- Position the plant so the top of the root ball sits 2–3 cm below the pot rim, leaving room for watering without overflow.
- Backfill around the roots with your soil mix, firming it gently to eliminate air pockets — but don’t compact the compost too hard.
- Water thoroughly until it flows freely from the drainage holes, then allow to drain completely before moving to its final permanent position.
Plan to repot every two to three years in spring, moving up by one pot size each time. A plant that is becoming pot-bound — roots emerging from the drainage holes, or drying out unusually quickly between waterings — is telling you it needs more space. Repot promptly to keep growth strong and healthy.
How Often Should You Water an Umbrella Tree?
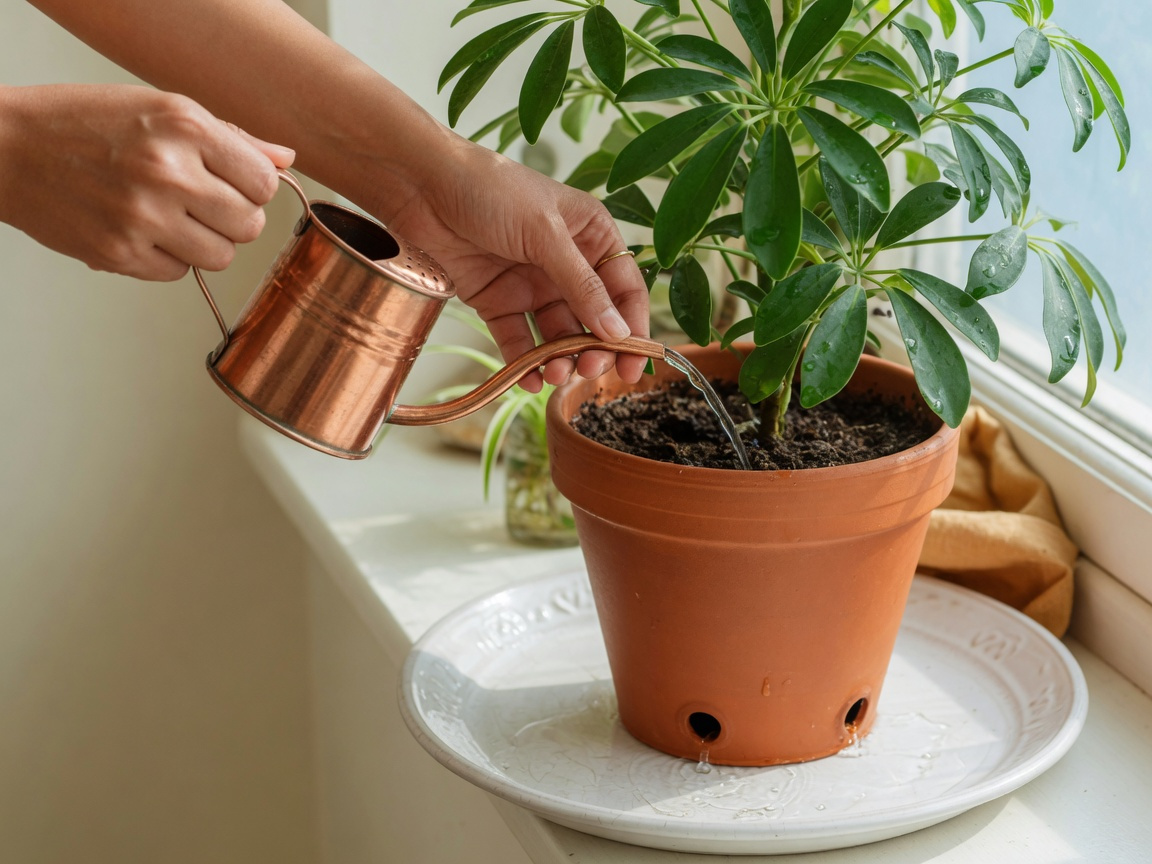
Watering is where most Schefflera growers go wrong — and almost always in the direction of too much rather than too little. The plant’s tropical origins suggest it might want constant moisture, but in a container at home, overwatering is a far more common cause of death than drought. The golden rule: water when the top 2–3 cm of compost feels dry to the touch, not before.
In practice, this works out to roughly once a week during the active growing season in spring and summer, and every 10–21 days in autumn and winter when growth slows and the plant consumes water much more slowly. Use these intervals as starting points, not rigid rules — what matters is the feel of the soil. A warm, sunny room dries compost faster than a cool north-facing one, and a recently repotted plant in fresh, open compost needs less frequent watering than one that is root-bound and has exhausted its growing medium.
| Season | Approximate Watering Frequency | Soil Dryness Cue |
|---|---|---|
| Spring / Summer | Every 7–10 days | Top 2 cm dry |
| Autumn | Every 10–14 days | Top 3 cm dry |
| Winter | Every 14–21 days | Top 3–4 cm dry |
When you do water, water thoroughly — continue until water flows freely from the drainage holes, ensuring the whole root ball gets moistened rather than just the top layer. Then stop, and empty the saucer or outer pot within 30 minutes. This soak-and-drain approach is far healthier than frequent small amounts of water, which encourage shallow root development and allow salt build-up in the upper layers of compost over time.
Signs of overwatering include yellowing lower leaves, soft mushy stems at the base, and a musty smell from the compost. Signs of underwatering are more dramatic — wilting, crispy leaf margins, and compost that has shrunk away from the sides of the pot. Both are fixable if caught early; root rot from chronic overwatering is the harder of the two to recover from.
When and How Should You Fertilise Your Schefflera?
Scheffleras are moderate feeders — they benefit noticeably from fertilisation during the growing season but don’t need heavy or frequent feeding. The active period runs from roughly April through to the end of September in the UK; outside of these months the plant is resting and adding fertiliser serves little purpose, since it can’t process the nutrients efficiently and salts can accumulate in the compost unnecessarily.
A balanced liquid fertiliser with an N-P-K ratio of approximately 10-10-10 or 20-20-20 applied at half the manufacturer’s recommended strength, once a month throughout the growing season, is the most reliable approach for container-grown Scheffleras. Half-strength reduces the risk of fertiliser burn on containerised roots, which are more vulnerable to concentrated salts than roots growing in open ground. If you’d rather not manage a monthly liquid feed, slow-release granular fertiliser worked into the top layer of compost at the start of spring will release nutrients steadily across the whole season without further intervention.
Always apply fertiliser to moist, pre-watered compost — never to a dry root ball. Adding concentrated nutrients to dry soil focuses salts in the compost and can damage the fine feeder roots that the plant depends on for nutrient uptake. If you notice a white crusty deposit forming on the compost surface over time — a clear sign of salt build-up — flush the pot thoroughly with plain water every three to four months to clear the excess before it affects root health.
A Schefflera producing pale, undersized new leaves despite correct watering and light is almost certainly telling you it needs more nutrients. Conversely, if new growth looks lush but older leaves are yellowing from the base upward, the issue is more likely watering or drainage rather than nutrition — feeding won’t fix it, and may make things worse.
How Do You Prune an Umbrella Tree to Keep It Looking Its Best?
Without regular pruning, Scheffleras grow naturally upward in a single column — impressive for height, but often bare lower down with a top-heavy cluster of foliage that looks more like a palm than the bushy, architectural plant most of us want. Pruning redirects growth energy and is the most effective tool you have for shaping your Schefflera into something genuinely beautiful and well-proportioned.
The best time to prune is in spring or early summer, when the plant is actively growing and has the energy and warmth to heal cuts quickly and push out new shoots. Pruning in autumn or winter leaves wounds slow to callus and the plant more vulnerable during its dormant period. Dead or diseased material, however, should be removed whenever you spot it regardless of season — there’s no benefit to leaving it in place.
How to Prune Your Schefflera: Step by Step
- Sterilise your secateurs or pruning shears before starting — rubbing alcohol, dilute bleach solution, or specialist tool cleaner all work well. This prevents spreading pathogens between cuts and between plants.
- Step back and assess the overall shape before making any cuts. Identify stems that are leggy, crossing, or growing in an unwanted direction.
- Cut just above a leaf node — the point where a leaf or side branch joins the main stem. New growth will emerge from just below this point, giving you two or three branches where there was previously one.
- Remove any completely dead, yellowed, or diseased branches back to healthy wood, making a clean cut at a slight angle to shed water away from the wound.
- To encourage a noticeably bushier plant, pinch out the growing tips of new shoots between your thumb and forefinger to stop upward extension and direct energy into lateral branching.
- After finishing, wipe blades clean and wash your hands — Schefflera sap is a mild skin irritant that can cause a rash on sensitive skin.
If your Schefflera has outgrown its space, you can cut it back by up to one-third of its total height without causing lasting harm. Within four to six weeks of a hard prune you’ll see new shoots emerging from the remaining stems, and the plant typically regrows more vigorously and attractively than before — with multiple stems branching where there was previously only one.
How Do You Propagate a Schefflera Plant?
Propagating your Schefflera is genuinely one of the most satisfying parts of growing this plant. Both main methods — stem cuttings and air layering — are achievable at home with basic equipment, and success rates are high when conditions are right. Cuttings work best on younger, more actively growing material; air layering is particularly effective on older, woodier plants where a cutting from lower stems may struggle to root.
Propagating by Stem Cuttings
Take cuttings in late spring or early summer from healthy, non-flowering stems. Each cutting should be 10–15 cm long with at least two to three leaf nodes and a clean cut made just below a node using sterilised, sharp secateurs. Remove all the lower leaves, leaving just two or three at the growing tip to reduce water loss through transpiration while rooting is underway.
Dip the cut end in rooting hormone powder or gel — this significantly improves both rooting speed and overall success rates and is well worth the small investment. Insert the cutting into a small pot of moist perlite, or a 50:50 mix of perlite and coir, and cover with a clear plastic bag or propagator lid to maintain humidity. Place in a warm spot at 18–22°C with bright indirect light. Roots typically develop within four to eight weeks; wait until you see new leaf growth before potting up into a standard compost mix, as this is the most reliable confirmation that rooting has succeeded.
Propagating by Air Layering
Air layering is the technique of choice for mature Scheffleras with woody stems, where cutting material may be less vigorous. It produces a much larger, more established new plant than a cutting — because the new root system develops while the stem is still receiving nutrients from the parent plant. Our detailed walkthrough on mastering air layering covers the full technique step by step, but here is a summary specific to Scheffleras.
Choose a healthy stem that is at least pencil-thick and positioned below a cluster of leaves. Make a shallow diagonal cut about one-third of the way through the stem, or remove a 3–4 cm ring of outer bark at the chosen point, to wound the tissue and trigger root formation. Pack the wound tightly with moist sphagnum moss, then wrap the moss ball in clear polythene film and seal both ends tightly with grafting tape or electrical tape to lock in moisture. Roots will appear at the wound site and grow into the moss over six to twelve weeks. Once a dense, well-developed root system is visible through the polythene, cut the stem just below the rooted section and pot it up into your standard Schefflera mix. Keep it in shade with high humidity for the first week to ease the transition from parent plant to independence.
What Are the Most Common Schefflera Problems and How Do You Fix Them?
Even well-cared-for Scheffleras encounter problems occasionally. The good news is that most issues are straightforward to diagnose and fix once you know what to look for. Here are the ones you’re most likely to meet.
Yellowing Leaves
Yellow leaves are the most common complaint and are almost always caused by overwatering or poor drainage. Check the soil and drainage holes first — if the compost has been consistently wet, let it dry out more between waterings, improve drainage, or repot into a better-draining mix. If watering appears correct, a nutrient deficiency during the growing season (particularly nitrogen) can also cause yellowing; try a balanced feed and monitor the response over four to six weeks.
Sudden Leaf Drop
Large-scale leaf drop — sometimes dozens of leaves in a single day — is the Schefflera’s stress response to environmental shock. The most common triggers are a move to a new location, a cold draught, a sharp temperature drop, or the plant’s first exposure to a cold windowsill as autumn sets in. Identify and remove the cause, move the plant to a stable warm position, reduce watering slightly while it recovers, and be patient. New leaves typically emerge within four to eight weeks once the plant feels secure again.
Spider Mites, Mealybugs, and Scale
Spider mites are the most frequent pest problem on Scheffleras, particularly in warm, dry indoor environments where natural predators are absent. Look for fine webbing on the undersides of leaves and a stippled, dusty texture to the leaf surface — these are the tell-tale signs. Increase humidity around the plant, wipe leaves down with a damp cloth to physically remove mites, and treat established infestations with insecticidal soap or neem oil applied every five to seven days for three consecutive weeks to break the life cycle.
Mealybugs appear as white cottony deposits in leaf axils and stem joints. Remove individual insects with a cotton bud dipped in rubbing alcohol, then follow up with a neem oil spray across the whole plant. Scale insects present as small brown or tan bumps on stems and leaf undersides; treat them in the same way as mealybugs. Persistence is the key with all three pests — repeat treatments are almost always necessary, as a single application rarely eliminates all life stages.
Root Rot
Root rot is the most serious problem your Schefflera is likely to face, but it’s recoverable when caught in time. Warning signs include a persistent musty smell from the compost, soft brown or black roots visible when you unpot the plant, and a plant that continues declining despite seemingly correct care. Remove the plant from its pot, trim away all soft, dark root material with sterile scissors or secateurs, and dust the cut surfaces with horticultural sulphur or powdered cinnamon — both effective natural antifungals. Repot into fresh, dry, well-draining compost in a clean pot, and reduce watering significantly for the following four to six weeks while the root system rebuilds.
Occasionally, Scheffleras develop aerial roots — roots that emerge from the stem above the soil line. This is entirely natural in tropical species and usually indicates a vigorous, healthy plant rather than a stressed one. If you’re curious about why plants produce these above-ground structures, our article on aerial roots — why they appear and how to care for them explains the biology clearly and helpfully.
Can You Grow a Schefflera Outdoors?
In the UK and Northern Europe, Scheffleras are best treated as indoor plants — they don’t tolerate sustained temperatures below 12°C and won’t survive a typical British winter in an exposed outdoor position. That said, there are several outdoor growing scenarios where they can genuinely thrive and benefit from the change of environment.
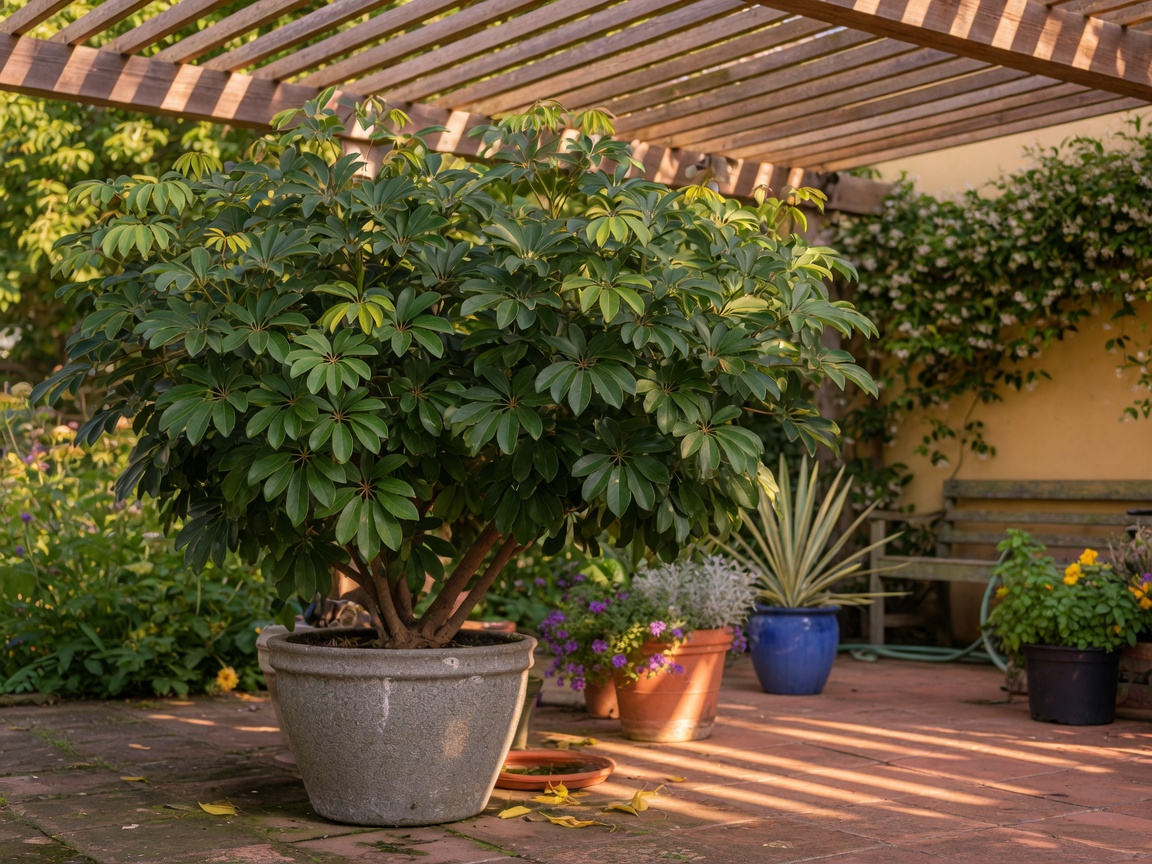
Moving a potted Schefflera to a sheltered patio or garden for the summer months — typically May through to early September in the UK — is actively beneficial. Better air circulation, higher natural light levels, and occasional rainfall all encourage vigorous growth. The key is timing: bring your plant back indoors before nighttime temperatures drop below 15°C, which in most parts of the UK happens reliably by mid-September. A brief warm spell in October isn’t worth the risk of catching it in an unexpected cold snap overnight.
In USDA hardiness zones 10–12 — which covers parts of the Mediterranean, Southern California, Florida, and tropical regions globally — Scheffleras grow successfully as permanent outdoor plants. In those climates, Schefflera actinophylla is capable of reaching 12–15 metres in the ground and is actually considered invasive in some regions due to its vigorous seeding and rapid spread. Checking local guidance before establishing it as a permanent outdoor plant in warm climates is always worth doing.
In the mildest parts of the UK — sheltered gardens in Cornwall, the Isles of Scilly, and some coastal south-west locations — hardy cultivars such as Schefflera taiwaniana have survived mild winters outdoors with some protection, though frost cloth on cold nights is advisable. If you’re planning a summer garden that incorporates container-grown tropicals like your Schefflera, our guide to planning and planting a summer garden has plenty of ideas that work beautifully alongside large-leafed tropical statement plants.
Frequently Asked Questions About Growing Schefflera Umbrella Trees
How much light does a Schefflera need each day?
Scheffleras need at least four to six hours of bright, indirect light per day. A position near — but not in direct contact with — a south- or east-facing window is ideal. Variegated cultivars with cream or yellow leaf markings need slightly more light than plain green forms to maintain their colouring. A practical test: if you can comfortably read a book at the plant’s location without turning on a lamp during daylight hours, the light level is likely adequate.
Why is my Schefflera dropping so many leaves?
Large-scale leaf drop almost always follows environmental shock — a move to a new location, a cold draught, a sharp temperature drop, or the plant’s first encounter with a cold windowsill in autumn. Chronic overwatering can also cause leaf drop if root rot has started to develop. Identify the cause first: if it’s environmental, stabilise the conditions and allow four to eight weeks for recovery; if it’s root-related, unpot and inspect what’s happening below the soil. Either way, reduce watering slightly while the plant stabilises.
How large do umbrella trees grow indoors?
In ideal indoor conditions, Schefflera actinophylla can reach up to 3 metres (roughly 10 feet) in height, though this takes many years. Schefflera arboricola is more compact, typically reaching 1.5–2 metres indoors. Regular pruning gives you full control over height and spread regardless of species — you can maintain either as a compact tabletop plant or train it into a dramatic floor-standing specimen, depending on what best suits your space.
Is the Schefflera plant toxic to pets?
Yes — all parts of the Schefflera plant are toxic to cats, dogs, and horses. The plant contains calcium oxalate crystals and other irritant compounds that cause mouth pain, drooling, vomiting, and difficulty swallowing if ingested. Keep your umbrella tree well out of reach of pets — ideally in a room they don’t access — and contact your vet immediately if you suspect your pet has chewed any part of the plant.
How do I make my Schefflera grow bushier?
The most effective approach is to pinch out the growing tips of main stems in spring, before the season’s new growth gets established. This stops upward extension and redirects the plant’s energy into producing side shoots, resulting in two or three branches where there was previously one. Repeat this on each new flush of growth and within one to two growing seasons you’ll have a noticeably fuller, more branched plant. Hard pruning — cutting leggy stems back by 30–50 percent in spring — produces a similar effect more rapidly for plants that have already become tall and bare lower down.
Can I propagate my Schefflera in water?
Yes — stem cuttings will root in water, though success rates are somewhat lower than with perlite or a propagating mix. Place the prepared cutting in a clean glass of room-temperature water in bright indirect light, and change the water every three to four days to prevent bacterial build-up. Once roots reach 3–5 cm, pot up carefully into compost — water-formed roots are more brittle than those developed in soil and need gentle handling during the transition to avoid snapping the fragile new root tips.
Start Growing Your Schefflera Today: A Simple Action Plan
The umbrella tree is one of the most rewarding tropical houseplants you can grow in 2026 — dramatic in scale, forgiving when its core needs are met, and genuinely capable of thriving for decades once it’s happy. Here’s a quick-reference summary of the essentials:
- Light: Bright, indirect — at least four to six hours daily, near but not touching a south- or east-facing window.
- Soil: Free-draining — multi-purpose compost with added perlite and grit, or a coir-based mix at a pH of 6.0–6.5.
- Water: Soak thoroughly when the top 2–3 cm is dry; always empty the saucer within 30 minutes.
- Feed: Balanced liquid fertiliser at half-strength, once a month from April to September only.
- Prune: Spring or early summer — cut above leaf nodes and pinch out growing tips to encourage bushy branching.
- Propagate: Stem cuttings in late spring for younger material; air layering for woodier mature plants.
Start this week by checking your plant’s current position against the light and temperature guidelines above — most Schefflera problems trace back to one of those two factors, and correcting them costs nothing. Once the fundamentals are solid, pruning and propagation are where the real satisfaction begins. There’s genuine pleasure in handing a well-rooted Schefflera cutting to another gardener who’s admired yours — and with this plant, it’s entirely within reach.