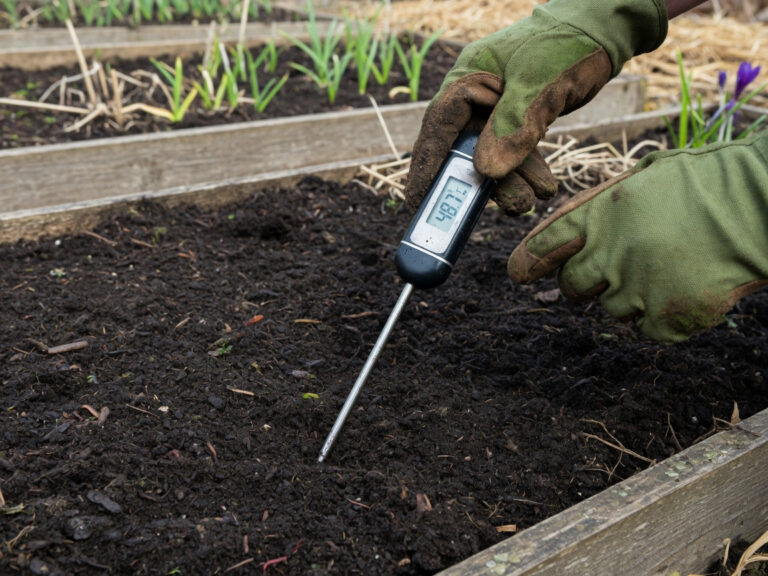

Air layering achieves reliable, consistent results when you apply five key techniques together: precise cambium removal, the right growing medium, consistent moisture control, rooting hormone application, and correct seasonal timing. Master all five and you can clone almost any woody plant with genuine confidence.
Some of the links in this article may be affiliate links. If you make a purchase through these links, we may earn a small commission at no extra cost to you. Thank you.
This guide walks you through every step clearly and practically. Whether you’re propagating a cherished magnolia, multiplying your fig trees, or rescuing a leggy rubber plant, air layering lets the new plant develop roots while still feeding from the parent. That single advantage dramatically reduces failure rates and produces a healthier, faster-establishing specimen than cuttings can reliably provide.
Key Takeaways
- Air layering consistently achieves high success rates on compatible species when all five techniques are applied together.
- Root development takes 6–12 weeks during the active growing season — spring through early summer is the optimal window.
- Sphagnum moss holds up to 20 times its own dry weight in water, making it the best growing medium by a clear margin.
- A clean 2.5–5 cm ring of bark removed down to the cambium is the single most critical step in the entire process.
- Starting air layers in late March through June gives significantly better results than late summer attempts.
What Is Air Layering and Why Does It Work So Well?
Air layering is a propagation method where you encourage roots to form on a branch while it’s still attached to the parent plant. You wound the stem, pack the wound with moist growing medium, seal it in polythene film, and wait. Once a healthy root system develops, you cut the new plant free. Simple in theory — and genuinely transformative in practice.
The reason air layering outperforms stem cuttings comes down to resource availability. A cutting is severed from its food and water supply the moment it’s taken. It must survive on stored energy while simultaneously trying to grow roots — a stressful combination that causes many cuttings to fail. Air layering removes that stress entirely. The developing roots receive a constant supply of water, sugars, and growth hormones from the parent plant right up until the moment of separation.
The Royal Horticultural Society recognises air layering as one of the most reliable vegetative propagation methods for woody ornamentals and established trees. It produces a genetically identical copy of the parent — vital for preserving named cultivars, unusual growth forms, and carefully selected specimens. You always know exactly what you’re growing.
Air layering also works reliably on mature wood where cuttings regularly fail. Many woody plants become increasingly difficult to root from cuttings as they age. Air layering sidesteps that problem entirely, making it possible for propagators applying the core principles of successful air layering to achieve results that standard cutting propagation simply cannot match on established specimens.
Which Plants Are Best Suited for Air Layering?
Not every plant responds equally well to air layering — but the list of suitable species is long and varied. Woody-stemmed plants with active cambium layers are your best candidates. The technique works reliably on a wide range of ornamental trees and shrubs, popular houseplants, and productive fruit trees.
These plants air layer particularly well:
- Magnolia — responds quickly, producing dense root balls within 6–8 weeks in spring
- Ficus (rubber plant, common fig, weeping fig) — one of the most forgiving subjects for beginners
- Rhododendron and azalea — roots consistently within 8–10 weeks when started in April or May
- Apple, pear, and quince — ideal for preserving named varieties without the complexity of grafting
- Camellia — slow but consistent over 12–16 weeks with careful moisture management
- Japanese maple (Acer palmatum) — excellent results on two-year-old wood with rooting hormone
- Croton and Chinese evergreen — popular for indoor propagation in warm, centrally heated homes
Plants that are difficult to air layer typically have very thin bark, produce heavy latex, or have naturally sluggish cambium responses. Conifers fall squarely into this category. Most softwood conifers simply don’t callus reliably enough to form roots through air layering. For those plants, grafting or cutting propagation is the more practical choice.
Age matters too. Choose branches that are one to three years old. They have reliable cambium activity but are young enough to respond quickly. Overly old hardwood and very young green growth both produce slower, less predictable results.
Technique 1 — How Do You Remove the Cambium Layer the Right Way?
Cambium removal is the most critical step in the entire process. Get this wrong and no other technique will compensate. The cambium is the thin layer of actively dividing cells sitting just beneath the bark. Completely removing it at a chosen point forces the plant to produce roots at the wound rather than simply healing over it.
Follow these steps precisely for a clean, effective ring:
- Choose your branch. Select a healthy, pencil-thick stem between one and three years old. Look for a section between two leaf nodes, approximately 30–60 cm from the branch tip.
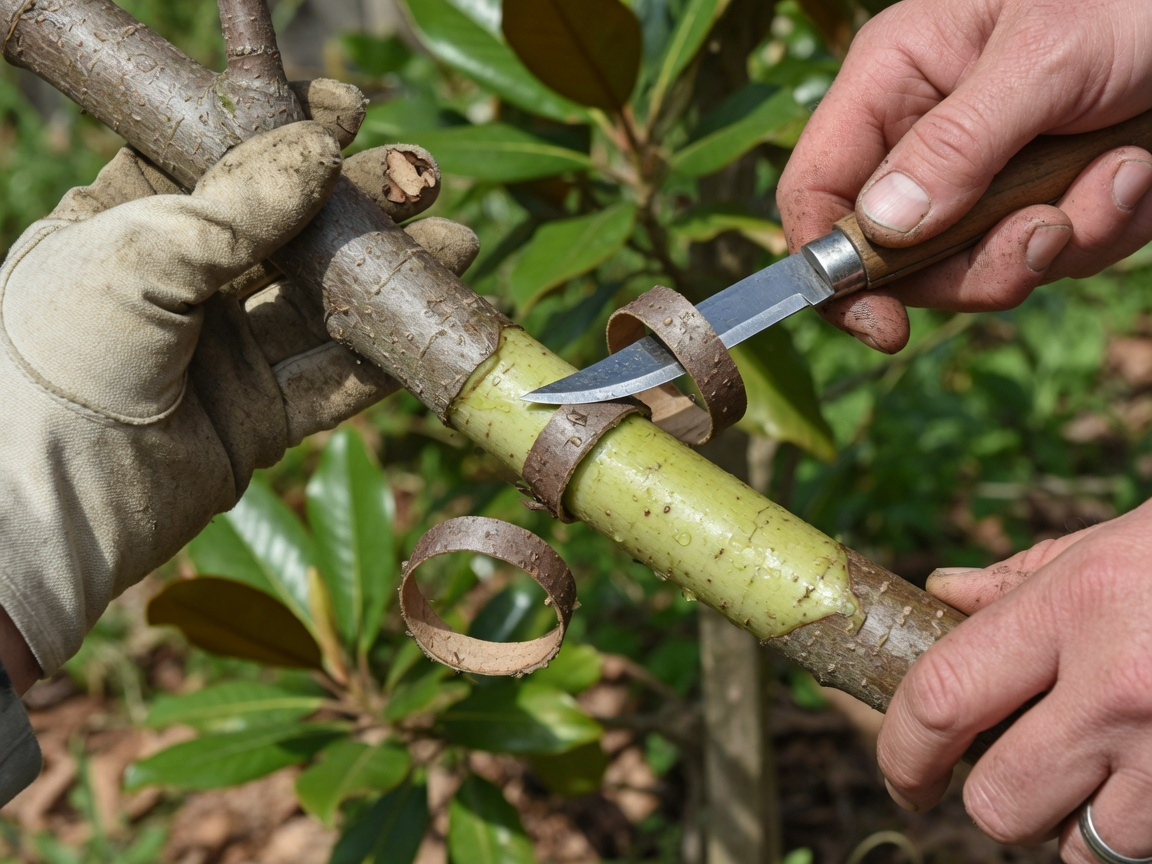
- Make two clean ring cuts. Use a sharp, sterile knife. Cut through the bark in two parallel rings spaced 2.5–5 cm apart. Press firmly enough to cut through bark and into the cambium without reaching the woody core.
- Remove the bark ring completely. Score lengthways between the two rings and peel the bark away. The exposed wood beneath should look pale and slightly moist.
- Scrape away all cambium. Use the back of your blade to remove the green or tan cambium layer entirely from the exposed wood. Any residue allows the wound to bridge over — and roots won’t form if that happens.
- Allow the wound to dry briefly. Give the exposed wood 20–30 minutes of air before applying growing medium. This short drying period reduces the risk of fungal infection at the wound site.
Sharpness is non-negotiable. A blunt knife tears plant tissue rather than cutting it cleanly. Torn cambium heals unpredictably and often bridges before roots can form. Sharpen your blade before each session and sterilise it with rubbing alcohol between cuts to prevent transferring disease between plants.
Technique 2 — Which Growing Medium Gives Air Layering the Best Results?
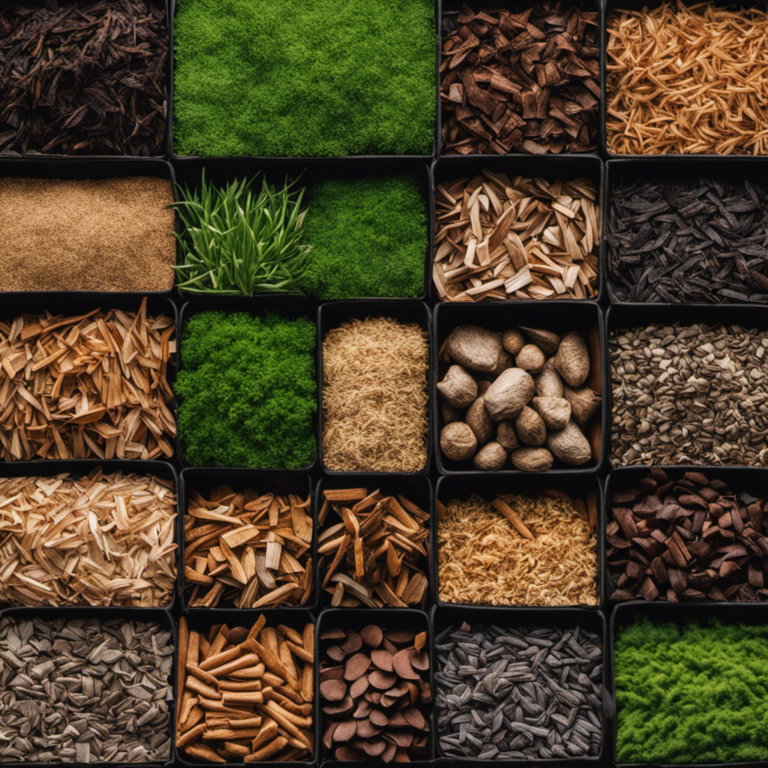
The growing medium you pack around the wound must do three things simultaneously: hold moisture, allow oxygen to reach developing roots, and stay in close contact with the exposed cambium. Only one medium consistently achieves all three — sphagnum moss.
Sphagnum moss is the professional propagator’s choice for excellent reasons. It holds up to 20 times its dry weight in water while maintaining the open, fibrous structure that lets roots grow through it freely. Roots penetrate sphagnum far more readily than compost or peat. When you eventually remove the wrapping, the roots interweave with the moss in a way that minimises root disturbance during potting on.
| Growing Medium | Moisture Retention | Aeration | Root Penetration | Overall Suitability |
|---|---|---|---|---|
| Sphagnum moss (moist) | Excellent | Excellent | Excellent | ⭐⭐⭐⭐⭐ |
| Sphagnum + perlite (50/50) | Good | Very Good | Good | ⭐⭐⭐⭐ |
| Coir fibre | Good | Good | Moderate | ⭐⭐⭐ |
| General-purpose compost | Variable | Poor | Poor | ⭐⭐ |
| Saturated peat moss | Good | Poor | Poor | ⭐⭐ |
To prepare your sphagnum moss, soak it thoroughly in clean water, then squeeze firmly until it feels like a wrung-out sponge — evenly moist but not dripping. Pack a generous handful roughly the size of a tennis ball directly over the wound. Extend the moss approximately 5 cm above and below the ring cuts to give developing roots plenty of room to spread.
Technique 3 — How Do You Maintain Moisture Without Waterlogging the Wound?
Moisture management is where many air layers fail. Too dry and the roots desiccate before they establish. Too wet and the wound rots before roots have a chance to form. The goal is consistent, moderate moisture throughout the rooting period — and the right wrapping approach makes this far easier than most beginners expect.
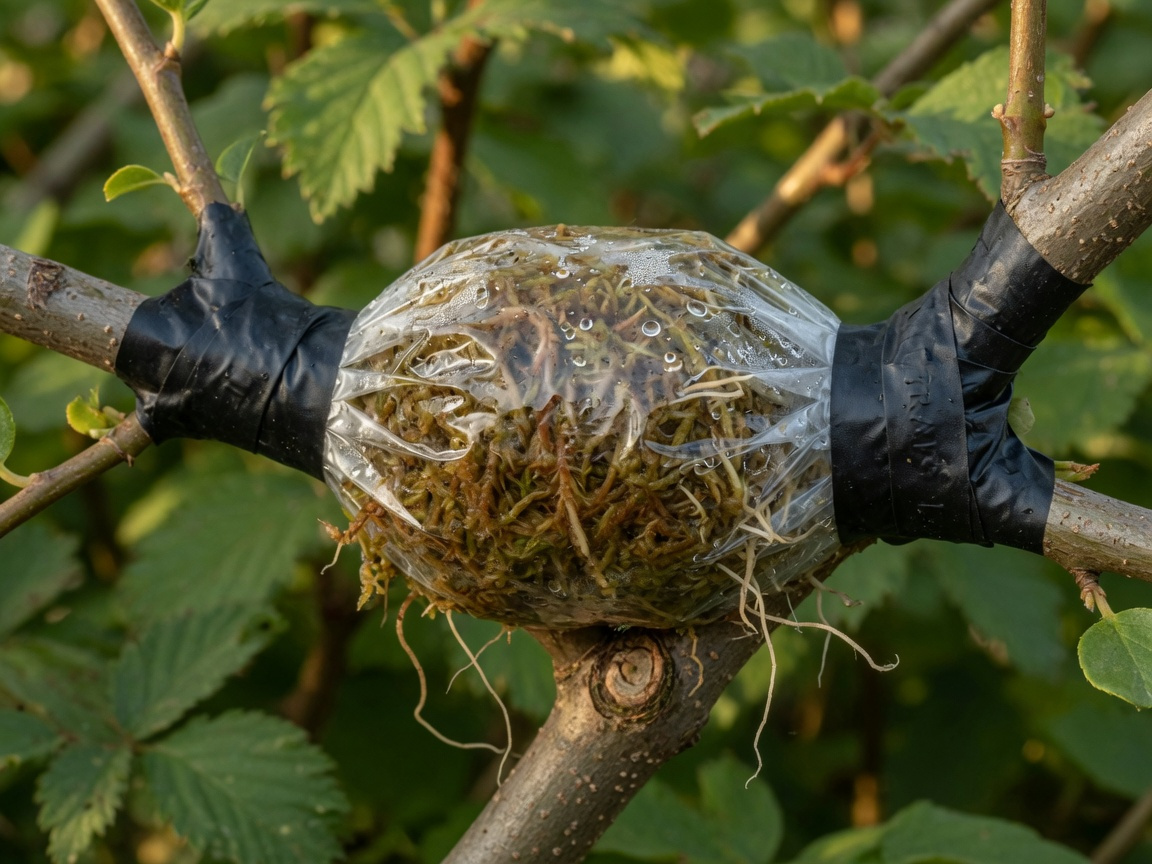
Once you’ve packed the sphagnum moss, wrap the entire bundle tightly in clear polythene film. Overlap generously and seal both ends firmly with grafting tape, electrical tape, or cable ties. The top seal matters most — water should not be able to pool inside the wrapping, as standing water encourages rot at the wound site.
Clear polythene offers a practical advantage that opaque materials don’t: you can monitor root development from the outside without disturbing the layer at all. You’ll see exactly when roots appear and judge their density through the film — no need to unwrap prematurely. This alone eliminates one of the most common causes of failure.
Check your air layer every two weeks. On outdoor plants during the growing season, a well-sealed polythene wrap typically holds moisture for the full rooting period without any additional water. In hot, dry weather — or for houseplants in centrally heated rooms — you may occasionally need to inject a small amount of water with a fine-nozzle syringe if the moss shows signs of drying at the edges of the wrap.
Understanding root physiology in humid enclosed environments is genuinely useful context here. Research into how aerial roots function in naturally humid conditions illustrates precisely why moisture and aeration must be balanced — not maximised in isolation — for reliable root development in any propagation context.
Technique 4 — When Do Rooting Hormones Actually Make a Difference?
Rooting hormone is not essential for every air layer — but it significantly improves results on plants that are naturally slow or reluctant to root. The active ingredient in most rooting products is indole-3-butyric acid (IBA), a synthetic auxin that mimics the plant’s own rooting signals at higher concentrations than the plant would produce independently.
Apply rooting hormone — powder or gel — directly to the scraped cambium surface immediately after completing the ring cut. Work it in gently with a clean, soft brush or fingertip. Powder formulations are sufficient for easy-rooters like ficus, magnolia, and rhododendron. Gel formulations offer better adhesion and are worth choosing for trickier subjects — camellia, mature maples, or any species you’ve struggled to root previously.
Propagation science consistently demonstrates that IBA application reduces the time to root initiation and improves root density on a wide range of woody species. The effect is most pronounced when conditions are slightly less than ideal — for example, when you’re air layering in July rather than May, or when working with a species that has naturally slow cambium response. On easy-rooters you’ll notice more numerous, evenly distributed roots. On difficult subjects, hormone application can make the difference between success and failure outright.
One important caution: never over-apply. Too much IBA can inhibit root formation by triggering a phytotoxic response in the cambium tissue. A light, even dusting of powder — or a thin, uniform coat of gel — is precisely the right amount. More is not better here.
Technique 5 — How Does Seasonal Timing Affect Your Success Rate?
Timing is the technique most beginners overlook — and it is one of the biggest determinants of whether an air layer succeeds or fails. Plants are not equally primed to produce roots at all times of year. Success rates are significantly higher during the peak growing season than in late summer on the same plant with identical technique applied.
The optimal window for UK and northern European gardeners is late March through to the end of June. During this period, sap is rising, cambium activity is at its annual peak, and natural auxin levels are elevated throughout the plant. These conditions prime every woody plant to respond to wounding with rapid root initiation rather than slow callus formation and wound bridging.
Here’s a practical seasonal timing guide for outdoor plants in the UK:
- March–April: Begin as buds break and new growth emerges. Excellent timing for magnolia, rhododendron, and ornamental cherry.
- May–June: Peak period for most woody ornamentals and fruit trees. Expect root development in as few as 6–8 weeks on vigorous species.
- July: Still viable for vigorous species like ficus and rubber plant. Allow slightly longer rooting times — typically 10–14 weeks.
- August–September: Diminishing returns as plants begin to harden off. Reserve for indoor tropicals with no true seasonal dormancy.
- October–February: Not recommended for outdoor plants with dormant cambium. Tropical houseplants in warm, controlled indoor environments remain viable year-round.
Having strong, healthy parent plants to work from is every bit as important as getting the timing right. If you’re building a productive garden that supplies reliable propagation material, a well-planned growing space ensures you have vigorous, well-established specimens that give every air layer the very best start.
What Are the Most Common Air Layering Mistakes and How Do You Fix Them?
Even experienced gardeners make these mistakes. Understanding them before you start saves weeks of frustration and the disappointment of discovering a failed air layer months after you set it up.
Mistake 1: Incomplete Cambium Removal
This is the single most common reason air layers fail. If any green cambium remains on the exposed wood, the plant bridges the wound rather than producing roots. Bridging can occur within just 10–14 days — fast enough to doom the layer before you’ve noticed anything is wrong. Scrape the exposed wood thoroughly until the surface is clean, pale, and entirely free of green or tan residue.
Mistake 2: Choosing the Wrong Branch or Species
Attempting air layering on old hardwood, very thin twigs, or naturally reluctant species leads to slow, unreliable results. Choose pencil-thick branches on species known to respond well. If you’re new to the technique, start with a rubber plant or magnolia to build confidence before tackling trickier subjects like camellia or mature Japanese maple.
Mistake 3: A Poorly Sealed Polythene Wrap
A single small gap in the polythene seal is enough for sphagnum moss to dry completely in warm weather — sometimes within just two or three days. Use wide tape, overlap the film generously, and run your fingers around both seals after wrapping to feel for any gaps. A second layer of tape at each end is inexpensive insurance and takes only 30 extra seconds to apply.
Mistake 4: Unwrapping Too Early
Impatience is a propagator’s most persistent enemy. Many gardeners unwrap after four weeks, see callus but no visible roots, and conclude the layer has failed. It hasn’t. Callus formation before roots is entirely normal — it’s a positive sign that the plant is responding correctly. Wait until roots are visibly pressing against the inside of the polythene before considering separation. That patience rewards you with a far stronger plant.
Mistake 5: Separating Before the Root Ball Is Dense Enough
A few visible roots pressing against the polythene is not sufficient. The young plant needs a dense, well-developed root ball to survive separation and establish successfully in a pot. Wait until roots have visibly circled within the moss ball and clearly fill the wrapping from multiple directions. A sparse cluster of three or four roots gives the new plant almost no margin for error in its first independent days.
How Long Before Your Air Layer Is Ready to Separate and Pot On?
The timeline varies by species, season, and technique — but most gardeners working on compatible plants in the spring window can expect visible roots within 6–8 weeks. A dense, pot-ready root ball typically develops within 10–12 weeks on faster-rooting species like ficus and magnolia.
Here’s how a typical air layer progresses from setup to separation:
- Week 1–2: The wound begins to callus. A white or cream swelling forms around the edges of the ring cut. This confirms the plant is responding correctly — it’s a good sign.
- Week 3–4: Tiny white root initials (small nubs) emerge from the callus at the wound margins. Look carefully through the polythene — they can be easy to miss at this early stage.
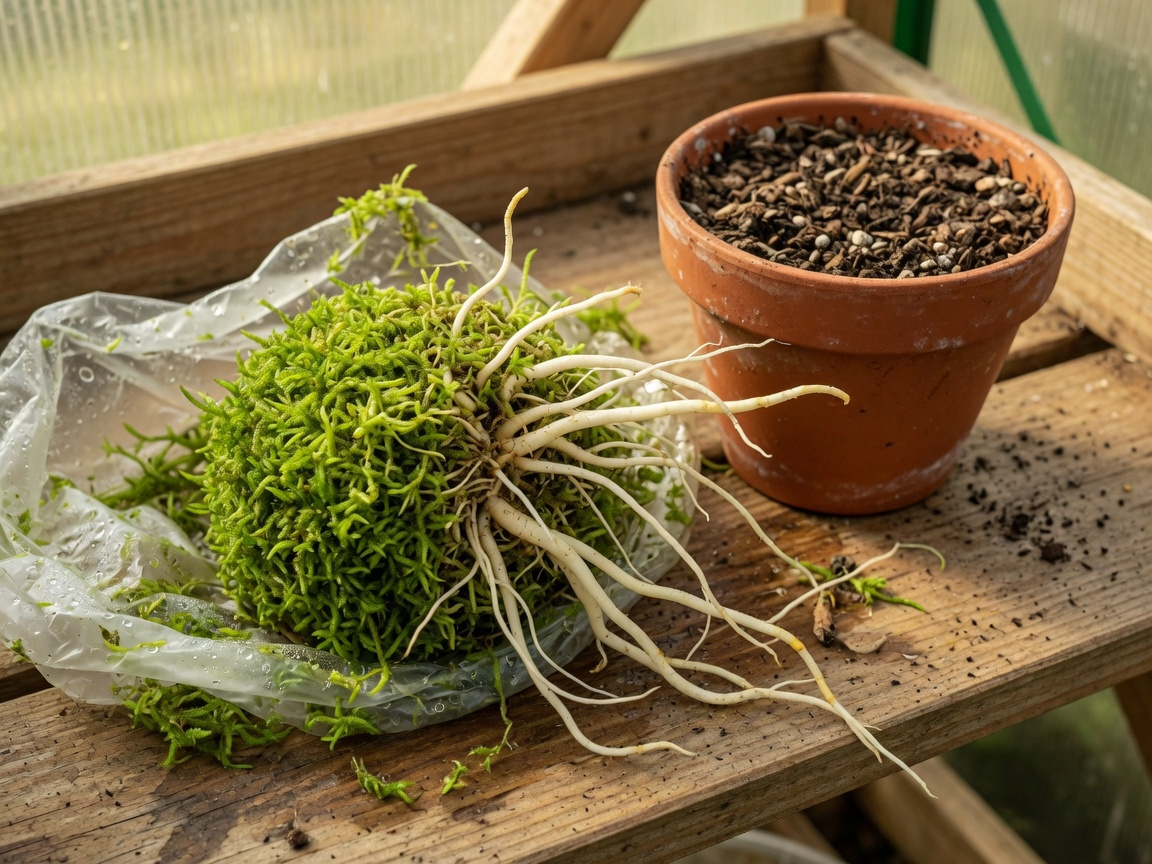
- Week 6–8: Roots lengthen and grow into the sphagnum moss. On vigorous species, you’ll see a clearly developing root ball by now. Roots should be white, firm, and reasonably well distributed.
- Week 10–12: A full, dense root ball has formed, filling the moss and pressing against the polythene on multiple sides. On most species, this is the signal that safe separation is possible.
When the root ball is ready, cut through the stem cleanly just below the lower ring cut. Remove the polythene wrap carefully, leaving the sphagnum moss and roots completely undisturbed. Pot the new plant into free-draining compost and keep it in a bright but indirect-light position for the first two to three weeks. This transition period allows the young root system to adapt to independent life without unnecessary stress.
The aftercare techniques that support vigorous root development post-separation draw on the same principles used to encourage healthy root growth across a range of propagation contexts — consistent moisture, good drainage, and careful attention during those critical first weeks of independent growth.
Frequently Asked Questions About Air Layering
How long does air layering typically take to succeed?
Most air layers on compatible woody plants produce a viable root ball in 6–12 weeks when started in spring or early summer. Slower-growing species like camellia may take up to 16 weeks. Tropical houseplants kept in warm, humid indoor conditions often root faster — sometimes in just four to six weeks.
Can you air layer at any time of year?
Technically yes, but results are far better in spring and early summer when plants are actively growing. For outdoor plants in the UK, late March to June is the prime window. Indoor tropical plants kept in warm conditions don’t follow a seasonal calendar and can be air layered at any point throughout the year.
Do you always need rooting hormone for air layering?
No. Easy-rooting species like rubber plants, magnolias, and rhododendrons root reliably without hormone assistance when technique and timing are right. That said, IBA rooting hormone meaningfully improves results on reluctant rooters, helps outside the optimal season, and increases root density on any species. It’s inexpensive and worth applying as standard practice on every air layer you set up.
What should I do if my air layer fails to root?
Investigate systematically. Was the cambium fully removed? Partial removal is the most frequent cause of failure. Check the polythene seal for gaps that allowed the moss to dry. Consider whether the species is a poor candidate, or whether the branch was too old or too young. The vast majority of failures trace to one of these four causes — correct the issue and try again. Air layering genuinely rewards persistence.
Is sphagnum moss the only viable growing medium?
Sphagnum moss is strongly preferred for its exceptional moisture retention and open, root-friendly structure. A 50/50 mix of sphagnum and perlite is a reliable alternative for species prone to root rot, as it improves drainage while maintaining adequate moisture. Pure coir works in a pinch but doesn’t retain moisture as consistently and is not recommended for slow-rooting species or dry climates.
Can air layering damage the parent plant?
Done correctly, air layering causes minimal disturbance. You’re removing bark from a single branch — the rest of the parent plant continues to grow normally. On rare occasions, if the air layer is left attached too long after the root ball has fully developed, the girdled section above the ring cut may show some die-back. Separate promptly once a dense root ball is clearly visible and the parent plant will be completely unaffected.
Which plants are the hardest to air layer successfully?
Conifers, willows, and most softwood species don’t respond reliably to air layering. Plants that produce heavy latex — such as certain euphorbia — can also be problematic, because the latex seals the wound quickly and interferes with root initiation. For these plants, stem cuttings or grafting are usually more practical propagation approaches.
Your Action Plan: Start Your First Air Layer This Weekend
Air layering is one of the most rewarding propagation skills in any gardener’s toolkit. The success rate is high, the equipment list is short — a sharp knife, sphagnum moss, polythene film, rooting hormone, and tape — and the results are deeply satisfying. A mature, beautiful specimen, cloned and growing independently within a single season.
Here’s your practical action plan for the next seven days:
- Day 1: Identify two or three suitable candidates in your garden or home — magnolias, ficus, rhododendrons, or apple trees with healthy, pencil-thick stems between one and three years old.
- Day 2: Gather your materials. You need a sharp grafting knife, sphagnum moss, clear polythene film, wide tape, and IBA rooting powder or gel.
- Day 3: Soak your sphagnum moss overnight. Prepare a clean, sterile workspace and sterilise your knife with rubbing alcohol.
- Day 4–5: Make your first air layer. Follow all five techniques in order: clean cambium removal, a 20–30 minute wound drying period, rooting hormone application, a moist sphagnum moss pack, and a fully sealed polythene wrap.
- Weeks 2–12: Check progress fortnightly through the polythene without disturbing the wrap. When roots clearly fill the moss ball on multiple sides, cut below the ring, pot into free-draining compost, and enjoy the results.
The best time to begin is whenever your target plant is actively growing. Apply these five techniques consistently and reliable, high success rates become the expected outcome. Happy propagating.