The most effective way to maximize seed longevity is straightforward: store seeds cold, dry, and dark inside airtight containers. Done consistently, this approach can extend viability from a single season to five years or more for most vegetables and flowers. Get it right, and your seed collection becomes a long-term resource that saves money, reduces waste, and keeps your garden growing confidently year after year.
Some of the links in this article may be affiliate links. If you make a purchase through these links, we may earn a small commission at no extra cost to you. Thank you.
Key takeaways for 2026:
- Temperature and humidity are the two greatest threats to seed viability — control both consistently and storage life improves dramatically for almost every species.
- Seed lifespans vary widely: onion seeds typically last just one to two years, while tomato and lettuce seeds can stay viable for five years or more under optimal conditions.
- Airtight containers, stable cool temperatures, and consistent labelling are the three non-negotiable pillars of effective seed storage.
- A simple germination test before each growing season tells you exactly what is still worth planting — preventing unpleasant surprises at sowing time.
What Is Seed Longevity and Why Does It Matter for Your Garden?
Seed longevity refers to how long a seed remains viable — meaning capable of germinating and producing a healthy plant — under given storage conditions. For gardeners, it is one of the most practical and under-appreciated concepts in horticulture. A well-managed seed collection means buying in bulk when prices are favourable, saving seeds from your best-performing plants, and preserving access to heritage and heirloom varieties that disappear from commercial catalogues with disappointing regularity.
The financial case alone is compelling. Seeds purchased carefully and stored correctly cost a fraction of buying fresh packets every season. Gardeners who save and store seeds effectively can reduce their annual seed spend by 60–80 percent compared to buying new stock each year. Beyond the economics, seed longevity supports biodiversity. Many heritage vegetable and flower varieties exist primarily in private collections, maintained by gardeners who understand how to keep seeds alive across multiple growing seasons.
Understanding how long different seeds remain viable also makes you a more efficient planner. Knowing that parsnip seeds rarely stay productive beyond one to two seasons, while cucumber seeds can last five or six years in good conditions, lets you prioritise which packets to use first and which can safely wait. The result is less waste, better germination rates, and a garden that performs as expected when the growing season arrives.
What Factors Affect How Long Seeds Stay Viable?
Several variables interact to determine how long any given seed remains viable. Temperature is the single most influential factor. Seeds stored at cool temperatures between 35–50°F (2–10°C) retain viability significantly longer than those kept at room temperature. Warmth accelerates metabolic processes inside the seed, gradually depleting the stored energy reserves the embryo needs to germinate successfully. Each 10°F rise in storage temperature roughly doubles the rate at which seeds lose viability — a principle that underpins professional seed bank practice worldwide.
Humidity is a close second. When moisture content inside a seed rises above roughly 10–12 percent, it triggers premature metabolic activity, mould growth, and cellular breakdown. Maintaining relative humidity below 50 percent in the storage area — ideally below 40 percent for long-term storage — is a widely accepted target among horticultural experts. Silica gel desiccant packets placed inside storage containers offer a reliable, low-cost way to achieve this without specialist equipment.
Light exposure is another underestimated factor. Ultraviolet radiation degrades the proteins and lipids within seeds even through indirect exposure over weeks and months. Opaque containers or consistently dark storage environments eliminate this risk entirely. Pest exposure, fungal contamination, and physical damage all shorten seed life further — particularly for legumes, which are attractive to weevils and other storage insects.
The seed’s own biology matters too. Maturity at harvest is crucial: seeds collected before they have fully ripened carry lower initial viability and shorter potential storage lives. Understanding phenomena like vivipary and premature sprouting in seed development provides valuable context here — seeds that begin germinating on the parent plant before harvest are already compromised before they reach your storage containers.
How Do You Choose High-Quality Seeds Worth Storing?
Not all seeds are worth storing. Starting with high-quality stock is the single greatest predictor of long-term storage success. High-quality seeds germinate at higher rates, tolerate storage conditions better, and produce healthier plants. Lower-quality seeds — regardless of how carefully you store them — tend to deteriorate faster and perform less reliably at planting time. Seed researchers consistently identify initial seed quality as the primary determinant of long-term storage outcomes, ahead of even container type or storage temperature.
Here is what to look for when assessing seed quality before committing to storage:
- Appearance: Healthy seeds are firm, plump, and free from cracks, discolouration, or signs of mould or pest damage. Shrivelled, hollow, or discoloured seeds indicate poor development.
- Weight: A well-developed seed feels dense for its size. Lightweight seeds often contain poorly formed embryos with reduced germination potential.
- Source: Seeds from reputable suppliers, or harvested yourself from vigorous, disease-free parent plants at peak maturity, consistently outperform bulk discount seeds of uncertain origin.
- Harvest timing: Seeds collected at full natural maturity — when they have reached their dry weight and the parent plant has signalled completion — store far better than those harvested early for convenience.
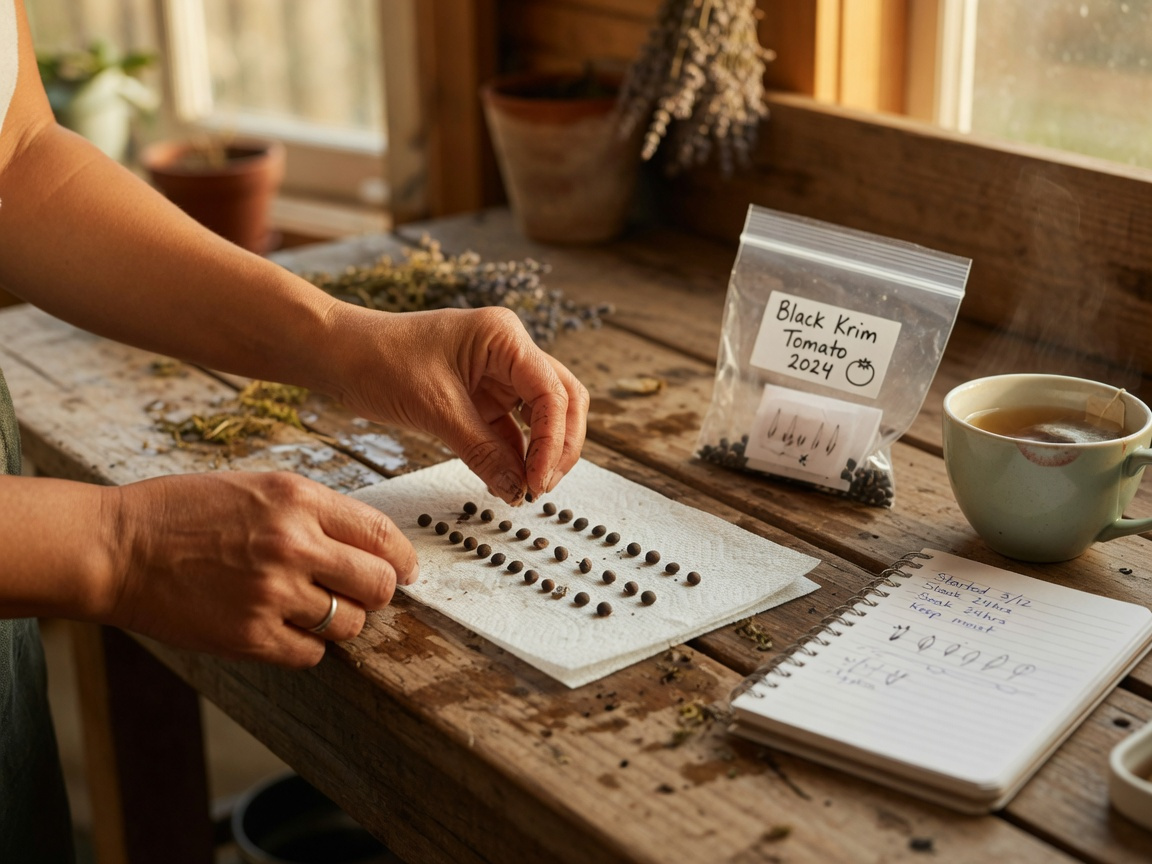
Conducting a germination test before committing to long-term storage gives you a useful baseline. Place ten seeds between damp paper towels at room temperature for the species-appropriate number of days. A germination rate above 75–80 percent suggests the batch is well worth keeping. A rate below 50 percent indicates that fresh stock would serve you better before the next growing season.
What Are the Ideal Storage Conditions for Maximizing Seed Lifespan?
Optimal seed storage comes down to three controllable variables: temperature, humidity, and light. Manage all three consistently, and most seeds will outlive their printed expiry dates by a significant margin — often by two or three years for well-stored collections. The good news is that achieving these conditions requires no expensive equipment for most gardeners.
Temperature: A refrigerator set to around 35–40°F (2–4°C) provides excellent conditions for most vegetable and flower seeds. A cool unheated cellar, garage, or north-facing outbuilding is a practical alternative where temperatures stay consistently below 50°F (10°C) year-round. Avoid anywhere subject to temperature fluctuations — kitchens, utility rooms near appliances, and conservatories all experience the kind of repeated warming-and-cooling cycles that accelerate seed deterioration.
Humidity: Target relative humidity below 50 percent in the storage area, ideally below 40 percent for collections intended to last several years. Adding a small silica gel desiccant packet to each storage container is one of the simplest and most effective interventions available. Recharge or replace desiccant packets annually — a packet that has absorbed its fill of moisture offers no further protection.
Light: Store seeds in opaque containers or inside a dark cupboard. Clear glass jars are excellent storage vessels but should be kept entirely away from windows and light sources. A useful practical guide used in professional horticulture is that the storage temperature in Fahrenheit plus the relative humidity percentage should total no more than 100. Storage at 50°F with 40% humidity gives a combined score of 90 — comfortably within safe territory for most species.
A simple rule of thumb: storage temperature (°F) plus relative humidity (%) should not exceed 100 for reliable long-term seed viability.
Which Containers Work Best for Long-Term Seed Storage?
Container choice directly affects storage outcomes. The goal is airtight, moisture-proof, pest-proof, and dark — or consistently stored somewhere dark. Here are the most practical options available to home gardeners, ranked by effectiveness for long-term use:
- Glass mason jars with metal lids: The gold standard for home seed storage. Excellent resistance to moisture, oxygen, and pests. Wide-mouth jars simplify seed retrieval. Store in a dark cupboard or drawer to block light exposure.
- Sealed foil envelopes: Used by professional seed banks for individual varieties, these provide excellent long-term barriers against both moisture and oxygen. Ideal for small quantities of rare or valuable seeds where maximum protection matters most.
- Food-grade plastic containers with snap-seal or screw lids: Practical and lightweight for medium-term storage of two to three years. Some plastics have modest moisture permeability over longer periods, making glass preferable for collections held beyond three years.
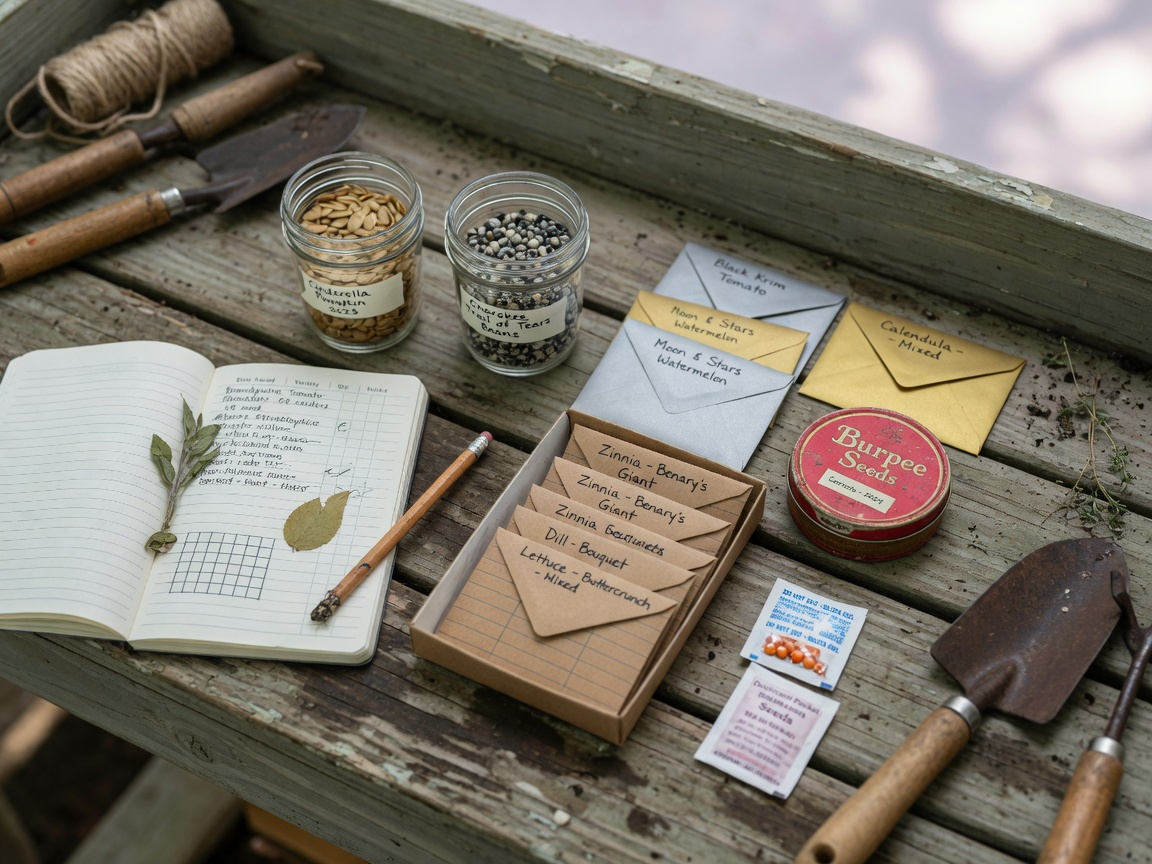
- Coin envelopes inside sealed tubs: A popular approach among experienced seed savers. Individual labelled envelopes hold each variety separately; all envelopes live together inside a large airtight tub stored in the fridge or cool cupboard.
Avoid paper bags, open jars, cloth pouches, or any container that allows free air exchange. These work well enough for a few weeks between harvest and storage, but degrade seed viability rapidly over longer periods. Zip-lock bags without an outer container are similarly unsuitable for anything beyond short-term sorting and handling.
How Do Different Seed Types Affect Your Storage Strategy?
Different seed species have dramatically different natural lifespans, even under identical storage conditions. This variation is largely genetic — some seeds are simply built to wait, while others are designed by nature to germinate quickly or not at all. Knowing these differences helps you prioritise which packets to use earliest and which can safely wait at the back of the collection.
| Plant Variety | Typical Viability (optimal conditions) | Key Storage Notes |
|---|---|---|
| Onion | 1–2 years | Very short-lived; prioritise fresh stock each season |
| Parsnip | 1–2 years | Among the shortest-lived vegetables; buy annually |
| Parsley | 1–3 years | Replace stock regularly; germination slows quickly |
| Corn / Maize | 2–3 years | Keep very dry; prone to moisture absorption |
| Bean / Pea | 2–3 years | Risk of insect damage; inspect before storing |
| Pepper | 2–4 years | Slightly warmer storage tolerated if kept dry |
| Tomato | 3–5 years | Reliable performer in airtight conditions |
| Lettuce | 3–6 years | Excellent storage life; well-suited to bulk buying |
| Cabbage / Brassicas | 4–5 years | Among the most reliable long-term seed stores |
| Cucumber | 5–6 years | Outstanding storage life when kept cool and dry |
Fruit and vegetable seeds that produce offspring true to their parent plant are especially worth preserving carefully. Understanding which fruits reliably grow true to seed lets you build a meaningful self-sustaining collection directly from your own garden, eliminating dependence on commercial sources for those particular varieties year after year.
Pepper seeds deserve specific mention because maturity at harvest affects them more than almost any other common vegetable. The guidance on saving seeds from green pepper fruits explains why waiting for full colour development before collecting seed makes a significant practical difference to both viability and long-term storage life.
How Do You Test Whether Your Stored Seeds Are Still Viable?
A germination test is the most reliable way to check stored seeds before the growing season begins. It takes roughly seven to fourteen days for most vegetables and costs nothing beyond a small amount of time. Running this test each late winter or early spring gives you clear, actionable information before sowing windows open — rather than discovering a viability problem after seeds are already in the ground and the window for that crop has passed.
Step-by-Step Germination Test
- Count out exactly ten seeds from the container you want to assess.
- Dampen two sheets of kitchen paper towel — moist but not dripping or waterlogged.
- Lay the ten seeds evenly spaced on one damp sheet and fold the second sheet over the top.
- Slide the paper into a labelled zip-lock bag or seal it loosely in a small plastic tub.
- Place the container in a consistently warm spot at roughly 65–70°F (18–21°C) — an airing cupboard works well for most species.
- Check daily, keeping the paper damp, over the species-appropriate germination window — typically five to fourteen days for most common vegetables.
- Count how many seeds have sprouted when the test period ends and note the result on the storage container.
Interpreting your results:
- 8–10 seeds germinated (80–100%): Excellent viability. Store or sow with confidence at normal recommended spacing.
- 5–7 seeds germinated (50–70%): Acceptable viability. Sow more densely than usual to compensate for the reduced germination rate.
- Fewer than 5 germinated (below 50%): Poor viability. Replace the stock before relying on it for a main sowing, or sow very thickly as a last resort.
What Are the Most Common Seed Storage Mistakes to Avoid?
Even experienced gardeners fall into predictable storage traps. These are the mistakes most likely to cost you viability — and most are easily avoided once you know to look for them.
Storing seeds in the kitchen. The combination of ambient warmth, steam from cooking, and fluctuating humidity found in most kitchens is close to the worst possible environment for seed storage. Even a drawer in a warm kitchen reduces viability faster than a cool outbuilding would. Move your collection somewhere genuinely stable and cool.
Skipping labels. After one or two seasons, unlabelled seeds become an expensive guessing game. Always record the variety name, source, harvest or purchase date, and any initial germination rate on every container before storing. A few seconds of labelling now saves real frustration at planting time.
Skipping the desiccant. Even a refrigerator carries higher humidity than ideal for seed storage. A silica gel packet in each container is inexpensive insurance. Fresh, uncharged desiccant packets cost very little and make a measurable difference over multi-year storage periods.
Storing seeds before they are fully dry. Seeds need to be completely dry before going into airtight containers. Residual moisture in a sealed container creates the perfect environment for mould growth. After harvesting or washing seeds, spread them on paper towel or a mesh tray and allow one to two weeks of ambient drying before sealing.
Treating the printed expiry date as absolute. Packet expiry dates reflect expected performance under average conditions, not the optimal storage you may have provided. Seeds stored carefully can remain viable well past the printed date. Germination testing is far more reliable than the label as a decision-making tool.
Putting seeds in the freezer without preparation. Freezing can preserve seeds for decades, but seeds must be thoroughly dry before freezing. Any residual moisture forms ice crystals that rupture cell walls and destroy viability — turning a preservation technique into an accidental seed cull.
Are There Advanced Seed Preservation Methods Worth Exploring?
Most home gardeners need nothing beyond cool, dry, airtight storage to achieve excellent results. However, if you are preserving rare or irreplaceable varieties, building a dedicated seed bank, or working with species that deteriorate quickly, more advanced methods are worth understanding.
Refrigerator storage: A dedicated drawer in a fridge kept at 35–40°F (2–4°C) significantly extends viability compared to cool-room storage and requires no special equipment. Use a section of the fridge that is not regularly disturbed — repeated door-opening causes temperature fluctuations and condensation on cold containers.
Deep freezer storage: For genuinely long-term preservation of ten years or more, a chest freezer set to around -4°F (-20°C) is the home gardener’s closest equivalent to a professional seed bank. Seeds must be vacuum-sealed or stored in thoroughly airtight containers with desiccant, and they must be completely dry before going in. Allow frozen seeds to reach room temperature before opening the container to prevent condensation forming directly on the seeds.
Cryopreservation: At the institutional level, seeds are stored in liquid nitrogen at temperatures around -320°F (-196°C), effectively halting all biological processes. This approach extends viability virtually indefinitely and is used by national seed banks for rare and irreplaceable genetic material. While beyond the reach of home gardeners, it demonstrates how powerfully temperature influences seed longevity — and why investing even in modest cooling is worthwhile.
Pre-storage desiccant drying: Before any long-term storage, drying seeds over fresh silica gel in a sealed container for one to two weeks reduces moisture content to the optimal range of around 6–8 percent. Seeds at this moisture level are brittle and snap cleanly rather than bending — a useful physical test for readiness that costs nothing to apply.
How Do You Build a Smart Seed Inventory System?
A seed collection without an inventory system becomes disorganised within a season or two. A well-managed system means you always know what you have, when it was stored, whether it has been germination-tested recently, and what needs replacing before the next sowing season begins. The good news is that no specialist software or complicated setup is needed.
Physical organisation: Group seeds by plant family — brassicas together, legumes together, nightshades together — or by planting season, whichever maps most naturally to how you plan your garden. Use small coin envelopes or individual seed packets for each variety, stored together inside labelled tins or jars by category. Write directly on each packet: variety name, date of harvest or purchase, source, and any notes on initial germination rate or storage quirks.
Simple tracking: A notebook, a spreadsheet, or a phone notes app is sufficient for most collections. Record each variety with its storage date and a rough target use-by based on the species’ typical viability. Review the list each autumn and spring to identify what needs germination testing and what needs replacing. Older stock goes to the front within each species group; fresh additions go to the back.
Dealing with surplus: Good inventory management inevitably reveals seeds you have in excess of what you can reasonably plant before viability declines. Rather than discarding them, making DIY seed bombs from leftover stock is a creative and genuinely satisfying way to put surplus seeds to work — seeding bare patches, naturalising meadow areas, or gifting to fellow gardeners — instead of sending them to the compost bin.
What Are the Sustainability Benefits of Maximizing Seed Longevity?
Seed saving and long-term storage are among the most eco-conscious practices available to a home gardener. The sustainability benefits extend well beyond the boundaries of your own plot, connecting to larger questions of biodiversity, food resilience, and the conservation of plant genetic heritage that commercial agriculture alone cannot guarantee.
Reducing commercial seed dependency: Every seed you successfully save and store is one fewer packet manufactured, packaged, and shipped. The individual impact is modest, but the collective effect across a community of seed-saving gardeners is genuinely meaningful — particularly for varieties with limited commercial demand that struggle to justify production at scale.
Preserving genetic diversity: Commercial seed catalogues have contracted steadily over recent decades. Heritage and heirloom varieties disappear when insufficient market demand exists to justify continued production. Home seed savers who maintain diverse collections serve as living repositories for genetic material that plant breeders and future generations may urgently need — particularly as climate change places greater selective pressure on cultivated plant populations and the need for resilience grows.
Supporting local adaptation: Seeds saved from plants that have thrived in your specific conditions — your soil chemistry, your local rainfall patterns, your pest pressures — carry subtle adaptations to that environment. Over successive saved generations, locally adapted seeds can genuinely outperform commercial alternatives selected for uniformity and transportability rather than local resilience.
Making the most of your stored seeds also means planning when to use them. If you are deciding what to sow in the coming months, a well-timed look at the best options for a productive autumn garden can help you match your stored seed stock to current seasonal planting windows — maximising the return on every carefully preserved packet.
Frequently Asked Questions About Seed Longevity and Storage
Can I store seeds in a home freezer?
Yes — with important preparation. Seeds must be completely dry before freezing, since any residual moisture will form ice crystals that rupture cell walls and kill the embryo. Place seeds in thoroughly airtight containers with fresh desiccant, and allow them to reach room temperature fully before opening after removal from the freezer. Avoid sections of the freezer subject to frequent defrost cycling. When done correctly, freezer storage can extend viability to ten years or more for many species.
How do I know if seeds past their expiry date are still usable?
The only reliable way to know is a germination test. Printed expiry dates reflect expected performance under average conditions, not the optimal storage you may have provided. Run a ten-seed germination test: if seven or more seeds sprout within the expected window, the batch is still worth using at normal density. If fewer than five germinate, replace the stock before relying on it for a main sowing, or sow very thickly and accept reduced results.
Do different seed species need different storage containers?
The container requirements are broadly the same across species — airtight, moisture-proof, and dark. What varies is the urgency of getting it right. Short-lived species like onions and parsnips have so little viability margin that even brief lapses in storage conditions cause a noticeable reduction in germination rates. Long-lived species like cucumber and cabbage are more forgiving. For all species, glass mason jars with tight-fitting lids and a desiccant packet inside represent the most accessible and reliable home storage option.
What is the best way to dry seeds before long-term storage?
Spread freshly harvested or washed seeds in a single layer on paper towel, fine mesh, or a breathable cloth tray. Leave in a warm, well-ventilated location away from direct sunlight for one to two weeks. For maximum dryness before sealing, place seeds loosely in a container with fresh silica gel for a further week — the desiccant draws out the last traces of moisture. Seeds ready for long-term storage should feel crisp and snap cleanly when bent rather than flexing, which indicates they are at or near the ideal 6–8 percent moisture content.
Is it worth saving seeds from hybrid plants?
Generally, no — not for productive growing. Seeds from F1 hybrid plants do not breed true; the offspring revert toward the characteristics of the original parent lines and are often significantly less vigorous than the hybrid you started with. Seed saving is most rewarding with open-pollinated and heirloom varieties, which reliably reproduce the characteristics of the parent plant generation after generation. If you are unsure whether a variety is hybrid or open-pollinated, check the seed packet — F1 varieties are almost always clearly labelled as such.
How often should I test my stored seeds for viability?
Test annually for short-lived species such as onions, parsnips, and parsley. For longer-lived species like tomatoes, brassicas, and cucumbers, testing every two to three years is sufficient under good storage conditions. The best time to test is late winter or early spring, roughly six to eight weeks before your main sowing season begins. This gives you enough time to source replacements if a batch has lost viability — rather than discovering the problem after the sowing window for that crop has already passed.
Your Next Steps: A Practical Timeline for Better Seed Storage in 2026
Improving your seed storage practice does not require a complete overhaul. A few deliberate steps, taken in the right order, build the foundation of a collection that works reliably season after season.
- This week: Audit your current seed collection. Gather all packets, note dates, and identify which species are short-lived and which can wait. Discard anything clearly past useful life rather than carrying it forward.
- Within a month: Invest in airtight storage containers — glass mason jars are ideal. Purchase silica gel desiccant packets. Transfer all seeds from open envelopes and paper bags into sealed, labelled containers with a desiccant packet each.
- Before your next sowing season: Run germination tests on any seeds more than two years old. Record results on the container. Order replacements for any batches testing below 50 percent before the sowing window opens.
- Ongoing each season: Maintain a simple inventory — a single notebook page per season works well. Record what was stored, when, and from where. Review it each autumn and spring, moving older stock to the front of each group.
- Long-term: Identify two or three heritage or heirloom varieties to begin saving yourself. Tomatoes, lettuce, and beans are excellent starting points — reliable, easy to process, and rewarding over multiple saved generations.
Seed storage is one of those gardening skills that rewards consistent, small habits far more than occasional large efforts. The gardeners who build the most resilient and cost-effective collections are not those with the most sophisticated equipment — they are the ones who label every packet, check their stock regularly, and treat their seeds with the same care they give their growing plants. Start now, and your 2026 garden will be better for it from the very first sowing.