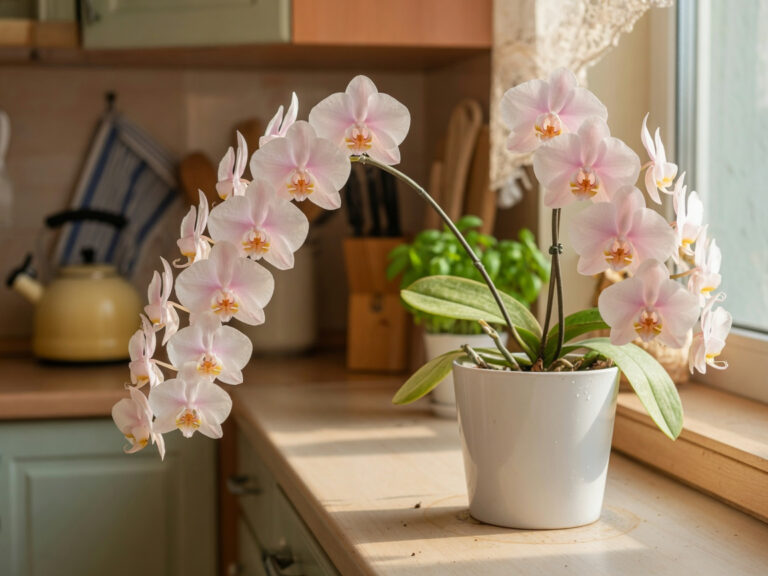
Soaking orchids is one of the most effective watering techniques available to home growers — and when done correctly, it dramatically improves root health, nutrient uptake, and blooming frequency. The method is straightforward: submerge the nursery pot in room-temperature water for 10 to 20 minutes, then drain thoroughly and discard the water immediately.
Some of the links in this article may be affiliate links. If you make a purchase through these links, we may earn a small commission at no extra cost to you. Thank you.
Key Takeaways
- Soak orchids for 10–20 minutes — long enough to saturate roots, short enough to prevent rot
- Always soak plants individually; never share a water bath between orchids
- Use room-temperature, low-chlorine water for the best results
- Discard soak water immediately after every session to eliminate pathogen risk
- Soaking frequency should be guided by root appearance, not a fixed calendar
What Is Orchid Soaking and Why Does It Work So Well?
Orchid soaking is a targeted watering method where you lower the entire nursery pot — orchid still inside — into a larger container filled with water. The roots absorb moisture simultaneously from below and through the drainage holes, producing an even, thorough soak that simple top-watering rarely achieves.
Most popular orchid species, including Phalaenopsis (moth orchids), originate from tropical forests where monsoon rains drench roots deeply, followed by fast drainage and a drying period. Soaking mimics this wet-then-dry cycle far better than a quick overhead pour. Growers who adopt soaking as their primary watering method consistently observe healthier root systems and more frequent flower spikes than those who rely on top-watering alone.
One significant advantage is salt flushing. Fertiliser residue accumulates in potting bark over time, raising mineral concentration around the roots. A thorough soak dissolves and dilutes those salts, preventing the chemical burn that turns root tips brown. Orchid enthusiasts who soak regularly report up to 40% fewer cases of root-tip dieback compared with top-watering only.
What Are the Amazing Benefits of Soaking Your Orchids?
The advantages of soaking extend well beyond basic hydration. Here are the most significant improvements you can expect after adopting a consistent soaking routine.
1. Deep, Even Root Hydration
Top-watering often wets only the uppermost layer of bark, leaving deeper roots bone dry. Soaking gives every root in the pot equal access to moisture. Research on orchid root anatomy shows that velamen — the spongy outer sheath of epiphytic orchid roots — can absorb up to 70% of its own volume in water when fully submerged for 15 minutes. That level of saturation is simply not achievable with a standard overhead pour.
2. Stimulated Root Growth
Consistently moist (not waterlogged) roots trigger auxin production — the hormone that drives new root tip development. Orchid growers who soak weekly during the active growing season regularly report new root tips emerging within two to three weeks of starting the practice. Healthy roots are the foundation of a genuinely thriving plant.
3. Rehydration of Dehydrated Plants
A severely dehydrated orchid — recognisable by wrinkled, accordion-like leaves or shrivelled pseudobulbs — needs far more than a light top-water. Soaking for up to 30 minutes (appropriate only for visibly dehydrated specimens) allows slow, steady rehydration without shocking the plant. Most growers see visible leaf plumping within 24–48 hours of a proper rescue soak.
4. Enhanced Nutrient Absorption
Adding a dilute balanced fertiliser — around a quarter of the recommended label dose — to the soak water significantly boosts nutrient uptake. The extended contact time between roots and the fertiliser solution allows absorption at an estimated 2–3 times the rate of the same nutrients applied overhead, making your fertiliser programme considerably more efficient.
5. Encourages Blooming
A well-hydrated orchid with a robust root system has the energy reserves to produce flower spikes. Many growers notice a new bloom spike emerging within four to eight weeks of establishing a consistent soaking routine, particularly when combined with appropriate light. For a complete look at balancing light for maximum flowering, the detailed guide on ideal lighting for orchids is an excellent companion resource.
6. Reduced Risk of Fungal Issues
Counter-intuitively, soaking with fast-draining bark media reduces fungal risk compared with repeated light top-watering, which can leave the bark surface permanently damp. A soak-then-dry cycle allows bark to dry fully between sessions — conditions that are far less hospitable to the mould and rot-causing bacteria that plague over-watered orchids.
What Factors Affect How Long You Should Soak Your Orchids?
There is no universal soaking time that suits every orchid in every home. The right duration depends on several overlapping factors, and getting this calibration right is what separates growers who see dramatic improvement from those who struggle with soggy roots.
| Factor | Shorter Soak (10 min) | Longer Soak (20 min) |
|---|---|---|
| Potting media | Dense bark or sphagnum moss | Coarse bark or inorganic mix |
| Orchid species | Moisture-loving types (Miltonias) | Drought-tolerant types (Cattleyas) |
| Ambient humidity | High humidity (above 60%) | Low humidity (below 40%) |
| Season | Winter (slow growth) | Summer (active growth) |
| Dehydration level | Roots plump and green | Roots fully white or shrivelled |
As a general rule, 10–15 minutes suits most Phalaenopsis growing in standard bark at average indoor humidity. Coarser, faster-draining substrates — particularly inorganic mixes — may need up to 20 minutes for adequate saturation. For a detailed look at how different substrate types affect watering needs, the guide to proven inorganic media for orchids is well worth reading alongside this one.
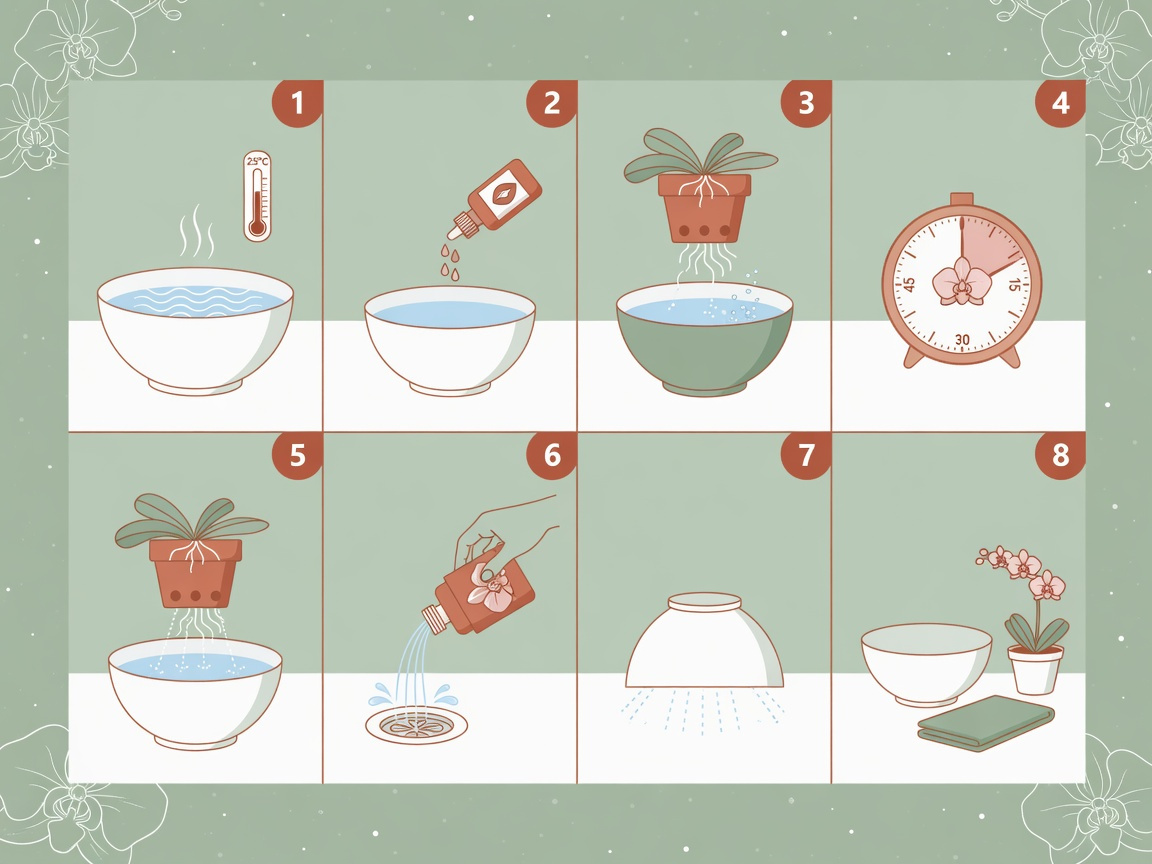
How to Soak Orchids: Step-by-Step Guide for 2026
Follow these steps every single time you soak, and you will minimise risk while maximising the benefit for your plant.
- Choose a clean container. Select a bucket, basin, or deep bowl large enough to hold the orchid’s nursery pot up to — but not above — the pot rim. This prevents water from flooding directly into the growing mix from above.
- Fill with room-temperature water. Cold water (below 15 °C / 59 °F) can shock tropical orchid roots. Aim for 18–22 °C (64–72 °F). If using tap water, let it stand in an open container for 30 minutes to allow chlorine to dissipate. Rainwater or filtered water is even better.
- Add fertiliser if desired. Mix in a balanced orchid fertiliser at quarter strength. This step is optional but measurably boosts nutrient uptake during the extended soak period.
- Submerge the pot. Lower the nursery pot into the water so the roots are fully submerged. Keep the crown of the plant — the central growing point — above the waterline at all times.
- Set a timer for 10–20 minutes. Never guess — use a timer. Over-soaking dramatically increases the risk of root rot, especially in pots with few drainage holes.
- Lift and drain thoroughly. Remove the pot and hold it above the container for at least 60 seconds, tilting it to encourage complete drainage. Move it to a spot with good airflow while it finishes draining.
- Discard the soak water immediately. Never use soak water for a second plant. Pathogens and fungal spores can transfer between orchids via shared water even when the donor plant looks perfectly healthy.
- Clean the soaking container. Rinse the bucket or basin with hot water and allow it to dry between uses. Cleanliness at this stage is your single most effective disease-prevention measure.
How Often Should You Soak Your Orchids?
Most Phalaenopsis kept indoors thrive with a soak every 7–10 days during spring and summer, and every 10–14 days in autumn and winter when growth slows. That said, the state of the roots and potting media is a far more reliable guide than any fixed schedule.
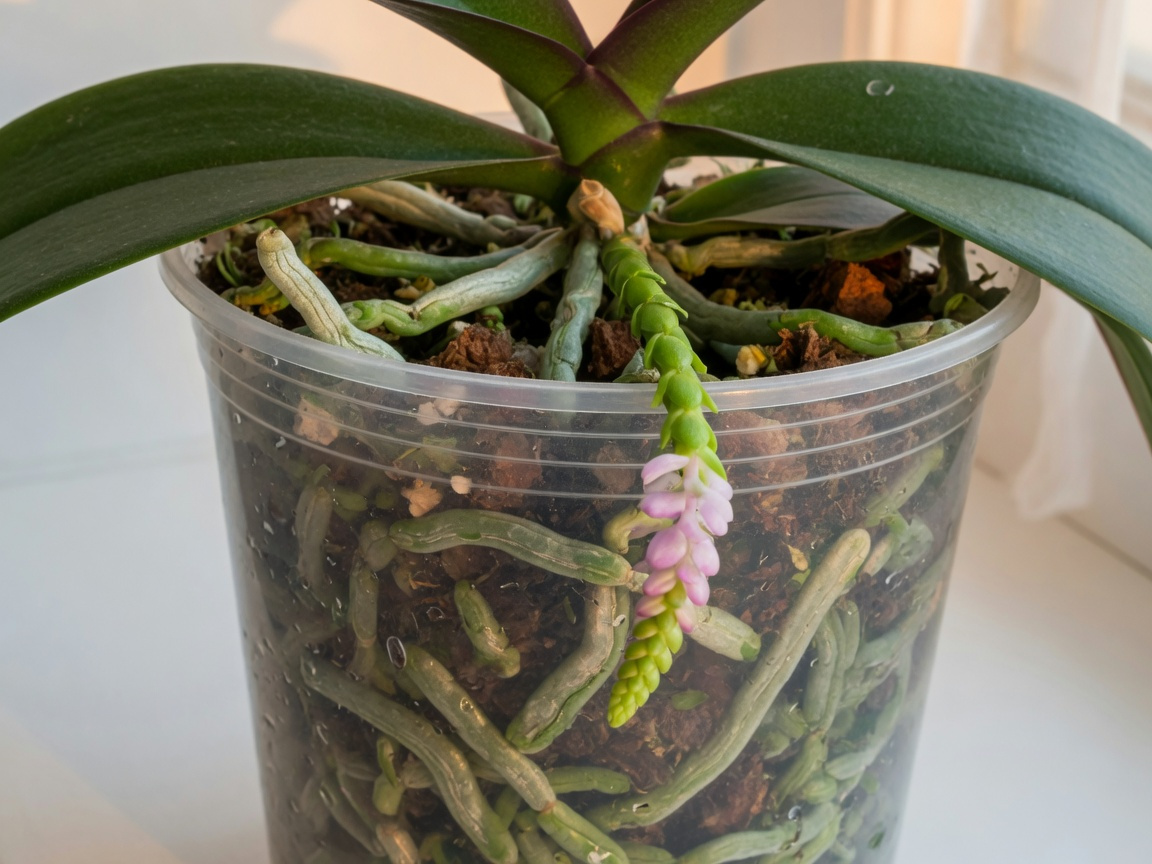
Before each soak, check the roots through the clear nursery pot (if applicable). Green or lightly silvery roots indicate adequate moisture. Fully white or silvery-grey roots signal it is time to water. A wooden chopstick inserted into the bark can help too — if it comes out bone dry, soaking time has arrived. A good moisture meter takes all the guesswork out of this step and is particularly useful if you grow several orchids.
Over-soaking — watering before the media has had a chance to partially dry — is one of the most common causes of orchid decline. Grower surveys and orchid society data consistently identify over-watering as the number-one preventable cause of orchid death, accounting for an estimated 75% of losses. When in doubt, wait one or two more days before soaking.
What Type of Water Is Best for Soaking Orchids?
Water quality matters more for orchids than for most houseplants, because orchid roots are particularly sensitive to dissolved minerals and added chemicals. Here is a straightforward comparison of your main options.
- Rainwater: The gold standard. Naturally soft, slightly acidic (pH 5.5–6.5), and free of fluoride and chlorine. Collect in a clean water butt and use within a week to keep it fresh.
- Filtered water: Removes chlorine, chloramines, and heavy metals. An excellent option year-round, especially in urban areas with heavily treated mains water.
- Tap water (pre-aerated): Acceptable in most areas with soft to moderately hard water. Allow it to stand in an open jug for 30–60 minutes so chlorine can evaporate. Chloramines, used by some utilities, do not evaporate and require a carbon filter to remove.
- Distilled water: Completely mineral-free. Fine occasionally, but using it exclusively over months can lead to micronutrient deficiencies. Add a dilute balanced fertiliser to compensate.
- Hard tap water: High dissolved mineral content raises the electrical conductivity of the bark over time, leading to salt burn on root tips. If your kettle shows significant lime scale, filtered or collected rainwater is strongly preferable.
Some growers experiment with enriched water alternatives to introduce organic matter and trace minerals alongside plain hydration. If you are curious about one popular option, the balanced overview of the pros and cons of using rice water for orchids covers the practical evidence in useful detail.
What Common Orchid Soaking Mistakes Should You Avoid?
Even experienced growers occasionally make these errors. Knowing them upfront saves you from learning them the hard way.
Soaking Too Long
Anything beyond 30 minutes dramatically increases the risk of anaerobic conditions around the roots, creating ideal conditions for Pythium and Fusarium fungi — the leading causes of root rot. For most plants, 10–20 minutes is both sufficient and safe. Only a visibly dehydrated orchid warrants edging toward the 30-minute mark.
Sharing Soak Water Between Plants
This is the fastest way to spread bacterial brown rot, orchid viruses, and pest larvae across an entire collection. A single asymptomatic carrier plant can contaminate a fresh water bath almost immediately. Always use clean water for each individual orchid, without exception.
Letting Water Sit in the Crown
Water pooling in the crown — the central growing point of Phalaenopsis and other monopodial orchids — causes crown rot surprisingly quickly. After each soak, gently blot the crown dry with a paper towel and ensure good airflow around the plant for the rest of the day.
Using Ice-Cold or Very Cold Water
The popular myth of watering orchids with ice cubes persists online, but it is actively harmful. Consistent cold-water treatment stresses tropical roots, slows growth, causes dark spotting on foliage, and is estimated to reduce blooming frequency by 20–30% compared with warm-water care. Always use water at room temperature or slightly above.
Failing to Allow Proper Drainage
Returning a freshly soaked pot directly to a decorative cachepot without adequate draining traps standing water around the roots. Always allow at least 10–15 minutes of free drainage over a sink before placing the plant back on display. This drainage discipline matters with any deep-watering approach — similar principles are explored in the guide to bottom-watering for container plants, where managing excess water is equally critical.
What Are the Best Alternative Watering Methods for Orchids?
Soaking is not the only effective strategy for hydrating orchids. Depending on your schedule, collection size, and growing environment, one of these alternatives might suit you better — or work well in combination with occasional soaking.
- Misting: Spraying foliage and aerial roots raises local humidity but does not adequately hydrate potted roots. Best used as a humidity supplement between soaks, not as a replacement watering method.
- Humidity trays: A tray filled with pebbles and water placed beneath the pot raises local humidity by approximately 10–15%. Particularly valuable in centrally heated homes where indoor humidity drops below 40% in winter.
- Semi-hydroponics (LECA): Growing orchids in expanded clay aggregate with a permanent low-level nutrient reservoir delivers constant, controlled moisture. Many growers report excellent root health and reduced watering effort with this method.
- Self-watering pots: A wick or reservoir system delivers water slowly from below. Works best for species that prefer consistent moisture. Drainage still needs monitoring to prevent waterlogging.
- Thorough top-watering: Pouring water slowly and repeatedly over bark until it runs freely from drainage holes — repeated three times — can approximate a soak for routine maintenance, though it is less effective for salt flushing than a true immersion soak.
Frequently Asked Questions About Soaking Orchids
Can I soak my orchid too often?
Yes — soaking before the potting media has dried out deprives roots of the oxygen they need between waterings. Over-watered orchids display yellowing lower leaves, mushy dark roots, and wilting despite wet bark. Always wait until roots look silvery-white before soaking again, and let the media guide the timing rather than a rigid schedule.
Should I remove the orchid from its pot before soaking?
No — leave the orchid in its nursery pot. The drainage holes allow water in and out efficiently, and the pot protects fragile roots from physical damage during handling. Simply submerge the entire pot and allow roots to absorb moisture naturally through the holes and pot walls.
Can I use tap water for soaking my orchids?
In most areas, yes — with one simple precaution. Let tap water stand in an open container for 30–60 minutes before use so chlorine can evaporate. If you notice significant lime scale in your kettle, your tap water is hard, and switching to filtered water or collected rainwater will produce noticeably better long-term root health.
Can I reuse soak water for other orchids?
No. Even when a plant appears perfectly healthy, soak water can carry viral, bacterial, or fungal material that spreads disease across your collection. The few moments it takes to empty and refill your soaking container is a very worthwhile investment in protecting every plant you own.
Can I soak multiple orchids together in the same container?
This is strongly advised against. Shared soak water is one of the most efficient vectors for transmitting orchid viruses and bacterial rot between plants. Soak each orchid individually using fresh water, clean the container between uses, and never assume a plant is disease-free based on appearance alone.
How do I know if my orchid needs an emergency soak?
Look for wrinkled, accordion-like pleating in the leaves (most visible on Phalaenopsis), shrivelled pseudobulbs, and fully white or silvery-grey roots with no green tips at all. A dehydrated orchid benefits from a longer soak of 20–30 minutes and may need two or three sessions across a week before it fully plumps up again. Patience and consistent soaking nearly always leads to a complete recovery.
Does soaking work for all types of orchids?
Soaking suits the vast majority of epiphytic orchids commonly grown as houseplants — including Phalaenopsis, Cattleya, Dendrobium, and Oncidium. Terrestrial orchids, which grow in soil rather than on trees or bark, generally prefer more consistent moisture and may not suit a soak-and-dry cycle. Always research the specific water needs of your species first. The overview of orchid types, habitats, and characteristics is an excellent starting point for understanding the wider orchid family and their varied needs.
Your 4-Week Action Plan for Healthier Orchids in 2026
If you are new to soaking or want to rehabilitate a neglected plant, this simple four-week plan gives you a structured, low-risk way to begin.
- Week 1 — Assess. Examine the roots, note the potting media type, and identify any signs of rot or dehydration. Remove any mushy, dark roots with sterilised scissors before beginning a soaking programme.
- Week 1–2 — First soak. Follow the eight-step guide above using plain room-temperature water. No fertiliser on this first session — let the plant adjust to the new routine before adding nutrients.
- Week 2–3 — Add nutrition. Include a quarter-strength balanced fertiliser in your second soak. Monitor root colour and leaf firmness over the following 48 hours and note any visible improvement.
- Week 3–4 — Establish your rhythm. If roots look healthy and the media dries in 7–10 days, you have found your soaking interval. Extend it to 10–14 days in winter as growth naturally slows.
Consistent care, attentive observation, and the simple discipline of soaking individually in fresh water every week or so will produce remarkable results over months. Give your orchids what they evolved to receive — a deep drink followed by a proper dry — and they will reward you with vigorous roots, lush foliage, and blooms you will be genuinely proud of.