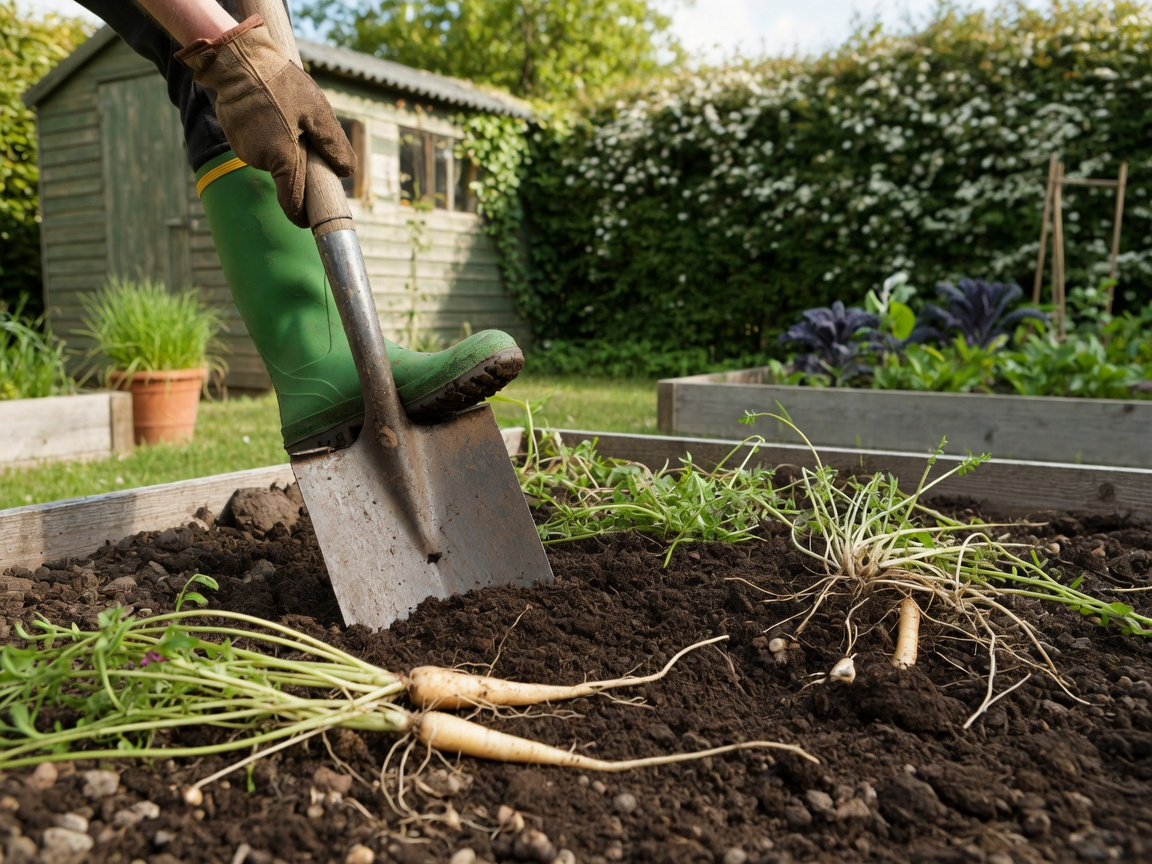

Tilling for weed control works — and the method you choose makes all the difference. Deep conventional tilling at 8–10 inches consistently produces the lowest weed density of any soil disturbance technique, burying dormant seeds beyond germination depth and physically destroying established root systems before they have a chance to compete with your crops.
Some of the links in this article may be affiliate links. If you make a purchase through these links, we may earn a small commission at no extra cost to you. Thank you.
Affiliate disclosure: Some links in this article may be affiliate links. If you make a purchase through these links, we may earn a small commission at no extra cost to you. Thank you for your support!
Key Takeaways
- Deep conventional tilling at 8–10 inches is the most effective single mechanical method for reducing weed numbers in your garden.
- Rototilling suppresses annual weeds but can multiply perennial weeds by chopping and spreading their root fragments throughout your bed.
- No-till gardening protects soil health but needs active support from thick mulching, cover crops, or targeted removal to keep weed pressure manageable.
- Killing weeds before you till — using heat, smothering mulch, or solarisation — significantly reduces how many seeds and roots get redistributed when you dig.
- The best long-term results come from combining deep tilling with complementary methods and following a consistent two- to three-season depletion schedule.
What Is Tilling for Weed Control and How Does It Work?
Tilling disrupts the soil to tackle weeds in two important ways. The first is mechanical — it physically uproots plants that are already growing, exposing their roots to air and sunlight where they dry out and die within days. The second, and far more powerful for long-term suppression, is strategic seed burial. When you till deeply, you move surface weed seeds down into darkness where almost none of them can germinate.
Here is why that matters: research in agricultural weed science shows that most weed species require light — even a brief flash of it — to break dormancy and trigger germination. Seeds buried below 3–4 inches rarely sprout. Seeds pushed below 6 inches almost never do. Your soil holds what scientists call a “seed bank” — a reservoir of dormant seeds that can remain viable for years. Studies confirm many common garden weeds stay viable for 5–10 years or more in undisturbed soil, with dock (Rumex spp.) seeds recorded as viable after 50+ years. Every time you till, you are reshuffling that seed bank. Done deeply and correctly, you move the surface supply into permanent darkness. Done shallowly or at the wrong time, you bring buried veterans back to the light — and make things worse than before you started.
Understanding this seed bank mechanism is the key to making tilling work for you rather than against you. The goal is not simply to churn the soil — it is to manage where those seeds end up and to physically destroy the plants already competing for your garden’s resources.
Which Tilling Method Controls Weeds Most Effectively?
Not all tilling is equal when it comes to weed suppression. There are four main approaches used in both home and commercial growing, and each has a distinctly different effect on weed quantity and weed type. Picking the right method starts with understanding what you are dealing with.
Conventional Tillage
Conventional tillage uses a deep implement — a spade, fork, moldboard plough, or chisel plough — to work the soil to at least 8–10 inches. This is the gold standard for weed control. By fully inverting the soil profile, it buries surface weed seeds deeply while physically destroying the root systems of established weeds. Studies across multiple agricultural research programmes consistently show conventional tillage produces the lowest weed density of any tillage method tested. The trade-offs are greater soil disturbance, more physical effort, and increased erosion risk on sloped ground — but for reclaiming weedy ground, nothing beats it.
Reduced Tillage
Reduced tillage works the top few inches of soil with lighter equipment, leaving some crop residue on the surface. It is gentler on soil structure — good news for earthworms and soil fungi — but it also leaves more weed seeds near the germination zone and creates a residue layer that some weed species exploit as a natural mulch. Weed pressure with reduced tillage is noticeably higher than with conventional deep tilling. To manage this, reduced tillage typically needs herbicide or surface mulch support alongside it.
Rototilling
Rototilling uses a powered machine with rotating blades, working to a typical depth of 4–6 inches. It is popular in home gardens because it is fast and produces a fine, workable tilth — but it comes with a significant catch for perennial weed management. Plants like bindweed, couch grass, and ground elder have deep roots and spreading rhizomes. A rototiller does not remove these; it chops them into small pieces and distributes them throughout your bed. Research confirms that perennial weed root and rhizome fragments as small as 1–2 inches can regenerate into full plants. If you have persistent perennial weeds, a rototiller can turn a single plant into dozens.
No-Till
No-till keeps the soil profile completely undisturbed, with organic matter and crop residue left on the surface. It genuinely benefits soil health, beneficial organisms, and long-term water retention. If you are exploring what organic gardening really involves, no-till is often central to the philosophy, paired with surface feeding and minimal intervention. But compared to conventional tillage, no-till results in higher weed density in the short to medium term. Without mechanical disturbance, weed seeds germinate freely at the surface each season. No-till beds need robust alternatives — cover crops, thick mulching, or timely hand removal — to compensate for the lack of mechanical suppression.
How Deep Should You Till to Suppress Weeds Effectively?
Depth is the single most important variable when tilling for weed control. The recommended target for effective suppression — particularly for hardy perennial weeds — is 8–10 inches. University extension services and horticultural research programmes consistently cite this range as the threshold for meaningful seed burial and root disruption that delivers measurable, lasting results.
As explained above, most weed seeds require light to break dormancy. Seeds at 3–4 inches germinate rarely. Seeds at 6 inches or below almost never do. When you till to 8–10 inches, you create a reliable zone of permanent seed suppression. You do also, temporarily, bring up older buried seeds from deeper layers — which is why timing your tilling to allow a “stale seedbed” flush before planting gives significantly better results than tilling and sowing on the same day (more on that below).
For perennial weeds, depth becomes even more critical. Dandelion taproots can extend 12–18 inches into the soil. Bindweed rhizomes spread both laterally and downward to similar depths. A shallow 3–4 inch cultivator pass merely tickles the surface of these root systems — and may actually stimulate regrowth by scarifying the top of the taproot without removing it. Going deep is the only mechanical approach with real impact on these persistent species.
“Seeds buried below 6 inches almost never germinate. Tilling to 8–10 inches moves the surface seed supply into a zone of near-permanent suppression — that is where the real weed control happens.”
| Tilling Method | Typical Depth | Annual Weed Control | Perennial Weed Control | Soil Impact |
|---|---|---|---|---|
| Conventional (spade / moldboard) | 8–12 inches | Excellent | Excellent | High disturbance |
| Reduced Tillage | 3–5 inches | Moderate | Poor | Medium disturbance |
| Rototilling | 4–6 inches | Moderate | Poor — may worsen | Medium disturbance |
| No-Till | Surface only | Poor without mulch | Poor | Minimal disturbance |

What Weeds Does Tilling Kill — and Which Does It Spread?
Tilling does not affect all weed types the same way. Getting this right is the difference between a tilling session that genuinely reduces your weed burden and one that accidentally makes it worse. The key distinction is between annual weeds and perennial weeds.
Annual Weeds Respond Well to Most Tilling Methods
Annual weeds — chickweed, hairy bittercress, groundsel, fat hen, shepherd’s purse, and annual meadow grass — complete their entire life cycle in a single growing season. They survive year on year by producing large quantities of seed and germinating rapidly from a shallow root system. Tilling at virtually any depth disrupts annual weeds effectively: it uproots their shallow roots and buries their seeds below the germination zone. Deep conventional tilling is particularly powerful against annuals, moving a whole season’s worth of surface seeds into permanent darkness in a single pass.
Perennial Weeds Demand a Different Approach
Perennial weeds are a completely different challenge. Bindweed, couch grass, creeping thistle, dock, ground elder, and nettles all survive mechanical disturbance unless their entire root system is extracted. Root and rhizome fragments as small as 1–2 inches can regenerate into full plants, as noted earlier. Shallow tilling actively promotes perennial weed growth by stimulating root regrowth. Rototilling is the worst choice for perennials: it fragments and distributes rhizomes throughout the entire tilled area, multiplying your problem.
Deep conventional tilling at 8–10 inches is the most effective mechanical approach against perennial weeds. It disrupts, severs, and buries the majority of the root mass in one pass. Horticultural researchers note, however, that even deep tilling rarely eliminates perennial weeds in a single session. Two to three deep tillage passes — timed so that any regrowth can be observed and re-tilled before the plant re-establishes — combined with careful hand-removal of visible root fragments, gives the best results.
Deep tilling also shifts weed diversity over time in a useful way. Because it disrupts perennial root systems so thoroughly, it tends to favour annual weeds — which regenerate from seed and are far easier to manage — over perennials. Shallow tilling does the opposite: leaving perennial roots intact while burying fewer seeds, which gradually tilts the weed population toward harder-to-manage persistent species.
Should You Kill Weeds Before or After Tilling?
Pre-tilling weed kill is one of the most underused strategies in home gardening — and it makes a measurable difference to the results you get from your tillage. If you till into a bed full of actively growing weeds, you risk fragmenting perennial root systems and distributing viable seeds throughout the tilled zone. Killing or weakening weeds first avoids both problems and lets tilling finish the job cleanly.
Here are four practical approaches to pre-tilling weed kill:
- Flame weeding: A propane flame weeder passed over a bed of small annual weeds kills them on contact by desiccating leaf tissue. It requires no chemicals, is fast to deploy, and leaves roots intact for clean tilling afterwards. Treat the bed 1–2 weeks before tilling and allow the dead material to dry. Particularly effective on bed edges and gravel paths before you work the main growing area.
- Mulching and smothering: Laying cardboard or thick organic mulch — 8–12 inches of wood chip or straw — over a weedy bed for 4–6 weeks cuts off light to annual weeds entirely and significantly weakens perennial root systems. After removal, the depleted, softened roots are far easier to till cleanly and extract by hand. This method also improves your soil’s structure and organic matter content in the process.
- Soil solarisation: In summer, stretching clear polythene over damp soil for 4–8 weeks raises temperature in the top 1–2 inches to 50–60°C. Research indicates solarisation can destroy 70–90% or more of weed seeds in the treated zone, along with many soil-borne pathogens. It works best in climates with long, sunny summers and is an excellent tool for reclaiming a heavily neglected bed without chemical intervention.
- Herbicide application: Applied to actively growing weeds before tilling, herbicides knock down both annual and some perennial weeds before you disturb the soil. Data shows that herbicide application without any subsequent tillage actually results in higher overall weed growth than conventional tillage alone — which tells us the combination of herbicide pre-treatment followed by deep tilling outperforms either method used in isolation.
How Does No-Till Gardening Handle Weeds Without Tilling?
No-till gardening rejects soil disturbance entirely, focusing instead on building organic matter, protecting soil structure, and supporting the web of organisms that make a healthy growing environment function. Thinking about how gardening helps the environment often leads to an appreciation of no-till practice, since it significantly reduces soil carbon loss, erosion, and disruption to beneficial soil life. But no-till does come with a genuine weed challenge that needs to be addressed proactively from the start.
Without mechanical disturbance, weed seeds on the surface have near-ideal conditions to germinate freely each season. Comparison studies consistently show no-till plots carry higher weed densities than conventionally tilled plots across the first two to three years of a conversion. Over a longer timeframe — typically five or more seasons of consistent, well-managed no-till — the weed community can shift away from annual germinators (which thrive in disturbed soil) toward less competitive perennial species. This transition is not automatic, though, and requires active management throughout.
Effective no-till weed management strategies include:
- Thick surface mulch (3–4 inches of wood chip, straw, or compost) blocks light from weed seeds at the surface. Adding organic amendments improves soil health simultaneously — coconut coir is a particularly versatile soil amendment worth adding to the mulching mix in no-dig beds for its moisture-retention and structure-improving properties.
- Cover cropping with fast-establishing species like buckwheat, phacelia, mustard, or winter rye outcompetes weeds for light and nutrients while adding organic matter at the end of the growing season.
- Cardboard sheet mulching — the “lasagne bed” technique — kills existing weeds in place and suppresses germination for a full growing season. Ideal for converting a weed-heavy patch without any digging at all.
- Dense planting leaves no bare soil for weeds to colonise. A closed plant canopy is one of the most effective ongoing weed suppressants available, regardless of your tillage approach.
The choice between tilling and no-till need not be binary. Many experienced gardeners use a hybrid approach: conventional or deep tilling to establish a new bed or reclaim heavily weeded ground, followed by a gradual transition to reduced disturbance once the seed bank is meaningfully depleted.
What Are the Environmental Downsides of Deep Tilling?
Deep tilling is effective for weed control, but it is not without cost to your soil and the wider garden ecosystem. Being clear-eyed about these trade-offs helps you decide when deep tillage is genuinely worth reaching for — and when a gentler approach makes more sense.
- Soil erosion: Freshly tilled, bare soil is highly vulnerable to erosion from rain and wind. On even gently sloped ground, a single heavy downpour after deep tilling can strip centimetres of valuable topsoil. Always plan to cover tilled ground quickly — with mulch, a cover crop, or transplants.
- Disrupted soil structure: Healthy garden soil has a complex architecture of aggregates, pores, and channels built over years by earthworms, mycorrhizal fungi, and plant roots. Deep mechanical disturbance breaks this structure down, reducing water infiltration and aeration capacity in the short to medium term.
- Loss of organic matter: Tilling accelerates microbial activity, which consumes soil organic matter faster than in undisturbed systems. Regularly tilled soils typically contain lower levels of organic matter than no-till soils over time, requiring more active replenishment.
- Disruption of beneficial soil organisms: Earthworms, ground beetles, predatory mites, and beneficial nematodes are all disrupted or killed by deep tillage. These organisms provide free pest, disease, and weed suppression services in an undisturbed soil ecosystem.
- Carbon release: Disturbing deep soil releases stored carbon into the atmosphere. At home garden scale the effect is small, but it is worth factoring in for gardeners with sustainability goals.
The practical takeaway: reserve deep tilling for situations where weed pressure is genuinely high and other methods have not delivered. Then transition to lighter disturbance once the seed bank is reduced and your soil health is restored.
How Do You Get Better Results by Combining Tilling With Other Weed Control Methods?
The most effective weed management programmes do not rely on any single approach. Combining deep or conventional tilling with complementary techniques gives significantly better suppression with less total soil disturbance over time. Here is a practical five-step integrated approach that works well in temperate gardens:
- Autumn deep till (8–10 inches): After your last harvest, perform a deep conventional till to bury surface weed seeds, expose perennial roots to winter frost, and reset the seed bank before the new growing year. Frost kills a meaningful proportion of exposed weed roots over winter — essentially free weed control that requires nothing further from you.
- Spring stale seedbed: In early spring, prepare your planting area shallowly — just 1–2 inches — to trigger germination of near-surface weed seeds. Wait 2–3 weeks for the flush of seedlings to emerge, then hoe or flame-weed them off before sowing your crop. Horticultural research suggests this technique alone can reduce weed emergence at sowing time by 50–70% — one of the best return-on-effort ratios in the entire gardening calendar.
- Mulch after planting: Once crops are established, apply a 2–3 inch layer of organic mulch around them to suppress any remaining weed germination between plants. Organic mulches also steadily feed and improve your soil across the season.
- Hand-remove perennials early: Catch perennial weeds while young — before they build the deep root systems that make them so hard to eliminate. A young nettle or couch grass plant pulled at 3 inches takes moments. An established clump takes a spade and real effort.
- Cover crop in gaps: Between harvests or in temporarily empty beds, sow a fast cover crop — phacelia, white mustard, or winter rye — to outcompete weeds and add organic matter ready for the next tilling session.
This integrated programme uses each method where it is strongest, stacking suppression mechanisms across the whole season. If you are planning beds for the coming year, these epic summer gardening tips cover timing and bed preparation strategies that pair beautifully with a smart, consistent tilling schedule.
What Tilling Schedule Works Best for Long-Term Weed Control?
A single deep till improves things — but it does not empty the seed bank. Building a consistent tilling schedule that progressively depletes the seed bank over two to three growing seasons is the most effective long-term strategy available to home gardeners. Here is how that typically looks in practice:
Year 1 — Establishment: Begin with a deep conventional till in autumn or early spring. Pre-treat any areas with heavy perennial weed cover using solarisation or smothering first. Follow every tillage session with a stale seedbed flush before sowing your crop. Expect moderate to high weed pressure throughout — you are working through an established, well-stocked seed bank built up over years. This is the hardest season, but it is the foundation for everything that follows.
Year 2 — Reduction: Repeat the autumn deep till. The seed bank is now smaller. Continue using the stale seedbed technique consistently and mulch between crops whenever ground is bare. Most gardeners who follow this programme see a noticeable reduction — often in the range of 40–60% less weed germination than Year 1 by mid-season. The work begins to feel lighter and more rewarding.
Year 3+ — Maintenance: Transition to shallower tilling or no-till with regular mulching and cover cropping. The seed bank is now significantly depleted. Spot-treat perennial weeds as they appear rather than fighting broad infestations. By this stage, weed management in a well-run bed can take a fraction of the time it demanded in Year 1 — freeing up hours each season for the parts of growing that are actually enjoyable.
Frequently Asked Questions About Tilling for Weed Control
Can tilling completely eliminate all weeds from my garden?
No — tilling cannot completely eliminate weeds. It significantly reduces weed populations, particularly annuals, but it has no residual effect once the soil settles and new seeds arrive. Weed seeds come in constantly via wind, water, and wildlife, and seeds already in your soil can remain viable for years to decades. The realistic goal of a tilling programme is progressive management and seed bank depletion over multiple seasons — not total eradication. Combining tilling with mulching, cover crops, and timely hand-weeding gives the best long-term control.
How long does it take for tilling to show results in weed control?
You will see immediate results with annual weeds — uprooted plants die within days of exposure. The stale seedbed flush of newly surface-exposed seeds can be cleared within 2–3 weeks of a tilling session. For perennial weeds, expect two to three deep tilling passes across a season before seeing meaningful reduction. Across two to three full growing seasons of consistent deep tilling, stale seedbeds, and organic mulching, weed pressure in a managed bed can be reduced by 60–80% compared to an unmanaged plot.
Is rototilling a good choice for controlling perennial weeds?
No — rototilling is actively counterproductive against established perennial weeds. The rotating blades chop rhizomes and root systems into fragments and distribute them throughout the tilled zone. Each fragment can regenerate a new plant. If you have couch grass, bindweed, ground elder, or creeping thistle, use deep conventional tilling with a fork or spade to extract root systems whole, or smother the bed thoroughly with cardboard and mulch before any mechanical work begins.
Does herbicide work better than tilling for weed control?
Neither is universally superior — they work through different mechanisms and perform differently depending on weed type. Data shows that herbicide application without any tillage results in higher weed density than conventional tillage alone, particularly for annual weeds. However, systemic herbicides can travel to the roots of established perennials more effectively than any mechanical approach. The strongest combined results come from herbicide pre-treatment followed by deep conventional tilling — better than either method used in isolation.
Should I till in spring or autumn for the best weed control?
Both timings offer real value and the ideal approach uses both. Autumn deep tilling exposes weed roots and rhizomes to winter frost, which kills a significant proportion passively — free weed control that requires no further effort. It also buries the current season’s fallen weed seeds before they can overwinter and germinate in spring. Spring tilling enables the stale seedbed technique — triggering a flush of near-surface seeds and then clearing the seedlings before sowing your crop. Autumn deep till plus spring stale seedbed is the most effective two-step combination available to gardeners.
Can tilling be used as a stand-alone method for weed control?
Technically yes — but the results are much better when combined with complementary strategies. Tilling alone does not address seeds arriving from outside your garden, does not provide ongoing suppression between disturbances, and does not prevent perennial weed regrowth from any root fragments it misses. Combining tilling with mulching for ongoing suppression, cover cropping for competitive exclusion, and prompt hand-removal of emerging perennials creates a programme that progressively reduces weed burden rather than simply managing the same levels year after year.
Ready to Put the Right Tilling Method to Work in Your Garden?
Tilling for weed control is genuinely effective when you match the method to your weed types, get the depth right, and build it into a consistent seasonal programme. Deep conventional tilling at 8–10 inches remains the single most powerful mechanical tool for reducing weed pressure in a garden. Rototilling is a decent option for annual weeds but needs careful handling around perennials. No-till, while excellent for soil health, requires robust mulching and cover cropping to compensate for its limited mechanical weed suppression. And every tilling approach benefits significantly from pre-till weed kill and a follow-up stale seedbed.
Your five action steps for this season:
- Identify whether your dominant weeds are annual or perennial — this decision drives your choice of method and depth.
- If you have established perennial weeds, plan a smothering or solarisation pre-treatment before any mechanical tillage work.
- Set your tilling depth to 8–10 inches for maximum seed burial and root disruption.
- Follow every deep till with a stale seedbed flush 2–3 weeks later to clear the surface seed bank before you sow.
- Commit to a three-season depletion schedule — and watch the weeding work get progressively lighter each year as the seed bank empties.
Your soil is a long-term project. The strategic work you put in now — tilling at the right depth, depleting the seed bank, and protecting soil health between disturbances — pays off in cleaner, more productive beds for years to come. Happy digging!