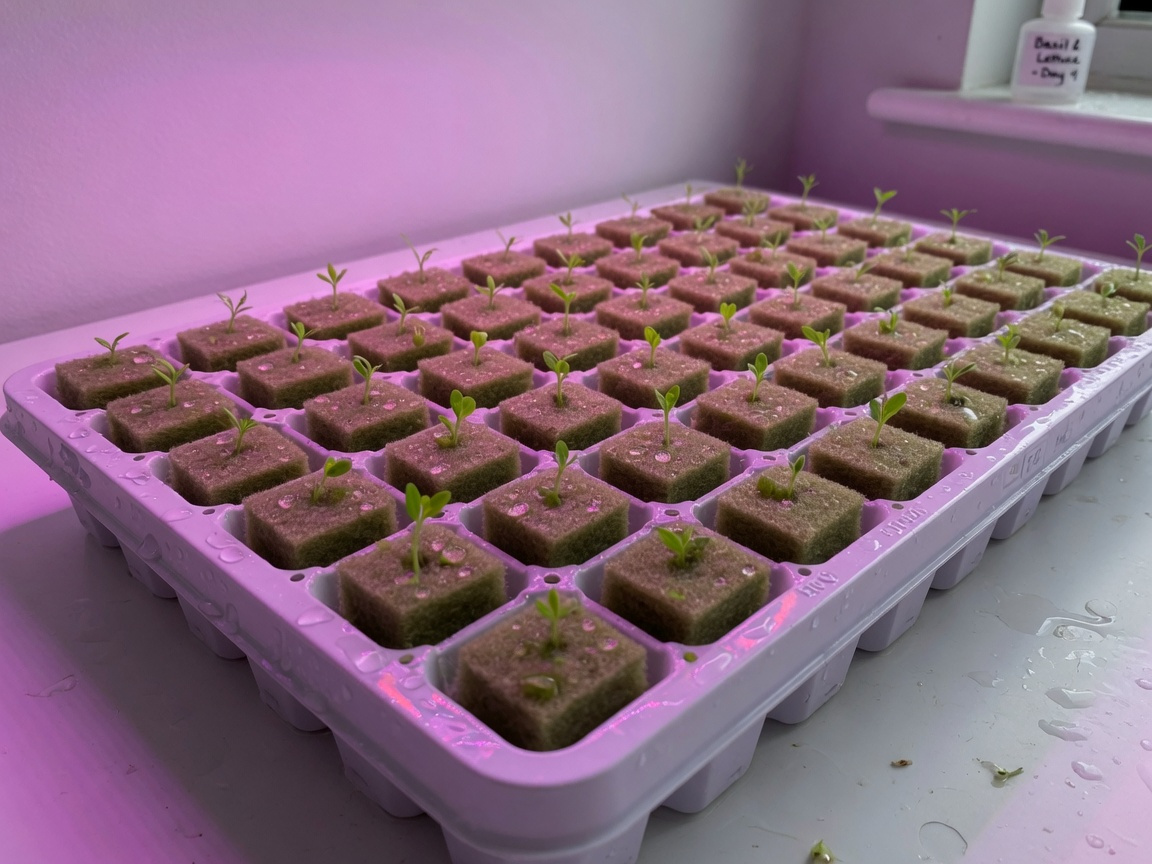

Starting seeds for hydroponics is simpler than most beginners expect. You pre-soak the seeds, settle them into a soil-free growing medium, dial in temperature and moisture, and most seedlings emerge within 3 to 7 days — no garden bed, no guesswork, no complicated equipment required.
Some of the links in this article may be affiliate links. If you make a purchase through these links, we may earn a small commission at no extra cost to you. Thank you.
If you’ve been curious about hydroponic gardening but felt unsure where to begin, you’re in very good company. Many new growers stall at the seed-starting stage because they don’t know which medium to choose, whether their tap water is safe to use, or exactly how deep to plant. This guide answers every one of those questions, walking you through each step in plain language so you can get growing with genuine confidence in 2026.
Key Takeaways
- Hydroponic plants commonly grow 30–50% faster than soil-grown equivalents when conditions are correctly managed.
- The right growing medium — rockwool, peat moss, or coco coir — is the single biggest factor in early germination success.
- Maintaining water pH between 5.5 and 6.5, with temperatures around 70–75°F, is non-negotiable for healthy seedlings.
- Beginner-friendly crops like lettuce, herbs, spinach, and peppers germinate quickly and reliably in hydroponic systems.
What Is Hydroponic Seed Starting and Why Does It Work So Well?
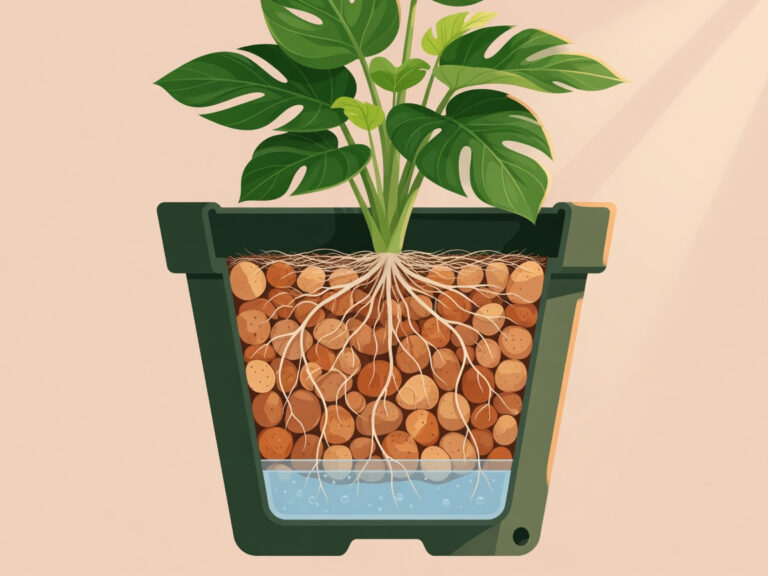
Hydroponic seed starting means germinating seeds in a soil-free environment where water, dissolved nutrients, and oxygen reach roots directly rather than through a dense growing medium. Instead of roots hunting through soil, the plant gets precisely what it needs — and it redirects that saved energy into faster, more vigorous growth.
Traditional soil gardening requires a root system to explore a variable, sometimes inconsistent medium in search of moisture and nutrients. In a hydroponic setup, that search ends entirely. Research widely cited in controlled growing environments suggests plants grown hydroponically can achieve growth rates 30–50% faster than soil-grown counterparts given equivalent conditions. That’s a meaningful difference whether you’re growing a windowsill herb collection or a full indoor salad garden.
Beyond raw speed, hydroponics delivers year-round growing independence. You’re no longer at the mercy of outdoor temperatures, seasonal rainfall, or soil quality. A modest indoor setup running in October 2026 can produce fresh basil, lettuce, and spinach just as reliably as it would in June. For home growers who want consistent, predictable harvests, that flexibility is genuinely transformative.
Water efficiency is another compelling advantage. Hydroponic systems recirculate their water supply, and growers consistently report using up to 90% less water than conventional soil gardening for comparable yields. That’s good environmental practice and noticeably kinder on household water bills. With input costs top of mind for most growers in 2026, that efficiency matters more than ever.
Which Seeds Are Best for Hydroponic Growing?
Not every plant thrives equally well in a hydroponic setup — particularly at the fragile seedling stage. The best candidates for beginners are fast-germinating, compact-rooted crops that don’t demand deep soil profiles or extended growing seasons to reach harvest.
Here are the top picks for first-time hydroponic growers:
- Lettuce — Germinates in 2–4 days, has a shallow root system, and thrives in almost any hydroponic configuration. The ideal starter crop by almost every measure.
- Spinach — Similar in speed and ease to lettuce; excellent for nutrient-dense, rapid-turnaround harvests.
- Herbs (basil, parsley, cilantro, mint) — High kitchen demand, compact growth habit, and fast germination make herbs a perennial favourite for indoor hydroponic growers.
- Tomatoes — Slightly more demanding but extremely rewarding. Deep Water Culture (DWC) systems suit tomatoes particularly well once established beyond the seedling stage.
- Peppers — Love the consistent warmth and moisture that hydroponic systems deliver reliably. If you plan to work with your own saved pepper seed stock, the detailed process of growing peppers from green fruit and saving seeds is worth reading before you start.
When purchasing seeds, look specifically for untreated, non-pelleted varieties. Pelleted seeds carry a clay or polymer coating designed to aid soil germination that can actually impede water absorption in hydroponic media. Standard, uncoated seeds perform far more reliably. Source them online, from a reputable plant nursery, or from a well-stocked garden centre — but always check the packet date to confirm they’re within their viability window.
What Equipment Do You Need Before You Start?
One of the most reliable ways to frustrate yourself early on is improvising equipment that’s genuinely worth getting right. You don’t need an elaborate setup — but a few core items make the difference between a successful first germination and a tray of nothing. Here’s what you actually need:
| Item | Purpose | Beginner Recommendation |
|---|---|---|
| Seed tray with cells | Holds growing medium and individual seeds | 72-cell or 128-cell plastic propagation tray |
| Growing medium | Anchors seeds, retains moisture, allows airflow | Rockwool cubes or pre-expanded peat pellets |
| Full-spectrum LED grow light | Delivers the light spectrum seedlings need | Low-heat LED panel — 2,000–3,000 lux at seedling stage |
| pH meter or test kit | Monitors water and solution acidity | Digital pH pen — significantly more accurate than test strips |
| Seedling nutrient solution | Feeds seedlings once first true leaves appear | General hydroponic nutrient at half recommended strength |
| Spray bottle and humidity dome | Maintains consistent moisture during germination | A humidity dome is strongly recommended for first-time growers |
A simple seed tray, a compact LED panel, and a bag of rockwool cubes are genuinely enough to germinate your first batch successfully. As your confidence and ambition grow in parallel, so can your setup. Start small, learn the fundamentals, and scale from there.
Does Water Quality Matter When Starting Hydroponic Seeds?
Yes — and this is consistently one of the most underestimated variables in beginner hydroponic setups. Water quality directly affects germination rates, root health, and nutrient uptake from the very first day of your setup.
The two most critical water variables are pH and mineral content (measured as electrical conductivity, or EC). For germinating seeds, target a pH between 5.5 and 6.5. Outside this window, seeds struggle to absorb what they need even when nutrients are technically present. Think of pH as the lock on a door — if it’s wrong, the door doesn’t open regardless of what’s on the other side.
Many new growers wonder whether tap water straight from the tap is usable. The honest answer: sometimes yes, sometimes no. Tap water varies considerably by location — some supplies are entirely suitable, while others carry chloramine or excessive dissolved minerals that interfere with germination and early root development. The detailed question of whether tap water is suitable for hydroponics covers exactly what to test for and how to treat your supply if needed.
For most beginners, letting tap water sit uncovered for 24 hours effectively dissipates chlorine. If your local supply uses chloramine — check with your water provider — you’ll need a carbon filter or a small addition of sodium thiosulphate to neutralise it before use. Getting this right from the start prevents a surprising number of early germination failures.
What Growing Media Should You Use for Hydroponic Seeds?
Growing media replaces soil in your hydroponic seed tray. It needs to do three things well: hold the seed firmly in place, retain enough moisture for consistent germination, and allow adequate airflow to the emerging root. No single medium is universally perfect — here’s how the main options compare for beginners:
- Rockwool cubes — The gold standard for hydroponic seed starting. Rockwool retains moisture well, provides excellent root aeration, and transfers cleanly into net pots at transplant. Pre-soak cubes in pH 5.5 water for at least one hour before use, as rockwool is naturally alkaline. Its main downside is that it’s non-biodegradable.
- Peat moss / peat pellets — A popular and affordable alternative. Peat retains moisture effectively and is widely available. Many beginners prefer it during the transition from soil gardening because the handling behaviour feels more familiar.
- Coco coir — Made from coconut husk fibre, coco coir is an increasingly popular eco-conscious option with excellent water retention and a healthy air-to-water ratio. Pre-buffering with a calcium-magnesium solution before use noticeably improves germination results.
- Clay pebbles (hydroton) — Better suited to supporting established seedlings and transplants than to direct seed germination. Widely used once plants are moved into the main system.
One thing to be firm about: avoid regular potting compost or garden soil entirely. Standard soil compacts when saturated, blocks oxygen to developing roots, and can introduce pathogens and pests directly into a closed hydroponic system. The difference in germination rate and early root health between proper hydroponic media and improvised soil alternatives is stark and immediate.
If you’re working with stored or saved seeds rather than freshly purchased ones, it’s worth thinking carefully about how long they’ve been kept and under what conditions. Understanding the principles behind maximising seed longevity and storage efficiency can make a meaningful difference to the germination rates you see from your existing seed stock.
How Do You Start Seeds for Hydroponics? (Step-by-Step)
This is the core of it — seven steps that take you from a dry seed to a transplant-ready seedling. Follow them in sequence and you’ll sidestep the stumbling blocks that catch most beginners out.
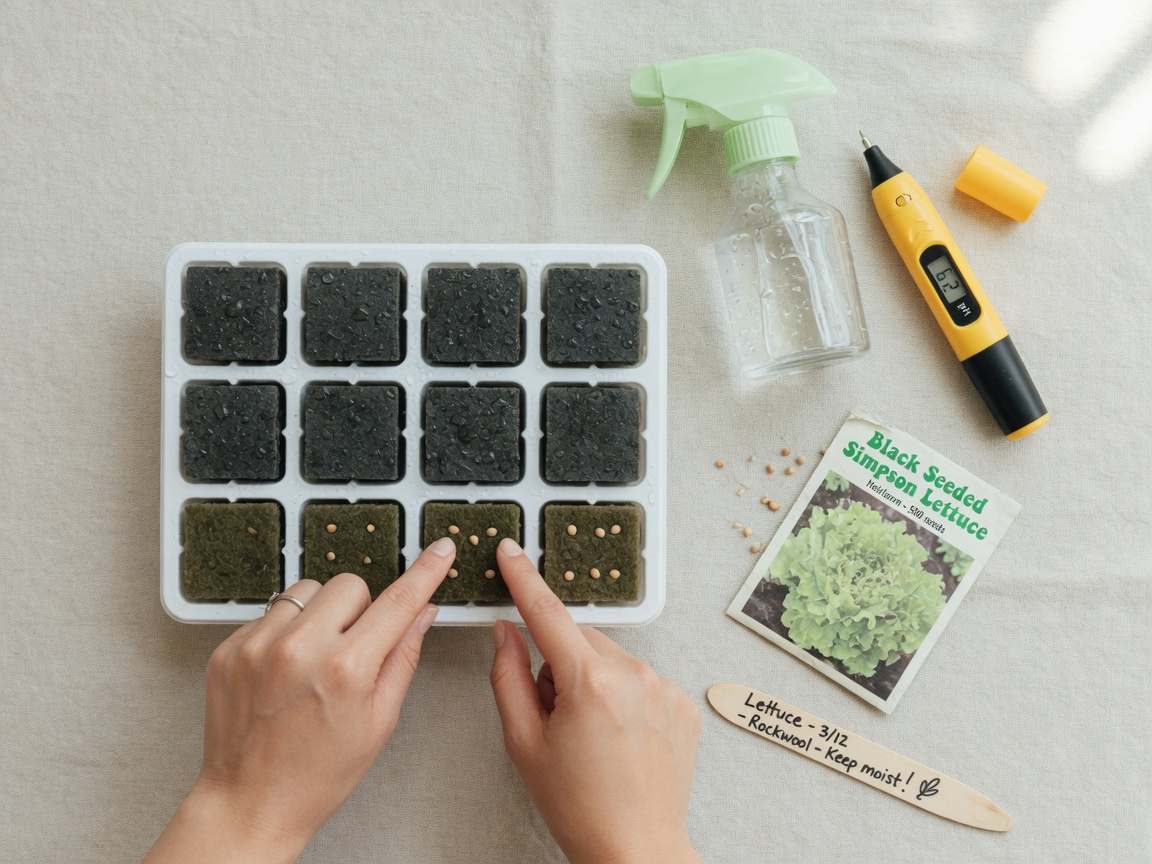
- Pre-soak your seeds. Place seeds in a small container of room-temperature, pH-adjusted water (pH 6.0–6.5) for 4–8 hours. This softens the seed coat and noticeably accelerates germination. Don’t exceed 12 hours — prolonged soaking increases the risk of seeds rotting before they can sprout.
- Prepare your growing medium. For rockwool, pre-soak cubes in water at pH 5.5 for at least one hour. For peat pellets, hydrate them in clean water until fully expanded. Drain any standing water so the medium is consistently moist but not waterlogged — the classic “wrung-out sponge” benchmark applies here.
- Fill your seed tray. Arrange your prepared medium in the tray cells, one cube or pellet per cell. Each should sit snugly without gaps around the sides.
- Plant your seeds. Make a small indentation in the medium using a pencil tip or your fingertip, at a depth equal to approximately twice the seed’s width. For fine seeds like lettuce or basil, this means barely 3–4mm. For larger seeds like tomatoes or peppers, aim for 5–7mm. Place one or two seeds per cell at this stage.
- Cover lightly and label immediately. Gently close the indentation over the seed with a small pinch of medium. Label each row clearly at this point — once multiple trays are running in parallel, unmarked varieties become a genuine puzzle.
- Mist and dome. Mist the tray surface gently with a spray bottle. Place a humidity dome over the tray to hold moisture and warmth consistently. Use plain pH-adjusted water at this stage — full-strength or even half-strength nutrient solution is too aggressive for ungerminated seeds.
- Monitor daily and maintain conditions. Check the tray each day. Keep the medium consistently moist. Aim for a temperature of 70–75°F (21–24°C) in the growing space. Under these conditions, most seeds will emerge within 3–7 days.
What Conditions Do Hydroponic Seedlings Need to Thrive?
Germination is step one. What happens in the days immediately after it determines the vigour and speed with which your seedlings develop into transplant-ready plants. These are the four conditions that matter most.
Temperature: Keep your growing space consistently between 70°F and 75°F (21–24°C). Below 65°F, growth slows noticeably across most seedling varieties. Above 80°F, seedlings become heat-stressed and leggy. A basic digital thermometer placed close to the tray makes monitoring straightforward and removes any guesswork.
Light: Seedlings require 16 to 18 hours of light per day. Full-spectrum LED grow lights are the recommended choice across the hydroponic growing community — they’re energy-efficient, produce minimal heat compared to older fluorescent and HID alternatives, and deliver the complete light spectrum that seedlings need for balanced, compact growth. Position your light according to the manufacturer’s recommended height above the canopy. Too close scorches tender leaves; too far causes etiolation — the tall, pale, floppy growth that signals light deficiency.
Nutrients: Hold off on adding any nutrient solution until the first true leaves appear (the leaves that are characteristic of the plant species, distinct from the initial seed leaves or cotyledons). Once true leaves show — typically 5–10 days after germination — introduce a diluted seedling nutrient solution at half the manufacturer’s recommended strength. Over-feeding young seedlings is one of the most consistent beginner errors and one of the most damaging.
Airflow and hygiene: Good air circulation matters considerably more than most beginners realise. Stagnant, humid air encourages damping off — a fungal condition that collapses seedlings at the base — and promotes algae growth across the tray and reservoir surfaces. A small USB fan providing gentle movement across the growing area is sufficient. If your system is prone to algae — a common issue particularly in semi-hydroponic setups — the practical strategies for keeping a semi-hydroponic system free of algae are well worth reading before it becomes a recurring problem rather than a preventable one.
What Are the Most Common Beginner Mistakes (and How Do You Avoid Them)?
Most early failures in hydroponic seed starting trace back to a small cluster of very predictable errors. Knowing them ahead of time is almost the same as avoiding them.
- Using soil or compost instead of hydroponic media. Soil compacts, suffocates roots, and introduces diseases into a closed system. Always use rockwool, peat, or coco coir.
- Ignoring pH until something visibly goes wrong. pH affects every stage from the moment seeds hit water. Test from day one and adjust proactively.
- Overwatering seedlings. Waterlogged medium starves roots of oxygen and leads to rot. Keep the medium moist, not saturated.
- Adding full-strength nutrients too early. Young seedlings cannot process high nutrient concentrations. Wait for true leaves; start at half strength.
- Insufficient or poorly-positioned lighting. Seedlings that don’t receive adequate light grow tall, pale, and structurally weak. Keep your LED at the correct distance and run it for 16–18 hours daily.
- Planting too deep. Very fine seeds buried beyond their ideal depth simply can’t generate the energy to push through. The “twice the seed width” rule is reliable across virtually all common hydroponic crops.
- Not labelling trays at the point of planting. A minor inconvenience that becomes a significant problem once multiple varieties are at different stages. Label everything immediately and don’t rely on memory.
If you’re working with seeds that have been through cold storage — or if you’re considering freezing seeds to extend their shelf life — it’s genuinely worth understanding what happens to viability in the process. The evidence around how freezing affects seed germination and plant health is more nuanced than many growers assume, and it’s worth factoring into how you manage and test your seed stock before planting.
When Are Seedlings Ready to Transplant Into a Hydroponic System?
Transplanting too early is every bit as problematic as waiting too long. Moving seedlings before they’ve developed a sufficient root system causes significant stress and typically sets growth back by a week or more — erasing much of the speed advantage hydroponics provides in the first place.
Look for all of the following before moving seedlings into your main system:
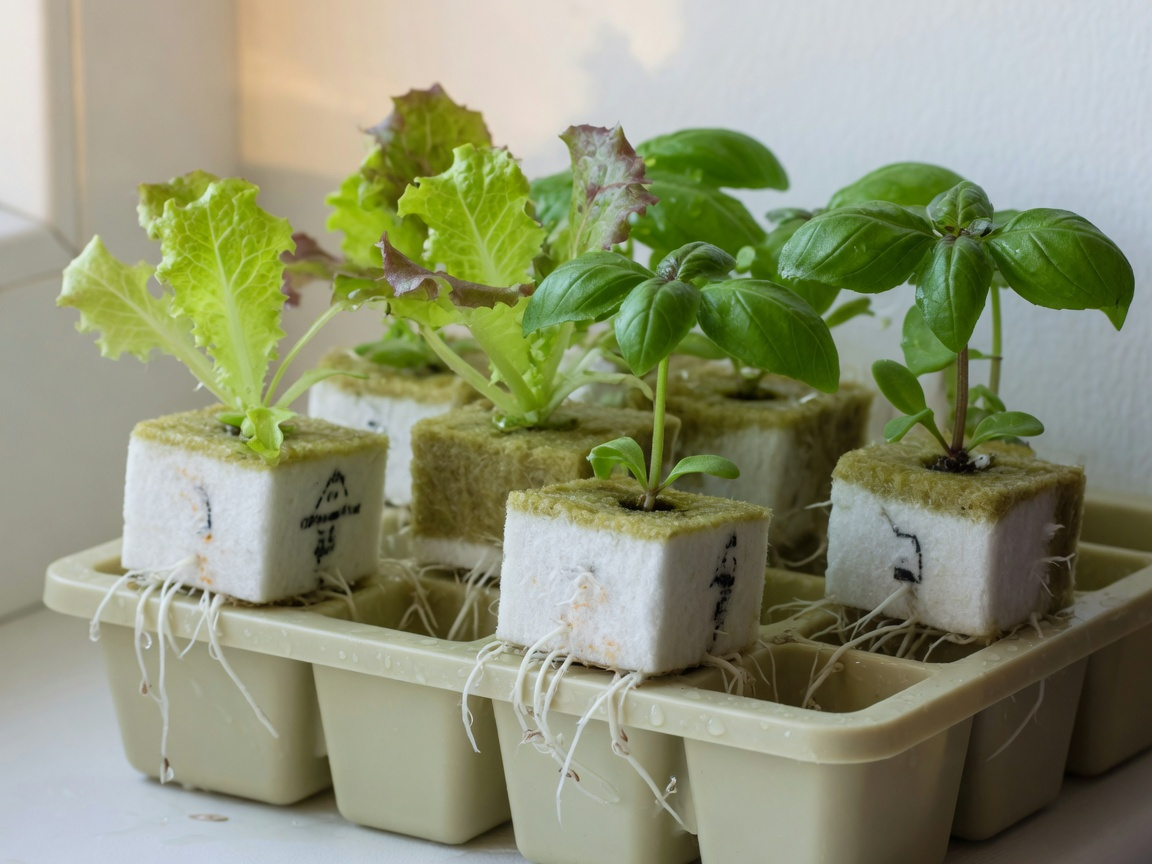
- Two or more sets of true leaves. Cotyledons (the initial seed leaves) don’t count. Wait until the plant has grown at least two full sets of species-characteristic leaves.
- Visible root emergence from the medium. You should be able to see 1–3 cm of healthy white root tip extending from the base of your rockwool cube or peat pellet before transplanting.
- A firm, upright stem. The stem should support the plant without drooping. A seedling that wilts under its own weight needs more time in the propagation tray.
- Age reference points. For most leafy greens and herbs, this stage arrives around 10–14 days after germination. Tomatoes and peppers typically need 2–3 full weeks.
When you do transplant, handle seedlings by the growing medium cube rather than by the stem. The stem at this stage is tender and easily crushed. Lower the cube carefully into the net pot, support it with clay pebbles, and ensure the base of the cube either contacts your nutrient solution directly or sits close enough to wick moisture upwards. From here, your main hydroponic system takes over — and growth typically accelerates noticeably within the first 48 hours.
Frequently Asked Questions
Can I start hydroponic seeds in regular potting compost?
No — and this is one of the most common and costly mistakes new hydroponic growers make. Regular compost or garden soil compacts when saturated in a hydroponic environment, suffocating developing roots and blocking the oxygen flow they depend on. It can also introduce fungal pathogens and pest larvae (particularly fungus gnats) directly into your closed system, where they spread quickly. Use only growing media specifically designed for hydroponic use: rockwool cubes, peat pellets, or coco coir.
What type of lighting works best for hydroponic seedlings?
Full-spectrum LED grow lights are the best choice for the vast majority of home growers in 2026. They deliver the complete light spectrum seedlings need for healthy, compact growth, generate significantly less heat than fluorescent or HID alternatives, and run at a fraction of the energy cost. Provide 16–18 hours of light per day during the seedling stage. Position the light at the manufacturer’s recommended height above the canopy — typically 15–30 cm for most seedling-stage LED panels.
How often should I water hydroponic seedlings?
This depends on your system type and ambient temperature, but the core principle is consistent: the growing medium should feel like a well wrung-out sponge at all times — never bone dry, never saturated. In a passive setup with a humidity dome, check moisture levels daily and mist whenever the medium surface begins to lighten in colour or feel less damp to the touch. In an active recirculating system, the pump cycle handles much of this automatically. The critical failure mode to avoid is letting the medium dry out completely — even brief desiccation at the seedling stage can cause irreversible root tip damage.
What pH should I target when starting hydroponic seeds?
Target a pH range of 5.5–6.5 throughout the seed-starting phase. For pre-soaking rockwool cubes, use water at the lower end of that range — around pH 5.5 — to compensate for rockwool’s naturally alkaline starting point. For misting and daily watering of seedlings, pH 6.0–6.5 is ideal. Use a digital pH pen rather than test strips for this — the accuracy difference at the seedling stage is meaningful, and digital pens are inexpensive and reliable.
How long does germination take in a hydroponic system?
Most common hydroponic crops germinate within 3–7 days when conditions are correctly maintained — temperature steady at 70–75°F, growing medium consistently moist, and humidity dome in place. Slower-germinating seeds like peppers and parsley can take up to 10–14 days. If nothing has emerged after two weeks, the most likely causes are seeds past their viability date, temperatures running too cool, or the growing medium having dried out at some point during the germination window. Check each variable in turn before writing the batch off.
Do I need to add nutrients from the moment I plant?
No — seeds contain their own internal nutrient reserves specifically to power early germination and the first days of growth. Plain, pH-adjusted water is all you need from sowing until the first true leaves appear, which typically happens 5–10 days after germination. Once true leaves are clearly visible, introduce a diluted seedling nutrient solution at half the manufacturer’s recommended strength. Increase the concentration gradually as the plant grows — and resist the temptation to rush this process. Nutrient burn at the seedling stage is easy to cause and slow to recover from.
Your Next Steps: Getting Started This Week
Starting seeds for hydroponics in 2026 is genuinely more accessible than it has ever been — better LED technology, more affordable pH testing equipment, and a wealth of accumulated community knowledge mean the barrier to entry is lower than ever. The learning curve is genuinely shallow, and results come quickly enough to keep motivation firmly intact.
Here’s your practical action plan for the next seven days:
- Day 1: Choose your first crop — lettuce or basil if you’re completely new, as both are fast and forgiving. Purchase untreated seeds, rockwool cubes, and a digital pH pen if you don’t already have one.
- Day 2: Pre-soak your rockwool cubes in pH 5.5 water for a minimum of one hour. Pre-soak your seeds in pH 6.0–6.5 water for 4–8 hours.
- Day 3: Plant your seeds at the correct depth, cover with the humidity dome, position under your grow light, and set a daily reminder to check moisture levels.
- Days 4–10: Monitor daily. Keep medium moist, temperature steady at 70–75°F, and lights running 16–18 hours. Resist the urge to intervene beyond this — germination takes the time it takes, and patience here is genuinely a skill.
- Days 10–14: Once true leaves appear, introduce half-strength nutrient solution and begin preparing your main hydroponic system for the first transplant.
The moment you pull your first hydroponic harvest — lettuce in under three weeks from sowing, herbs within a month — the investment in setup pays for itself immediately and completely. Give it a go, follow the steps, and don’t overthink it. Hydroponics reliably rewards the growers who simply start.