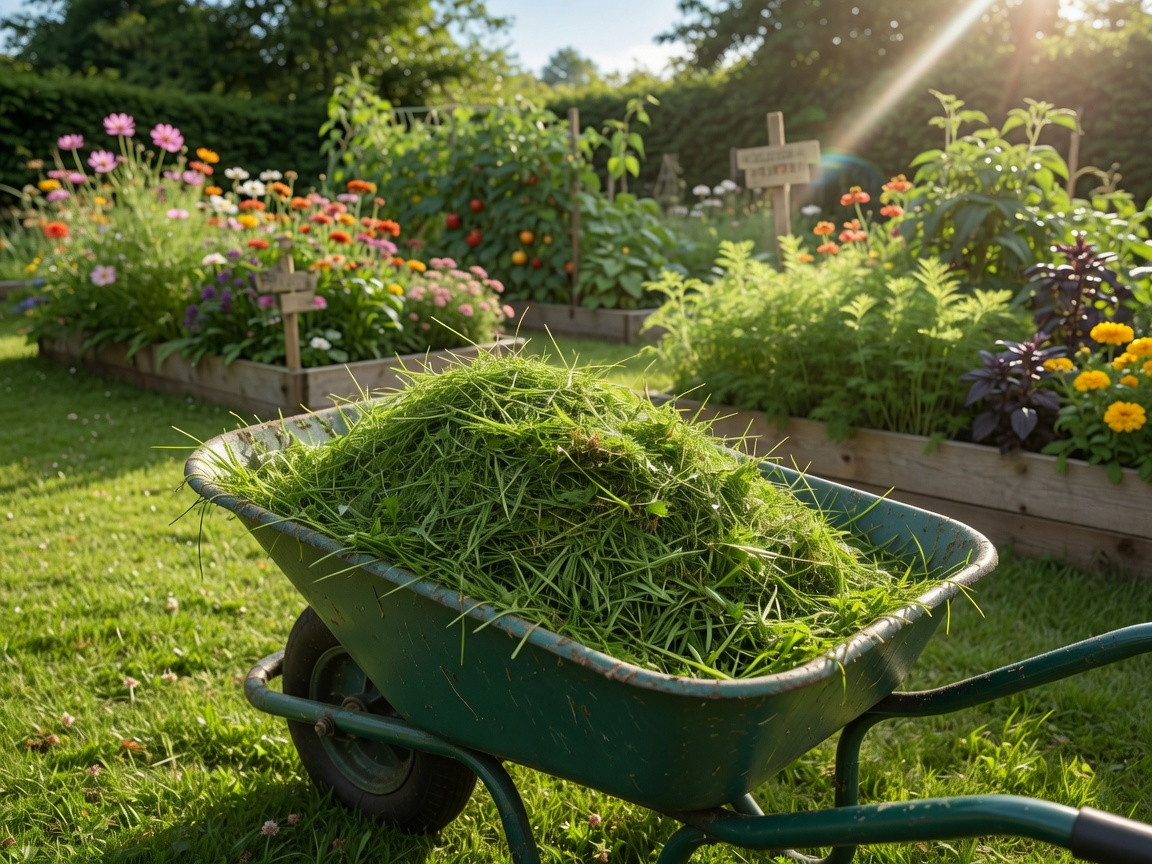

Grass clippings are a free, nitrogen-rich fertiliser sitting right behind your mower after every cut. You can use them in three proven ways: as mulch to lock in moisture, as a compost accelerator to speed decomposition, or dug straight into your beds as a fast-acting soil amendment — all without spending a single penny.
Some of the links in this article may be affiliate links. If you make a purchase through these links, we may earn a small commission at no extra cost to you. Thank you.
- Fresh grass clippings contain approximately 4% nitrogen by dry weight — comparable to many commercial lawn feeds
- Mulching with clippings can noticeably reduce garden watering needs during dry spells
- A typical home lawn produces enough clippings across a season to meaningfully feed garden beds for free
- All three methods require no specialist equipment and can be started on your very next mow
What Makes Grass Clippings Such a Valuable Garden Resource?
Every time you mow, you’re quietly harvesting a batch of free plant food. Fresh grass clippings are around 80% water, but what remains after drying is impressively rich in nutrients. By dry weight, clippings average roughly 4% nitrogen, 0.5% phosphorus, and 2% potassium — the N-P-K trio that powers healthy plant growth and soil vitality.
To put that in context, a standard 25 kg bag of general-purpose garden fertiliser can cost £15–£25 at the garden centre. The clippings from a typical home lawn, returned to the garden rather than binned, can deliver a comparable nitrogen contribution across a full growing season — entirely free. Returning organic material to the soil this way is well established as a way to reduce the need for supplementary feeding over a growing season.
Beyond raw nutrients, grass clippings bring valuable organic matter to the soil. As they break down, they feed the microbial life below ground — the bacteria and fungi that make nutrients available to plant roots, improve soil structure, and boost drainage in clay or water retention in sandy beds. Regular use of clippings builds soil health and texture over two to three seasons of consistent application.
Are Grass Clippings Safe to Use in Every Garden?
For the vast majority of gardens, grass clippings are completely safe — but three situations call for a pause before you spread them around.
Herbicide-treated lawns: If you’ve applied a selective broadleaf weedkiller to your lawn within the past four to six weeks, hold off using the clippings on vegetable beds or near food crops. Certain residues — particularly aminopyralid and clopyralid, found in some common lawn treatments — can persist through composting and damage sensitive crops like tomatoes, beans, and brassicas. Ornamental borders tend to tolerate treated clippings better, but waiting is the safest approach regardless.
Diseased grass: Lawns showing red thread, fusarium patch, or other fungal diseases shouldn’t supply clippings for mulch or direct soil amendment. Hot composting at sustained temperatures above 55°C will kill most pathogens, so a well-managed heap is the right route for clippings from affected turf.
Weeds gone to seed: Clippings taken before lawn weeds have flowered are perfectly fine to use anywhere in the garden. If dandelions, annual meadow grass, or other weeds are actively seeding when you mow, ensure those clippings hot-compost fully before they go near your beds.
Method 1: Using Grass Clippings as Mulch
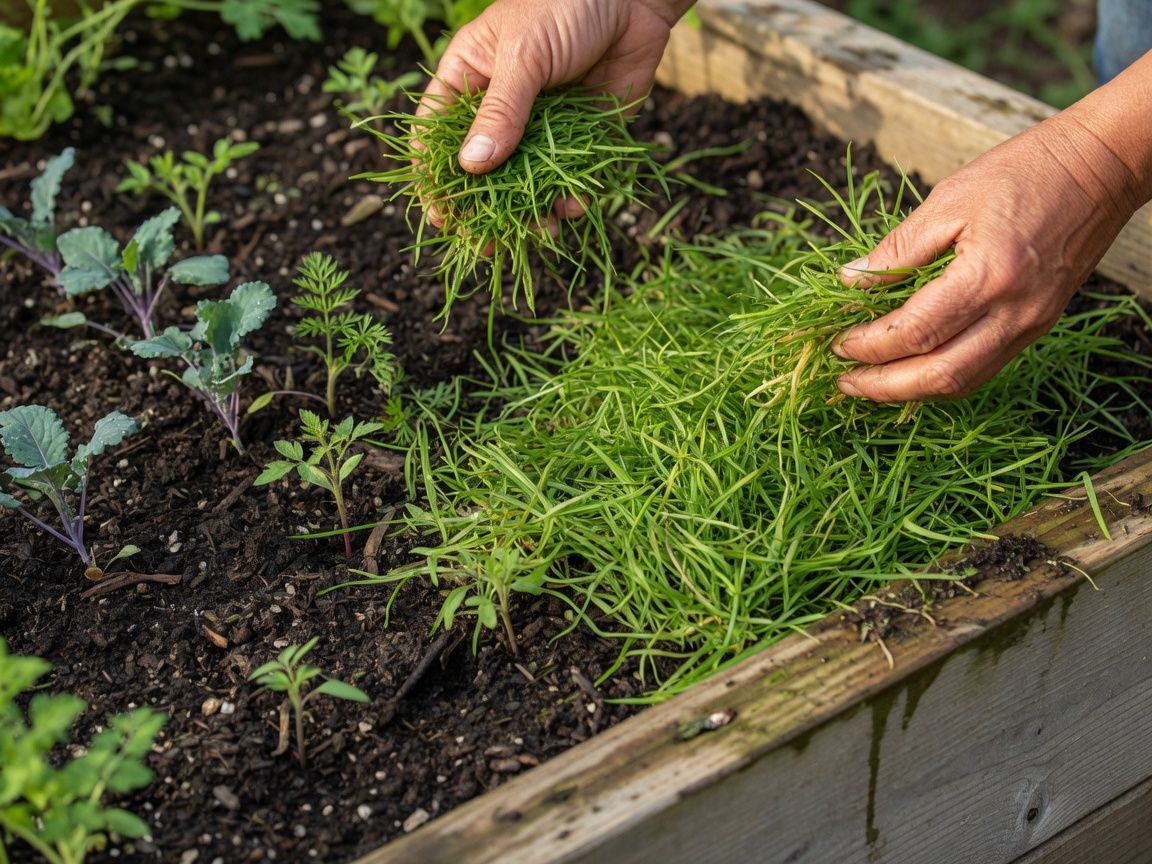
Mulching is the most immediate way to put grass clippings to work, and it costs nothing but the few minutes it takes to spread them. A 2–3 cm layer laid around the base of plants acts as a physical barrier against weeds, slows moisture evaporation from the soil surface, and releases a steady trickle of nutrients as the organic material breaks down. A light layer helps reduce soil moisture loss during dry spells — a meaningful saving in watering time and effort through the summer months.
The golden rule with grass clipping mulch is thin layers only. Layer deeper than 5 cm and you create anaerobic conditions within days: the clippings mat down, turn slimy, smell unpleasant, and actually repel water rather than retaining it. Keep applications to 2–3 cm, let each layer dry slightly before adding more, and always leave a 5 cm gap between the mulch and plant stems to prevent rot. For trees and established shrubs, keep mulch at least 15 cm back from the base.
Grass clipping mulch works particularly well around fruit bushes, vegetable beds, and established perennial borders — anywhere you want to suppress weeds and retain summer moisture without the cost of bought-in bark or straw. If you’re weighing up the best organic mulch for your situation, the comprehensive comparison of top mulches for suppressing weeds and feeding soil covers the full range of options side by side.
Step-by-step guide to grass clipping mulch:
- Mow on a dry day so clippings are loose rather than clumped
- Collect clippings with a bagger attachment or rake them up promptly after mowing
- Allow very wet clippings to wilt for 24 hours before applying
- Spread a 2–3 cm layer around plants, keeping clear of stems and trunks
- Top up with a thin addition every two to three weeks as the previous layer breaks down
Method 2: Using Grass Clippings as a Compost Accelerator
Grass clippings are the textbook definition of a “green” compost ingredient — high in nitrogen and moisture, exactly what a compost heap needs to heat up and get moving. Add a bucketful of fresh clippings to a cold, sluggish heap and you’ll often see it spring back to life within days. It’s one of the simplest and most reliable ways to keep a compost bin actively decomposing through the main growing season.
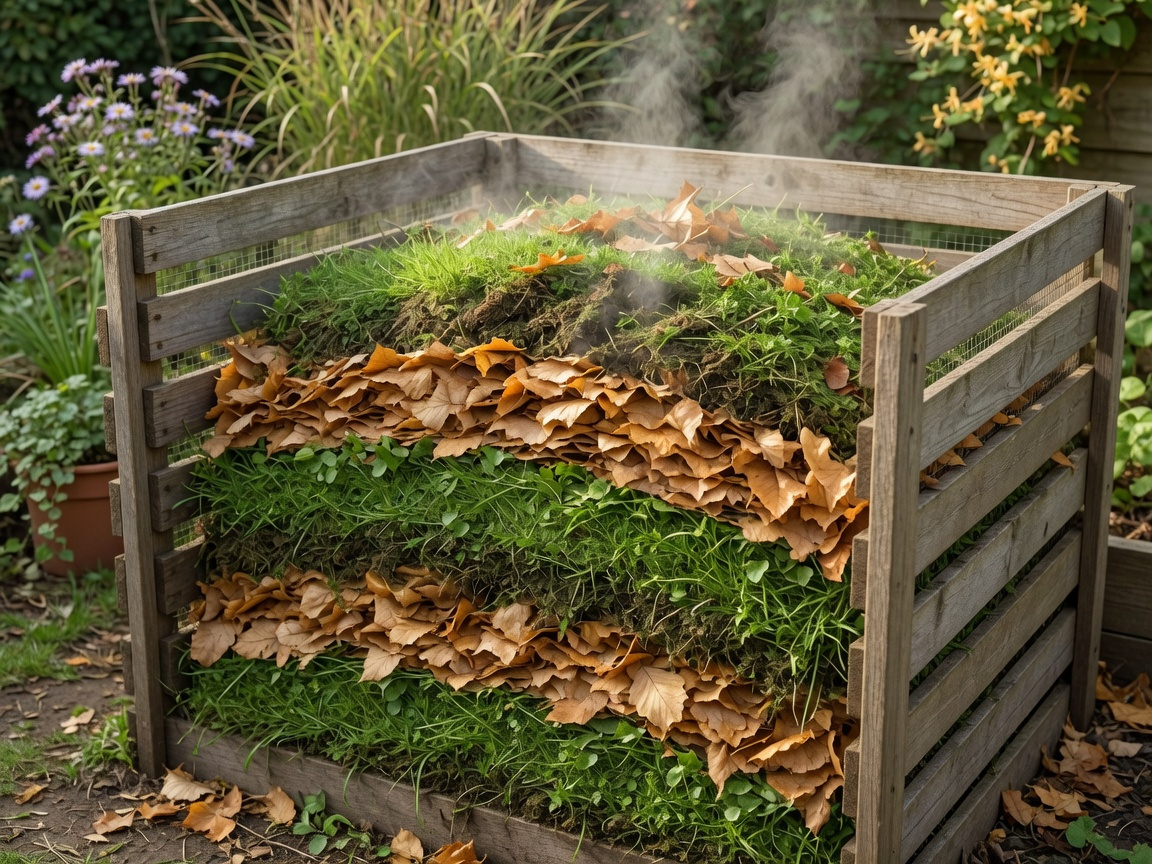
The critical thing to understand is balance. Fresh clippings added in bulk create a dense, airless mass that quickly turns anaerobic — this is where the classic ammonia smell comes from that puts people off using grass in the compost. The fix is simple and consistent: layer every addition of clippings with an equal volume of dry “brown” carbon material. Autumn leaves, torn cardboard, shredded paper, straw, or woody prunings all do the job well. This green-brown layering is the foundation of efficient, odour-free composting.
Horticultural guidance consistently recommends a carbon-to-nitrogen ratio of around 25:1 to 30:1 for efficient decomposition. Fresh grass clippings sit at roughly 15:1 to 20:1 on their own, so pairing them with browns brings the heap into the ideal window. When the balance is right, an active heap can reach 55–65°C at its core — hot enough to kill weed seeds and most pathogens within a few days. Understanding the difference between fungal and bacterial compost is worth a look here, as the mix of ingredients you choose shapes both the speed of decomposition and the character of the finished product.
Step-by-step guide to using clippings as a compost accelerator:
- Collect fresh clippings immediately after mowing
- Add a 5–8 cm layer of clippings to your compost bin or heap
- Follow immediately with an equal or slightly deeper layer of dry browns
- Repeat the green-brown layering pattern with every mowing session
- Turn the heap every one to two weeks to maintain airflow and even heating
- Harvest when the compost is dark, crumbly, and smells of fresh earth — typically 8–12 weeks in warm weather
Method 3: Using Grass Clippings as a Direct Soil Amendment
This is the fastest and most direct method of all: no heap required, no long wait. Simply spread clippings across a bed and work them into the soil. It’s particularly useful at the start of the growing season — before planting — when you want to boost fertility quickly without waiting for compost to mature over several months.
Spread a 2–4 cm layer of clippings across your prepared bed, then turn them into the top 10–15 cm of soil using a fork or spade. In warm soil, they’ll break down within two to four weeks, releasing nitrogen directly at root level. As they decompose, they also improve soil texture: in heavy clay, organic matter opens up compaction over successive seasons; in sandy or chalky soils, it helps retain the water and nutrients that would otherwise drain straight through.
One important timing consideration: freshly incorporated clippings go through an initial fermentation phase during which soil microbes temporarily tie up available nitrogen — a brief process called nitrogen immobilisation. Incorporating clippings at least two weeks before planting gives this initial phase time to pass, so young seedlings meet a fertile, welcoming bed rather than a temporarily nitrogen-depleted one.
This method pairs beautifully with other organic soil improvers. If you already use coconut coir as a soil conditioner, grass clippings are an ideal complement — coir improves structure and water retention, while clippings add the nitrogen that coir inherently lacks, making the two a natural and effective combination for building well-rounded, fertile beds.
Step-by-step guide to direct soil amendment with clippings:
- Clear the bed of existing plants and debris
- Spread a 2–4 cm layer of fresh clippings evenly across the soil surface
- Fork or spade the clippings into the top 10–15 cm of soil
- Water the bed lightly to kick-start microbial activity
- Wait at least two weeks before planting or sowing
- Repeat once or twice per growing season as needed
How to Collect Grass Clippings the Right Way
The condition your clippings arrive in — loose or clumped, dry or soaking — affects how well each of the three methods performs. A little attention at the collection stage saves problems further down the line.
The most convenient collection method is a mower fitted with a built-in grass box or bagger attachment. These gather clippings as you cut, keeping them neat and loose without any extra effort on your part. Most modern rotary and cylinder mowers can be fitted with one, and they make the whole collection process genuinely quick and tidy.
Without a bagger, rake clippings up within an hour or two of mowing — sooner in warm weather. Clippings left lying in rows heat up quickly and begin to clump and mat together. Once that happens, they’re significantly harder to spread evenly and much more likely to go anaerobic. Raking while they’re still fresh and loose takes a fraction of the effort.
Try to mow and collect when the grass is dry wherever possible. Wet clippings are heavier, clump together more readily, and take longer to dry out before use. If you’ve had to mow after rain or early morning dew, spread the clippings thinly on a hard surface — a path or patio works perfectly — for a couple of hours before using them as mulch or adding them to the compost heap.
Common Mistakes to Avoid When Using Grass Clippings
Most problems with grass clippings come down to too much, too deep, or too wet. Here are the mistakes that trip up even experienced gardeners — and the simple fixes for each.
Layering mulch too thickly. Anything over 5 cm creates anaerobic conditions within days: the clippings mat down, smell, repel water, and provide excellent shelter for slugs. Build up in thin 2–3 cm layers and top up regularly rather than applying a thick application all at once.
Composting clippings alone. A bin full of nothing but fresh clippings turns into a slimy, smelly, airless sludge within a week. Always layer with an equal volume of dry carbon material — no exceptions, every single time.
Ignoring herbicide waiting periods. Aminopyralid and clopyralid residues can survive standard composting temperatures and remain biologically active in finished compost. If you’ve treated your lawn with a broadleaf weedkiller, the six-week waiting period before using clippings on vegetable plots is non-negotiable.
Laying mulch against plant stems. Moisture trapped at the base of stems promotes rot and fungal disease. Maintain a minimum 5 cm gap around herbaceous stems and 15 cm around tree and shrub bases at all times.
Forgetting to top up during hot weather. In summer heat, clippings break down very quickly — sometimes within two to three weeks rather than the usual month. Check mulch levels regularly during dry spells and top up as needed rather than sticking to a fixed schedule.
How Do Grass Clippings Compare to Other Free Garden Amendments?
Grass clippings aren’t the only free organic material available to gardeners, but they’re often the most immediately accessible and fastest-acting. Here’s how they stack up against other common no-cost garden inputs:
| Material | Nitrogen Content | Best Use | Time to Break Down |
|---|---|---|---|
| Grass clippings | ~4% (dry weight) | Mulch, compost, soil amendment | 2–4 weeks |
| Autumn leaves | ~0.5–1% | Mulch, compost browns | 6–12 months |
| Kitchen vegetable scraps | ~2–3% | Compost greens | 4–8 weeks |
| Torn cardboard | ~0.1% | Compost browns, sheet mulch | 3–6 months |
| Wood chip | ~0.3% | Path mulch, fungal compost | 1–2 years |
Grass clippings stand out as the fastest-acting and most nitrogen-dense of the free options. Their short breakdown window — two to four weeks — means nutrients reach the soil mid-season rather than the following year, which is exactly why they’re such a practical choice for feeding beds during active growth. For the richest possible organic amendment once your clipping compost is ready, pairing it with vermicompost — one of the most nutrient-dense organic fertilisers available to home gardeners — creates an exceptionally powerful, biologically active soil feed.
Tips for Getting the Most From Grass Clippings in 2026
Gardening practice around grass clippings has refined steadily as soil science has deepened our understanding of how organic matter behaves in the ground. Here’s what current best practice looks like for making the most of every mowing in 2026.
Rotate your approach through the season. Many experienced gardeners get the best results by using all three methods at different times: direct soil incorporation in early spring before planting, active surface mulching from May through August to retain summer moisture, and compost acceleration in autumn when mowing frequency drops and leaf fall begins. Each method is best suited to a different moment in the gardening calendar, and rotating between them makes the most of every batch of clippings year-round.
Match the method to your soil type. Sandy or chalky soils that drain quickly benefit most from direct incorporation, which builds the organic matter content that holds water and nutrients in the rooting zone. Heavy clay benefits from both approaches: incorporation opens up the soil structure over successive seasons, while surface mulching prevents the surface capping and cracking that clay is prone to in dry spells.
Know which crops respond best. Nitrogen-hungry plants — leafy vegetables like spinach, chard, kale, and lettuce — respond very well to grass clipping amendments. Root vegetables, by contrast, can produce forked or misshapen roots in high-nitrogen soil, so use clippings sparingly around carrots, parsnips, and beetroot. It’s also worth noting that repeated heavy applications over several years may nudge soil pH very slightly downward — which can actually benefit acid-loving plants such as blueberries, rhododendrons, and azaleas, but is worth monitoring if you’re growing in already-neutral or alkaline conditions.
Use clippings to support a no-dig growing approach. No-dig gardening builds fertility through surface layers of organic matter rather than cultivation. Grass clippings are a natural fit: thin surface applications between growing seasons feed the soil biology that does the structural work underground, reducing your effort while steadily improving long-term soil health. A 2–3 cm layer applied after each harvest and left to break down over winter sets beds up beautifully for spring.
Don’t waste autumn clippings. As mowing frequency drops from September onwards, each batch of clippings becomes more valuable. Mix them into the compost heap alongside fallen leaves — which are perfectly timed as the brown, carbon-rich balance — and you’ll have a rich, well-structured compost ready for spring mulching and bed preparation. Autumn is also a good time to work a final light application of clippings into any bare beds before winter cover or overwintering mulch goes down.
Frequently Asked Questions About Using Grass Clippings in the Garden
Can I use grass clippings on vegetable beds?
Yes — grass clippings make excellent mulch and soil amendment for most vegetable crops, especially leafy greens and brassicas that are hungry for nitrogen. The main caveat is herbicide residue: if your lawn has been treated with a selective weedkiller in the past four to six weeks, hold off until that window clears. Untreated clippings are safe to use around almost all vegetables once the waiting period has passed.
Will grass clippings make my garden smell bad?
Only if applied too thickly or left in dense, wet clumps. A thin, even 2–3 cm layer breaks down without any unpleasant odour. The ammonia-like smell associated with grass clippings comes from anaerobic decomposition — which only happens when clippings are piled too deep or left in damp, airless conditions. Applied thinly and kept loose, clippings smell of nothing worse than freshly cut grass.
Do grass clippings attract slugs or other pests?
Thick, damp mulch layers can provide shelter for slugs — but this is true of any organic mulch, not just grass clippings specifically. Keeping layers at or below 3 cm and allowing them to dry out between applications removes the cool, damp hiding conditions slugs look for. Pulling mulch back from plant stems eliminates the most attractive spots. Applied correctly, the soil health benefits of clipping mulch comfortably outweigh the modest pest risk.
How often should I top up grass clipping mulch?
During the active growing season, top up every two to three weeks — roughly in line with your mowing schedule. In hot weather, clippings break down faster and may need refreshing every one to two weeks to maintain an effective layer. In autumn, once mowing becomes infrequent, transition your clippings to the compost heap alongside fallen leaves rather than continuing to apply as surface mulch.
Can grass clippings affect my soil pH?
Fresh grass clippings are essentially pH neutral — typically around 6.0 to 6.5. Regular, modest applications will have negligible impact on soil pH. Very heavy, sustained applications over several years may nudge pH slightly downward as organic acids accumulate during decomposition, but this effect is minor and is often a welcome development in alkaline soils. For most gardeners applying clippings at normal rates, pH is not a concern worth worrying about.
Should I let clippings dry out before using them?
For mulching and composting, letting very wet clippings wilt for around 24 hours before applying them reduces clumping and the risk of anaerobic conditions forming. For direct soil incorporation, fresh clippings are perfectly fine — they’ll begin breaking down as soon as they’re mixed into the soil. If you’ve mowed after rain or heavy dew, spreading clippings thinly on a hard surface for a couple of hours before use is a quick step that makes all three methods work more smoothly.