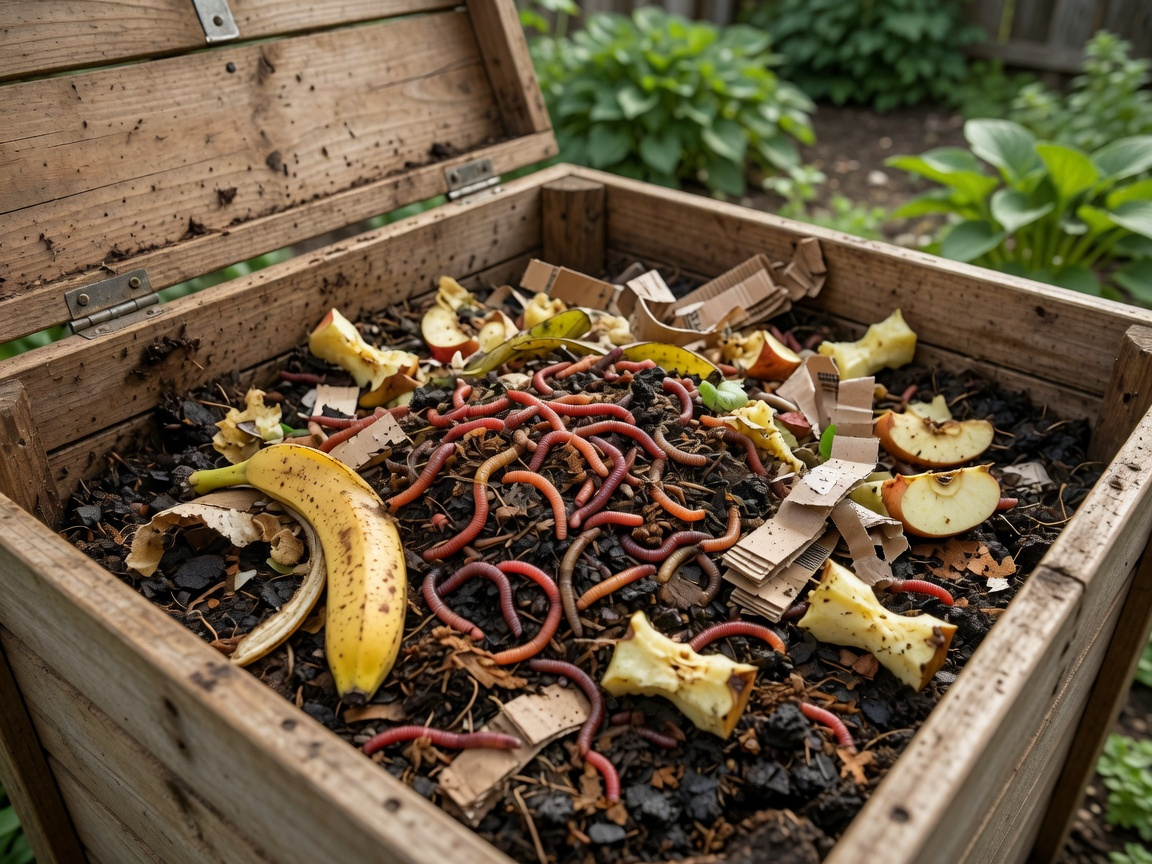

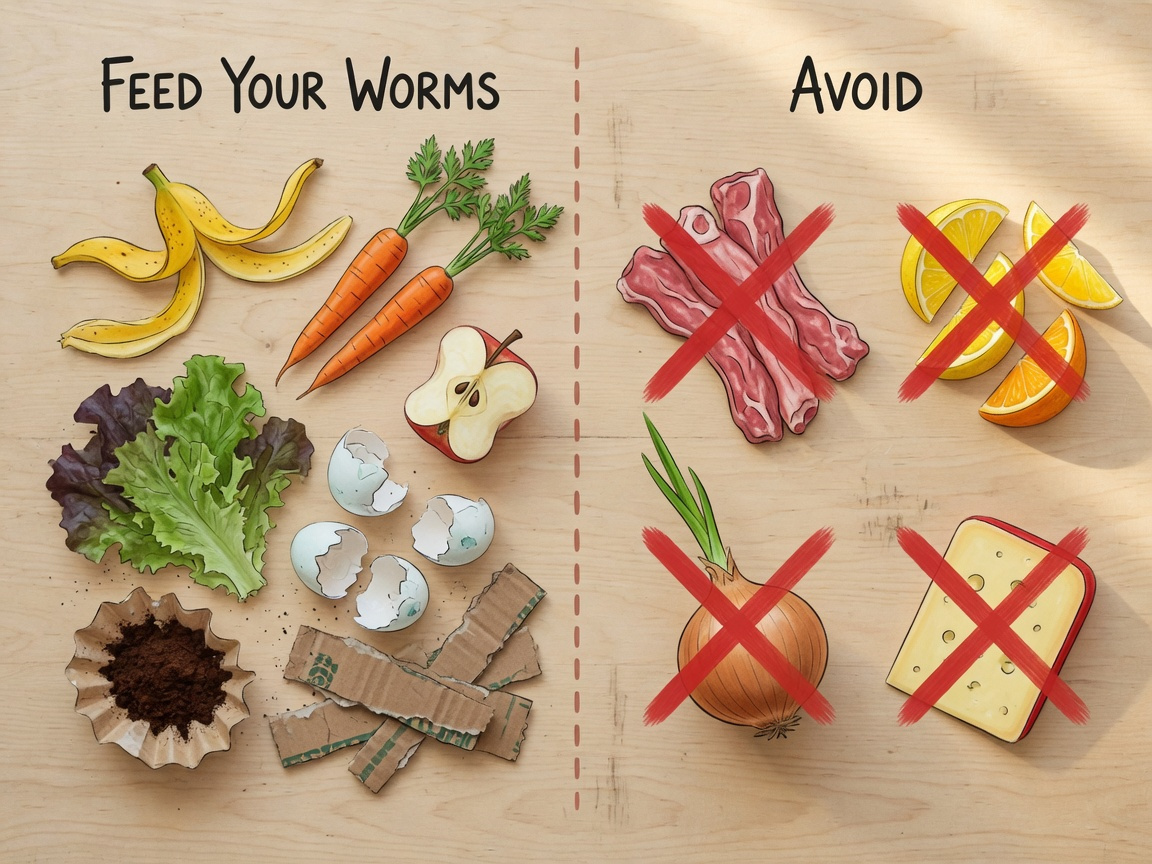
The best foods to feed worms for vermicomposting are fruit and vegetable scraps, coffee grounds, crushed eggshells, and moistened cardboard. Feed your worms these basics and they will reward you with dark, crumbly castings that are among the finest natural fertilisers your garden will ever receive.
Some of the links in this article may be affiliate links. If you make a purchase through these links, we may earn a small commission at no extra cost to you. Thank you.
Quick summary:
- Fruit and vegetable scraps form the core of a healthy worm diet — variety is key.
- Coffee grounds and tea bags are welcome additions, but keep them under 10% of total bin volume.
- Meat, dairy, oily foods, citrus in large quantities, onions, and pet waste should never enter your bin.
- Worm castings are exceptionally rich in plant-available nutrients, making them one of the finest soil amendments a garden can receive.
- One pound of red wigglers processes roughly half a pound of food waste per day under optimal conditions.
What Is Vermicomposting and Why Does the Worm Diet Matter?
Vermicomposting is the process of using worms — most commonly red wigglers (Eisenia fetida) — to break down organic waste into nutrient-dense castings. Unlike a traditional compost heap, a worm bin works indoors or outdoors, year-round, and transforms kitchen scraps in weeks rather than months.
The worm diet matters because what goes in directly determines what comes out. Feed your worms a rich, varied mix and they produce dark, crumbly castings loaded with beneficial microbes, nitrogen, phosphorus, and potassium. Feed them the wrong things and you end up with a smelly, pest-ridden bin — and unhappy worms that slow right down.
The environmental case for vermicomposting is compelling too. UK households discard approximately 6.6 million tonnes of food waste annually, and a worm bin can comfortably handle a meaningful share of one household’s kitchen scraps each week. Starting with the right feeding habits from day one sets your entire worm farm up for long-term success.
What Are the Best Foods to Feed Worms?
Worms are not fussy eaters, but they do have clear preferences. The best worm foods are soft, moist, and plant-based. Red wigglers thrive when they receive a mixture of nitrogen-rich “green” inputs and carbon-rich “brown” materials — this balance keeps the bin moist, odour-free, and productive.
The richer and more varied the food inputs, the more diverse the microbial community inside the bin — and the more nutritious the finished castings that emerge.
Below are the top food categories, broken down by what to feed, how to prepare each item, and how much to add at a time.
Fruit and Vegetable Scraps
Fruit and vegetable scraps are the cornerstone of any worm diet. Apple cores, banana peels, melon rinds, strawberry tops, carrot peelings, lettuce leaves, and courgette ends are all excellent choices. Worms are especially fond of soft, slightly overripe material because it is easier to break down.
Always chop or tear scraps into small pieces before adding them to the bin. Smaller pieces have more surface area, which means worms — and the microbes they work alongside — can process them far faster. A useful rule of thumb: aim for pieces no larger than a 50p coin.
Coffee Grounds and Tea Bags
Coffee grounds are a worm favourite and a brilliant source of nitrogen. They also have a slightly gritty texture that actively helps worms with digestion — worms have no teeth, so they rely on abrasive particles to grind food down inside their gizzards. Used tea bags work just as well; remove any staple before adding them.
Moderation is essential here. Keep coffee grounds and tea bags to no more than 10% of your total bin material. Too much acidity or caffeine can stress your worms and slow the whole system down. If you brew a lot of coffee, spread the grounds across several feeding sessions throughout the week rather than adding a full batch all at once.
Eggshells
Crushed eggshells are one of the most underrated worm bin additions available. They provide calcium, which supports worm health and reproduction, help neutralise excess acidity in the bin, and act as a gentle abrasive for digestion. Many experienced worm farmers keep a small pot next to the kettle where they dry and crush eggshells throughout the week before adding a batch to the bin.
Always crush eggshells into small fragments before adding them — whole shells take months to break down and will simply sit in the bin. A quick rinse to remove any residual raw egg white is a good habit, as fresh egg white can produce an unpleasant odour as it decomposes. Dried, crushed shells have no smell at all.
What Bedding Do Worms Need — and Does It Count as Food?
Bedding is not simply comfort padding for your worms — it is also food. Worms feed on the microbes that colonise bedding material just as much as they feed on the kitchen scraps you add. Getting the bedding right is therefore just as important as choosing the right foods to include.
Shredded cardboard and newspaper are the gold-standard bedding materials. They absorb moisture well, create air pockets in the bin, and provide carbon that balances the nitrogen in food scraps. Tear or shred them into strips no wider than an inch and moisten them before adding to the bin — bedding should feel like a thoroughly wrung-out sponge.
Other excellent bedding options include coir (coconut fibre), straw, dried autumn leaves, and plain brown paper. Avoid glossy paper, coloured paper, and anything with heavy ink printing — these materials can contain chemical coatings that are harmful to worms. The carbon-to-nitrogen ratio in a healthy worm bin sits around 25:1, so keep adding fresh bedding regularly as food scraps are consumed.
What Foods Should You Never Put in a Worm Bin?
Knowing what not to feed your worms is just as important as knowing what to include. The wrong additions can harm your worms, create foul odours, attract pests, and undermine the quality of your castings. Here is a clear reference table of what to avoid and why.
| Food to Avoid | Why It’s Harmful | What to Do With It Instead |
|---|---|---|
| Meat, fish, and poultry | Attracts pests; putrefies quickly; worms cannot digest it efficiently | Traditional hot compost or food waste bin |
| Dairy products | Encourages harmful bacteria; creates strong unpleasant odours | Food waste bin |
| Oily and fatty foods | Coats food scraps, preventing breakdown; can suffocate worms | Food waste bin |
| Citrus fruits (large amounts) | High acidity lowers bin pH and stresses worms | Add small amounts only; compost the rest |
| Onions and garlic | Strong compounds repel worms and disrupt beneficial bin bacteria | Hot compost heap |
| Spicy or heavily seasoned food | Capsaicin and spice compounds are toxic to worms | Food waste bin |
| Pet waste | Contains pathogens dangerous to plants and humans | Specialist pet waste composters only |
| Coloured and glossy paper | Inks and coatings may contain harmful chemicals | Recycling |
A small amount of citrus peel now and then is unlikely to cause serious harm, but adding large quantities regularly will acidify your bin. If you notice your worms retreating to the very top layer of the bin, excess acidity is a common culprit. A handful of crushed eggshells or a light dusting of agricultural lime will bring the pH back in line quickly.
How Do You Feed Worms Without Creating Problems?
Feeding technique matters as much as the food itself. Overfeeding is the single most common mistake new vermicomposters make. Pile in too much food at once and uneaten scraps decompose anaerobically, producing the sour, sulphur smell associated with a struggling worm bin.
Feed small amounts every few days and observe how quickly the material is consumed before increasing the volume. This approach prevents problems before they start.
Follow these practical steps for a smooth, odour-free operation:
- Bury food scraps under the bedding rather than leaving them exposed on top. This discourages fruit flies and keeps the bin surface tidy.
- Rotate feeding zones — add food to a different corner of the bin each time. Worms migrate to fresh food, leaving finished castings behind for easy harvesting.
- Chop everything small before it goes in. Smaller pieces mean faster breakdown and happier worms.
- Maintain correct moisture levels. The bin should feel like a damp sponge — not wet, not dry. Add moistened bedding if it feels too wet; mist lightly with water if it feels too dry.
- Check the bin weekly to monitor breakdown speed and adjust feeding amounts as the worm colony grows.
A well-established bin processes roughly half a pound of food waste per pound of worms per day. If you start with one pound of red wigglers — approximately 800 to 1,000 individuals — expect to feed around 3–4 pounds of food per week once the colony is established, typically after the first four to six weeks.
What Is the Right Balance of Green and Brown Materials?
Every healthy worm bin needs a balance of nitrogen-rich “greens” and carbon-rich “browns.” Too many greens — fresh food scraps — and the bin becomes wet, smelly, and acidic. Too many browns — cardboard, paper, dried leaves — and decomposition slows to a crawl.
Aim for a ratio of roughly 2:1 browns to greens by volume. In practice this means adding a small handful of shredded cardboard or dried leaves every time you add a batch of food scraps. Over a few weeks, this habit becomes entirely automatic.
Common green inputs include fruit and vegetable scraps, fresh grass clippings, tea bags, coffee grounds, and fresh plant trimmings. Common brown inputs include shredded cardboard, newspaper strips, dried autumn leaves, straw, and plain brown paper bags. The best visual cue: if the bin smells earthy and looks dark and textured, the balance is right. A sour or wet smell means add more browns. A dusty, dry appearance means add more greens or a light mist of water.
How Do You Use Worm Castings in the Garden?
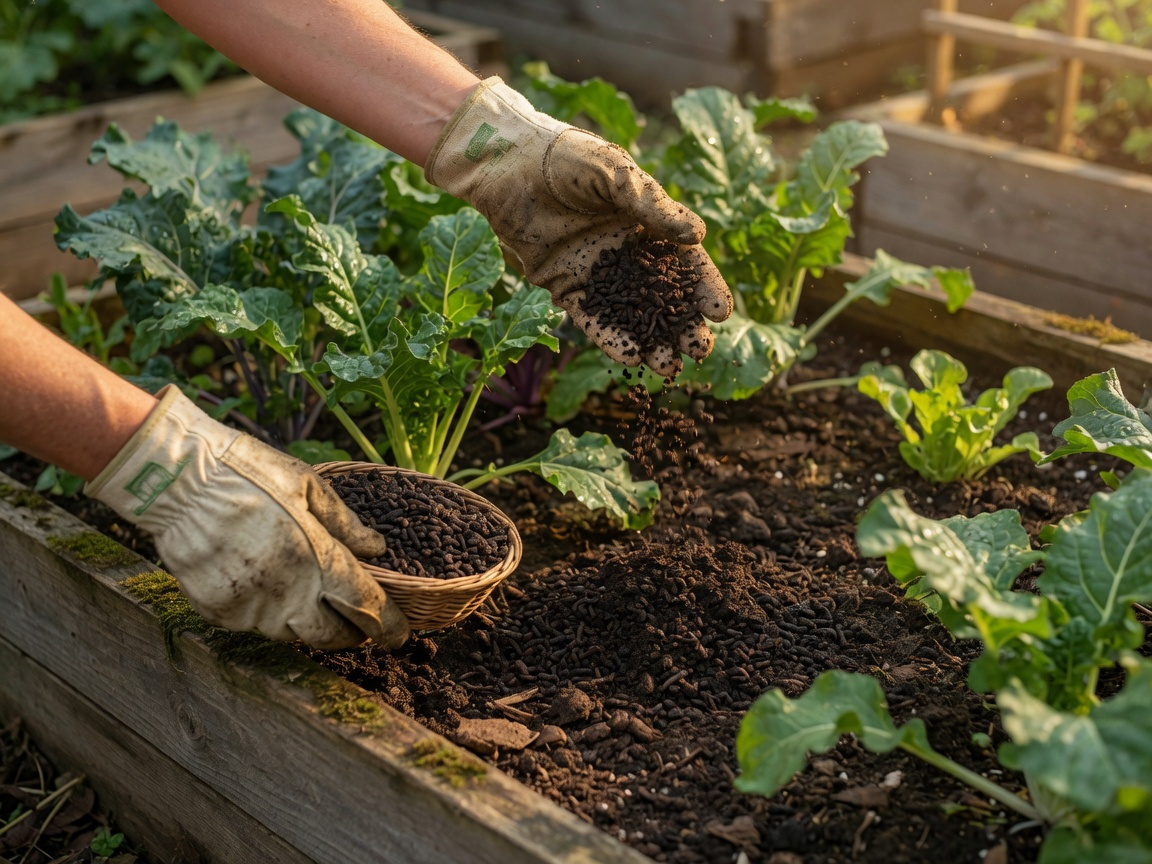
Worm castings — the finished output of your vermicomposting bin — are among the finest soil amendments a gardener can use. They contain concentrated plant-available nutrients, beneficial microbes, and humic acids that improve soil structure, water retention, and root development in measurable ways.
There are several practical ways to apply them:
- Top dressing: Scatter a thin layer of castings around the base of plants and water in gently. Ideal for established beds and container plants.
- Potting mix amendment: Mix castings into compost at a ratio of 1:4 (one part castings to four parts compost) for a supercharged growing medium.
- Worm tea: Steep a handful of castings in a watering can of water for 24 hours, then apply directly to soil or as a foliar spray. This liquid delivers nutrients instantly to roots and leaf surfaces.
- Seed starting: A small amount of castings mixed into seed compost gives seedlings a gentle nutritional boost right from germination.
Castings are gentle enough to apply directly around plant roots without risk of burning — unlike synthetic fertilisers, which can scorch if over-applied. They are also slow-release, meaning nutrients become available gradually over several weeks rather than all at once after a single watering.
What Pests Might a Worm Bin Attract — and How Do You Prevent Them?
A well-managed worm bin should stay largely pest-free, but slip-ups with feeding can invite unwanted visitors. Fruit flies are the most common nuisance — they are attracted to exposed, overripe food scraps sitting on the surface. Burying food under bedding, keeping a lid on the bin, and avoiding overripe fruit in large quantities solves the problem in most cases.
Outdoor worm bins occasionally attract larger visitors. Rodents may investigate bins that contain cooked food or meat — another strong reason to stick strictly to raw, plant-based inputs. In some gardens, outdoor composting setups can also attract reptiles drawn by warmth and the small invertebrate activity around the bin. If your worm bin sits in or near a vegetable patch and you want to think about the wider garden environment, our guide on keeping snakes away from your garden covers practical deterrent strategies that work well alongside a wildlife-conscious composting setup.
Ants can also move into bins that are too dry. Keeping moisture levels consistent — that damp-sponge feel — usually keeps them at bay. A thin ring of diatomaceous earth around the base of the bin provides a physical barrier if ant activity becomes a persistent issue.
How Do You Troubleshoot a Struggling Worm Bin?
Even experienced vermicomposters hit rough patches. Here are the most common problems and their practical fixes:
- Bin smells bad: Usually caused by overfeeding, too many greens, or buried meat or dairy. Remove any problem items, add a generous layer of shredded cardboard, and cut back feeding for a week.
- Worms clustering at the top: Often signals low pH from too much acid food, or excess moisture. Add crushed eggshells or a light dusting of garden lime and aerate the bedding gently.
- Bin is too wet: Drain off any pooled liquid — this leachate can be diluted 10:1 with water and used on non-edible plants. Add dry bedding material to absorb excess moisture.
- Worms are dying: Check temperature (red wigglers prefer 15–25°C), moisture levels, and whether any forbidden foods have been added. A fresh layer of bedding and a small amount of food usually restores activity within days.
- Bin isn’t breaking down fast enough: Chop food scraps smaller, ensure the bin is warm enough, and confirm the worm population is sufficient for the volume of food being added.
Patience is the great virtue of vermicomposting. A new bin takes four to six weeks to fully establish as worm populations grow and microbial communities develop. Avoid the temptation to intervene dramatically in the early weeks — consistent, moderate feeding is far more effective than dramatic corrections that swing conditions from one extreme to another.
Frequently Asked Questions About Feeding Worms for Vermicomposting
How often should I feed my worms?
Feed your worms every 2–3 days in small amounts rather than adding a large batch once a week. This prevents overfeeding, keeps the bin balanced, and lets you monitor how quickly the worms are processing each addition. As your colony grows over the first few months, gradually increase feeding frequency and volume to match.
Can I feed my worms bread or cooked food?
Plain, unsalted bread in very small quantities is generally acceptable. However, cooked food — especially anything containing oil, salt, or seasoning — should be avoided. Salt dehydrates worms through their skin, which is how they absorb moisture. Oily cooked foods coat bin material and create anaerobic pockets that produce foul smells. Stick to raw, plant-based scraps for the best results.
How many worms do I need to start vermicomposting?
A good starting point is one pound of red wigglers per square foot of surface area in your bin. For a standard 60cm × 40cm starter bin, that means roughly one to two pounds (450–900g) of worms. Red wiggler populations double approximately every 60–90 days under good conditions, so a small starting colony will scale up to match your food waste fairly quickly.
Can I add garden soil to my worm bin?
A thin layer of garden soil can be a useful addition to a new worm bin — it introduces beneficial microbes and provides a small amount of grit to aid worm digestion. However, large amounts of soil are not necessary and can compact the bin over time, reducing the airflow that worms need. Stick to cardboard and coir as your primary structural and bedding materials.
What do I do with the liquid that drains from my bin?
The liquid that collects in the tray beneath a worm bin is called leachate. It contains some nutrients but also potentially harmful anaerobic bacteria. Dilute it at a ratio of at least 10 parts water to 1 part leachate before using it on ornamental plants. Do not apply it directly to edible crops. Worm tea — made by steeping finished castings in oxygenated water for 24 hours — is a safer and more beneficial liquid fertiliser option for vegetables and herbs.
Is vermicomposting suitable for flats and small homes?
Absolutely. A well-managed worm bin is effectively odourless and can live comfortably under a kitchen sink, on a balcony, or inside a utility cupboard. Compact stackable worm bins are designed specifically for small-space use and can process a typical single-person or couple household’s food waste with ease. The key is correct feeding — no meat, no dairy, no oily foods — and keeping the moisture balance right.
Do worms need any special supplements?
Crushed eggshells are the one supplement genuinely worth adding regularly — they provide calcium and help maintain a neutral pH in the bin. Some worm farmers also add a small amount of rock dust every few months to boost the mineral content of their castings. Beyond that, a varied diet of fruit and vegetable scraps, coffee grounds, and well-balanced bedding gives your worms everything they need to thrive.
Ready to turn your kitchen scraps into garden gold? Start with a simple bin, a pound of red wigglers, and the foods covered in this guide. Within six to eight weeks you will have your first harvest of rich worm castings — and your garden will thank you for it every season from here on.