Hydrophobic soil repels water instead of absorbing it, leaving plant roots dry despite regular watering. Five organic fixes tackle this directly: organic wetting agents, tilling, compost additions, mulching, and slow-watering techniques — all chemical-free and achievable within a single growing season.
Some of the links in this article may be affiliate links. If you make a purchase through these links, we may earn a small commission at no extra cost to you. Thank you.
- Root cause: Waxy residues from decomposing organic matter or synthetic chemical build-up coat soil particles, blocking water absorption.
- Fastest fix: Organic wetting agents restore water penetration within one or two waterings.
- Best long-term fix: Compost and mulch rebuild soil structure over one to two growing seasons with consistent application.
- Container plants: Bottom watering and full submersion re-wet severely hydrophobic potting soil quickly and effectively.
What Is Hydrophobic Soil and Why Does It Matter for Your Garden?
Healthy soil acts like a sponge. Water lands on the surface and soaks in within seconds, moving steadily toward plant roots where it is needed most. Hydrophobic soil behaves in the opposite way — it repels water, causing moisture to pool on the surface, run off to the sides, or in containers, rush straight through the gap between a dry soil ball and the pot wall without touching the root zone at all.
The word hydrophobic comes from the Greek for water-fearing. In soil science, it describes a condition where particles have become coated with water-repellent compounds — typically waxy residues from certain decomposing plant materials, fungal hyphae, or the accumulation of synthetic chemicals applied over multiple growing seasons. Once those coatings develop, water cannot properly bond with the soil surface, regardless of how often or how much you apply.
The practical consequences are hard to miss. Plants show classic drought stress — wilting, yellowing leaves, stunted growth, and in severe cases collapse — even in beds that have been watered consistently. Surface runoff strips away precious topsoil and nutrients. In raised beds and containers, persistent dry hot spots develop that normal watering simply cannot reach. Research in soil science consistently identifies low organic matter content as the single greatest risk factor for water repellency, making prevention as important as cure.
The five organic solutions in this guide range from rapid short-term relief to structural long-term improvement. They work together to restore healthy, moisture-retentive soil without a synthetic chemical in sight. For a thorough look at all the factors that drive water repellency, the in-depth guide on the causes and effects of hydrophobic soil on plant health is an excellent companion read before you begin.
What Causes Soil to Become Water-Repellent?
Hydrophobicity rarely develops overnight. It builds gradually, driven by a combination of soil chemistry, gardening practices, and environmental conditions. Understanding the causes helps you address the root problem — not just the symptoms — and prevents the condition from returning after treatment.
Overuse of synthetic fertilisers and pesticides. One of the most common causes in cultivated gardens. Synthetic products can leave residues that coat soil particles with water-repellent compounds over time. Heavy chemical use also suppresses populations of beneficial microbes that would otherwise naturally break down those coatings, accelerating the problem year on year.
Low organic matter content. Soils with very little organic content are particularly vulnerable. Organic matter acts as a natural buffer — it holds water in place, supports biological activity, and keeps soil particles loosely aggregated in an open structure that allows moisture to move freely. Strip it away through neglect or heavy synthetic inputs, and the door opens to water repellency.
Waxy plant residues during decomposition. Certain decomposing plant materials leave behind waxy compounds as they break down, including pine needles, eucalyptus leaves, and dry grasses. In warm or dry conditions, these compounds accumulate faster than soil organisms can process them, gradually creating a hydrophobic layer in the topsoil.
Extended dry periods. When soil dries out completely, any waxy coatings present harden and become far more resistant to rewetting. Sandy and gravelly soils are especially prone to this cycle — they hold less water to begin with, dry out faster, and contain less organic matter to buffer against repellency.
Compaction. Compacted soil restricts both air and water movement through the profile. The reduced porosity creates surface conditions where water cannot easily enter, encouraging runoff and eventually contributing to the formation of hydrophobic surface layers.
Soil health is cumulative. Every season of synthetic inputs or depleted organic matter brings soil closer to water repellency — but every season of organic care moves it back toward healthy absorption.
Fix 1: How Do Organic Wetting Agents Break Down Hydrophobic Barriers?
Organic wetting agents are the fastest-acting solution for hydrophobic soil. They work by reducing surface tension between water molecules and soil particles, allowing moisture to penetrate the waxy coatings that cause repellency. Applied correctly, you can see a genuine improvement in water absorption within one or two waterings — making them the ideal first response when you spot the problem.
Commercial organic wetting agents are typically derived from plant extracts — yucca (Yucca schidigera), seaweed, or saponin-rich compounds found in various plants. Unlike synthetic surfactants, these biodegrade quickly, leave no harmful residue, and actually provide trace nutrients and food for soil microbes as they break down. They are a genuinely soil-positive treatment rather than simply a chemical intervention.
How to Apply Organic Wetting Agents Step by Step
- Dilute the wetting agent in water according to the product label — typically a few millilitres per litre.
- Apply the diluted solution evenly across the hydrophobic area using a watering can with a rose head or a garden sprayer.
- Follow immediately with a slow, thorough watering to drive moisture deeper into the soil profile.
- Repeat every two to four weeks during dry periods, or whenever you notice water beginning to bead on the surface again.
- For potted plants, add wetting agent to the watering can before each session for the first two to three weeks after a dry-out event.
DIY option: A few drops of plain washing-up liquid in a full watering can provides short-term surfactant action in a pinch. It breaks down quickly and is safe for plants in small quantities, but it lacks the microbe-feeding benefits of a dedicated organic wetting product. Treat it as a stopgap while you source something more effective.
Wetting agents shine as a first-response treatment that reopens water pathways so the rest of your fixes can work properly. Without addressing surface tension first, even generous compost or mulch applications may take considerably longer to show a visible effect.
Fix 2: Can Tilling and Watering Together Restore Soil Structure?
Tilling while watering addresses hydrophobicity physically rather than chemically. The process breaks up the compacted, waxy surface layers that prevent water from entering the soil profile, combining mechanical disruption with immediate moisture to re-establish the pathways roots depend on. It is particularly valuable for established beds where surface compaction has built up over several seasons.
Step-by-Step: Tilling With Water
- Moisten the surface first. Apply a light spray of water before beginning — this softens the top crust and reduces dust during tilling.
- Work shallowly. Use a hand fork or soil cultivator to loosen the top 5–10 cm of soil. Avoid deeper disturbance in beds with established plants, as this risks damaging root systems.
- Apply water as you work. Alternate between loosening small sections and applying water with a gentle rose head. Allow each section to partially absorb before moving on.
- Work the area in multiple passes. Return to your starting point and apply water again. Two to three passes dramatically increases absorption depth compared to a single treatment.
- Test absorption at the end. Pour water slowly on the treated area and watch the absorption rate. Compare to an untreated patch nearby to gauge the improvement achieved.
A practical note: deep tilling with rotary tillers causes significant root disturbance and can bring dormant weed seeds to the surface where light will trigger germination. In established beds, a hand fork or three-pronged cultivator is more precise, causes far less disruption, and is easier to control around existing plants.
Tilling is most effective as a one-off treatment that breaks the initial water-repellent barrier and re-establishes moisture pathways. On its own, it does not prevent the condition from returning — that’s exactly where Fixes 3 and 4 come in to finish the job.
Fix 3: How Does Adding Organic Matter Transform Water-Repellent Soil?
Adding organic matter is the single most impactful long-term fix for hydrophobic soil. It improves physical soil structure, introduces billions of beneficial microorganisms per teaspoon, and creates the natural water-holding capacity that water-repellent soil lacks. Where wetting agents offer quick relief, organic matter delivers genuine structural recovery that compounds season after season.
The mechanism is straightforward. Organic matter breaks compacted soil particles into stable aggregates — clumps with pore spaces between them that water, air, and roots can move through freely. The microorganisms in mature compost produce sticky compounds called glomalin and polysaccharides that hold those aggregates together. The result is a stable, open structure that water enters easily and stays in rather than running off the surface.
Best Organic Amendments for Hydrophobic Soil in 2026
| Amendment | Best For | Application Rate | Time to Effect |
|---|---|---|---|
| Mature garden compost | All soil types | 5–10 cm layer | 4–8 weeks |
| Vermicompost (worm castings) | Rapid microbial boost | 2–5 cm layer | 2–4 weeks |
| Well-rotted manure | Sandy or heavy clay soils | 5–10 cm layer | 4–8 weeks |
| Biochar | Long-term water retention | 1–3 cm mixed in | 3–6 months |
| Leaf mould | Vegetable and flower beds | 5 cm surface dressing | 4–6 weeks |
Compost is the most versatile amendment — it suits every soil type and every planting style, from raised vegetable beds to ornamental borders. For faster results, vermicompost (worm castings) delivers a particularly concentrated source of microbial activity and humic compounds that improve soil structure and water retention faster than standard garden compost.
How to Apply Organic Matter to Hydrophobic Soil
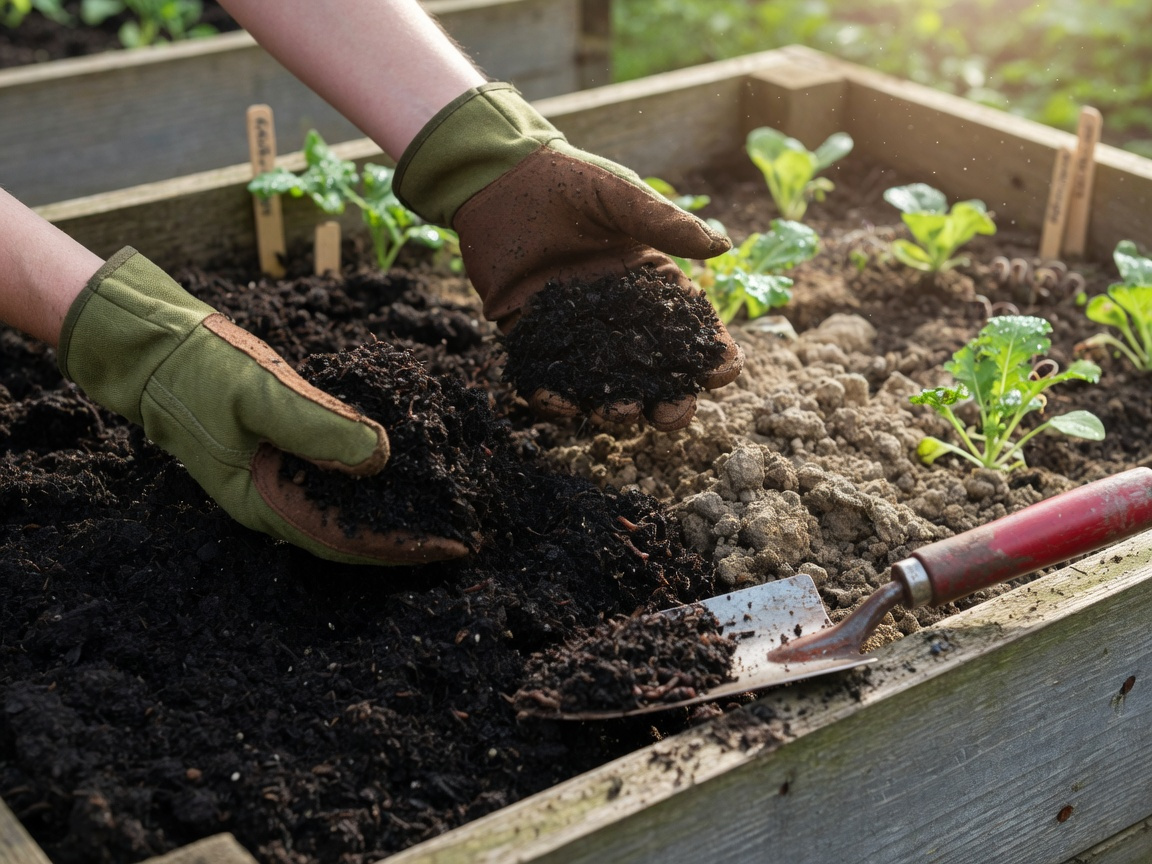
- Spread a 5–10 cm layer of your chosen amendment evenly across the affected area.
- For beds where tilling is safe, work the amendment into the top 10–15 cm of soil with a fork.
- For no-dig beds or around established plants, leave it as a surface dressing and allow worms and rainfall to incorporate it naturally over the following weeks.
- Water in well immediately after application — this drives microbial life down into the soil profile where it can begin improving structure right away.
- Repeat annually as a maintenance dressing every spring or early autumn to sustain the gains.
Fix 4: Why Is Mulching One of the Best Long-Term Solutions for Hydrophobic Soil?
Mulch tackles hydrophobicity from above, protecting the soil surface from the very conditions that allow water repellency to develop and persist. A generous layer of organic mulch is one of the most cost-effective garden interventions available — it slows the problem worsening while simultaneously improving the soil underneath it.
- Prevents soil from drying out completely. A 5–8 cm mulch layer dramatically reduces evaporation from the soil surface, keeping the top layers consistently moist — the condition under which hydrophobic compounds cannot easily form or harden.
- Moderates soil temperature. Cooler, more stable temperatures support the microbial communities that naturally break down waxy compounds. Heat stress suppresses those organisms, removing the soil’s built-in biological defence against water repellency.
- Continuously adds organic matter. As organic mulch decomposes, it feeds the topsoil with humus, maintaining the organic matter levels that prevent hydrophobicity from re-establishing.
- Reduces surface compaction. Mulch cushions the impact of rainfall and overhead watering, preventing the surface crusting that contributes to runoff and the development of repellent layers.
Best Organic Mulches for Water Retention
- Straw or hay: Lightweight, decomposes quickly, excellent moisture retention. Ideal for vegetable beds.
- Wood chips: Long-lasting, ideal for pathways and shrub borders. Suppresses weeds effectively.
- Leaf mould: Fine-textured and moisture-retentive, brilliant for vegetable and flower beds. Makes excellent use of garden waste.
- Grass clippings: Readily available, breaks down quickly, and feeds the soil as it decomposes. Apply in thin layers to avoid matting.
- Compost as mulch: The double-benefit option — feeds the soil biology and retains moisture simultaneously.
Apply mulch in a layer of at least 5–7 cm, keeping it a few centimetres away from plant stems to prevent rot. Top up annually in spring or early autumn to maintain the full effect. The combination of mulching and regular organic matter addition is one of the most reliable ways to keep soil water-absorbent year after year — a practice rooted in the same principles explored in the guide to nurturing the beneficial microbes that keep soil healthy.
Fix 5: What Slow Watering Techniques Work Best for Hydrophobic Soil?
Watering technique is the fifth fix, and it works in tandem with everything else in this guide. Fast, heavy watering applied to hydrophobic soil produces immediate runoff — water hits the surface, cannot penetrate, and drains away before reaching plant roots. Slow, gentle watering gives moisture the time it needs to work through the repellent layer, especially once the other fixes have begun to open up the soil structure.
Drip irrigation delivers water directly to the root zone at a slow, controlled rate. It is arguably the most effective method for gardens with persistent or severe hydrophobicity. The continuous, low-volume drip saturates soil incrementally, allowing waxy coatings to soften with each successive application. Horticultural research consistently identifies drip irrigation as the most water-efficient approach for moisture-challenged soils, reducing waste and improving uptake simultaneously.
Soaker hoses work on the same principle. Laid along the base of beds, they seep water evenly along their full length at ground level, delivering a gentle, sustained soak that surface hydrophobicity cannot deflect as easily as overhead watering.
Watering can with a fine rose head is the simplest upgrade most gardeners can make right away. A fine rose delivers water as a gentle spray that mimics natural rainfall, giving the soil surface more time to absorb between individual droplets rather than being overwhelmed by a single stream of water.
The soak and wait method works with any watering tool: apply water until you see the first signs of surface runoff, then pause for 20–30 minutes. Apply again. Repeat three to four times. Each pass penetrates a little deeper into the soil, and the pauses allow the surface absorption to catch up. This patient approach transforms what would otherwise be a wasted watering session into a genuinely effective one.
Watering at the wrong rate is like trying to fill a glass by pouring from height — most of it bounces off. Slow watering is the glass held steady under the tap.
Timing matters too. Water in the early morning or evening to reduce evaporation and give the soil the best conditions for absorption. Surface hydrophobicity is at its most intense in the middle of the day, when waxy compounds are driest and hardest — morning watering makes every litre count.
How Do You Fix Hydrophobic Soil in Potted Plants?
Container plants are particularly vulnerable to hydrophobicity. Potting soil dries out faster than ground soil, and once completely desiccated, the soil ball contracts away from the pot wall, leaving a gap that water rushes through in seconds — bypassing the root zone entirely. Every litre you pour on appears to drain, yet the soil stays bone dry. The good news is that container-specific techniques work quickly and are easy to apply.
Bottom watering is the most effective approach for mild to moderate cases. Place the pot in a tray or basin of water and leave it for 20–30 minutes. Moisture wicks upward through the soil via capillary action, gradually rehydrating the full root zone without the runoff problems that top watering creates on repellent soil. As a bonus, this technique encourages deeper root development over time.
Full submersion is the go-to fix for severely dried-out pots. Submerge the entire container in a bucket or deep basin of water until bubbles stop rising from the soil — this signals that all air pockets have been displaced and the soil is fully rehydrated. Allow excess water to drain completely before returning the plant to its usual spot.
Organic wetting agent in the watering can works well for ongoing maintenance after a dry-out. Add a few drops to each watering session for the first two to three weeks. This re-establishes moisture pathways within the soil gradually without requiring full submersion every time.
Repotting with fresh soil is the most reliable long-term fix for containers that develop hydrophobicity repeatedly. Remove the plant, discard or compost the old soil, and repot using a fresh, open, moisture-retentive mix suited to the plant’s needs. For plants transitioning from water propagation to soil, the detailed guide on converting water roots to soil roots covers exactly how to make that process successful.
| Technique | Best For | Speed of Results |
|---|---|---|
| Bottom watering | Mild to moderate hydrophobicity | Quick (20–30 mins) |
| Full submersion | Severely dried-out pots | Very quick (20–40 mins) |
| Organic wetting agent | Any potted plant, maintenance | Quick (1–2 waterings) |
| Repotting with fresh soil | Persistent or severe cases | Immediate and lasting |
How Long Does It Take for Organic Fixes to Show Results?
Timelines vary depending on the severity of hydrophobicity and which combination of fixes you apply. Here is a realistic guide to what to expect from each approach:
- Organic wetting agents: Improvement visible within one to two waterings. Surface tension breaks down quickly, allowing water to penetrate the repellent layer. Effects typically last two to four weeks before reapplication is needed.
- Tilling with water: Immediate improvement in the treated area. Does not address the underlying soil chemistry, so effects are temporary without the supporting long-term fixes.
- Compost and organic matter: Structural improvement begins within two to four weeks as microbial activity increases. Full soil health transformation typically requires one complete growing season with consistent application.
- Mulching: Moisture retention improves immediately on application. The soil-building benefits — improved structure, higher organic matter, stronger microbial activity — develop progressively over one to two seasons of consistent mulching.
- Slow watering techniques: Effective from the very first session when combined with the other fixes. Works as a multiplier, making every other treatment more efficient.
For most gardens, a combination approach delivers the fastest overall improvement: wetting agent for immediate relief, tilling to break the surface crust, compost worked in or surface-dressed, mulch applied on top, and slow-watering from that point forward. Patience and consistency are essential — hydrophobicity that has built up over several years will not reverse overnight, but with this combined approach it will reverse reliably within one growing season.
What Are the Environmental Benefits of Choosing Organic Soil Fixes?
The benefits of addressing hydrophobic soil organically extend well beyond your garden boundary. Choosing organic fixes has a measurable positive impact on water conservation, soil biodiversity, and the health of surrounding ecosystems — reasons that go beyond the purely practical.
Reduced water consumption. Healthy, organic-rich soil holds moisture far more effectively than chemically treated or depleted soil. Less runoff means less water wasted — and a reduced need to irrigate. In practical terms, improving your soil’s water retention capacity means spending less time with a watering can and less money on your water bill, while contributing to more sustainable water use in your local area.
Support for soil biodiversity. Every organic amendment you add feeds the soil food web — earthworms, mycorrhizal fungi, bacteria, and beneficial insects all thrive when organic matter and consistent moisture levels increase. Healthy soil biodiversity is one of the most effective long-term defences against future hydrophobicity, because biological activity naturally breaks down the waxy compounds that cause it.
No chemical residue. Synthetic wetting agents and soil conditioners can leave residues that affect pollinators, soil organisms, and nearby waterways. Organic alternatives biodegrade quickly, adding nutrients rather than pollutants to the soil environment as they break down.
Compounding improvement over time. Unlike synthetic interventions, organic fixes build on each other season after season. Compost added in 2026 improves microbial activity through 2027. Mulch applied in autumn becomes humus by the following spring. The soil gets meaningfully better each year — the opposite of the degradation cycle that heavy synthetic input often creates over time. For gardeners who want to understand the principles behind this approach, the guide to what organic gardening really means explains the full philosophy clearly.

Frequently Asked Questions
How can I tell if my soil is hydrophobic?
The simplest test is the water drop test. Pour a small amount of water directly onto the soil surface and watch what happens in the following 5–10 seconds. Healthy soil absorbs it almost immediately. Hydrophobic soil causes the water to bead on the surface, pool, or run sideways without penetrating. Other reliable indicators include persistently dry patches that remain dry even after heavy rain, a crusty or slightly powdery surface texture when dry, and plants showing drought stress in beds that you have watered regularly. In containers, water that instantly streams to the edges and out through the drainage holes without the soil darkening is a clear sign.
Is hydrophobic soil the same as dry soil?
No — and this is one of the most important distinctions to understand when diagnosing the problem. Dry soil lacks moisture, but it absorbs water readily when you water it. Hydrophobic soil actively repels water regardless of how much you apply, because waxy coatings on soil particles physically prevent absorption. You can pour water on hydrophobic soil repeatedly and the root zone remains completely dry. Dry soil responds to watering; hydrophobic soil requires targeted treatment with wetting agents or organic amendments before normal watering can work effectively again.
Can hydrophobic soil affect certain plants more than others?
Yes. Shallow-rooted plants — annual vegetables, seedlings, herbs, and container plants — are most severely affected because they cannot reach moisture reserves deeper in the soil. Deep-rooted trees and shrubs may show fewer symptoms in the short term, drawing on deeper moisture below the repellent layer, but persistent surface hydrophobicity will eventually affect even established specimens as their surface feeding roots are deprived. Seedlings and young transplants are especially vulnerable, since their entire root system may sit entirely within the hydrophobic layer.
What are the natural signs that soil may be developing water repellency?
Early warning signs to watch for include water-repellent surface crusts forming after rainfall rather than soaking in, visible cracks in the topsoil during dry spells, puddles that sit on the surface and evaporate without penetrating, and plants wilting or showing stress after what should have been adequate watering sessions. A slightly powdery or faintly greasy feel to the surface when you rub dry soil between your fingers can indicate waxy compound accumulation. Catching these signs early means simpler treatment — surface wetting agents and compost rather than the full combination of all five fixes.
Can hydrophobic soil be fixed without using organic solutions?
Synthetic wetting agents and chemical soil conditioners can provide rapid relief from water repellency, and they are used in commercial horticulture and agriculture for exactly that reason. However, they do not address the underlying soil health issues that typically caused the problem, and overuse of synthetic products is frequently one of the causes of hydrophobicity in the first place. Organic solutions are preferable for most gardeners because they improve soil structure, feed microbial life, and help prevent the condition from recurring — making them a more complete and genuinely sustainable solution over the long term.
How do I prevent hydrophobic soil from developing in the first place?
Prevention is straightforward once you understand the causes. Maintain organic matter levels by composting regularly and applying organic mulch year-round. Avoid letting soil — especially in containers — dry out completely between waterings. Reduce or eliminate synthetic fertilisers and pesticides in favour of organic alternatives. Monitor soil moisture consistently through dry periods rather than relying on a fixed watering schedule. Healthy soil with active, well-fed microbial life naturally resists the build-up of waxy compounds that cause hydrophobicity, making consistent organic maintenance the most effective prevention strategy available.
Your Next Steps: Restoring Water Absorption This Season
Hydrophobic soil is a solvable problem. The five organic fixes in this guide — wetting agents, tilling, compost, mulch, and slow watering — address both the immediate symptoms and the underlying causes of water repellency. They work better together than any single fix applied in isolation, and they improve your soil’s long-term health with every application.
Here is a practical starting plan for this week:
- Test your soil — do the water drop test on affected beds and containers to confirm where hydrophobicity is present.
- Apply a wetting agent — get water moving through the soil right away while longer-term fixes are put in place.
- Add compost — spread a 5–10 cm layer over affected areas and water it in thoroughly.
- Top with organic mulch — layer 5–7 cm over the composted soil to lock in moisture and protect the surface.
- Adjust your watering method — switch to a fine rose head, soaker hose, or drip irrigation for all future sessions.
Keep monitoring through the season and reapply wetting agent every three to four weeks in dry spells. By the end of one full growing season of consistent organic care, the improvement in your soil’s water absorption will be unmistakable. Beds that once shed water like a raincoat can become rich, moisture-retentive growing environments that support plants confidently through even the driest summer stretches — and that get better every year you continue the practice.